3.4.2.3. Construction BIM model manual
File preperation
- Download the Revit SIGNAX template file
1. Open Revit, select "Create" a new file. Next, click "Browse", find the saved template file, the file format must be .rte, click "OK".

2. Click “Insert” - “Revit Link”, choose project file.

3. If this is the first link for this file, choose “Auto - Project Base Point to Project Base Point”.

4. Click "Close" if there is a link error.
5. Click “Manage” - "Project Location", click “Coordinates” and choose “Acquire Coordinates”. Move mouse pointer on the linked model and click the left button.

6. For additional Links choose “Auto - By Shared Coordinates”.
If the alignment "By Shared Coordinates" didn't work out, it means the designer doesn't have shared coordinates for configured files. Click "Project Base Point to Project Base Point".
7. Choose the Link, click “Manage” - “Pin”.
Apply to all Links.
8. Choose “View”-“View Templates” - “Manage View Templates” after all Links are added.


-
Select “1. Copy Elements” template. Choose “V/G Overrides RVT Links” parameter and click "Edit".

Enable “Underlay” for all Revit Links. Now you can identify all the copied elements.

Choose “V/G Overrides RVT Links” for the “2. Construction Model” and “3. Construction model (Navisworks)” templates. Click "Edit"

Disable the "Visibility" for all Links.

Now this file is ready for Copying elements. Save it as Project.


Copying Elements from the Project Model(Revit Link)
1. Open the “1. Copy Elements” view. If every setting is correct, the project will display the geometry of the linked files as the underlay.

2. Choose "SIGNAX", click "Freeze elements". Select the Link and click “GO”.

Ex.:
The plugin will not copy the elements that have been copied before if the "Enable checking by ID" switch is active. Therefore, delete the previous element version before copying if you need to replace previously copied elements.
The "Copy materials" switch displays materials on the copied geometry. Keep it disabled to avoid the overall script running time.
3. The Revit window will switch to element selection mode after selecting the link. Select the elements you want to copy and click "Finish" in the upper left corner.
Construction Model
The "3. Construction model (Navisworks)" view saves all the construction progress data. Initially, it should not display any information when you just copied the elements.
1. Open “2. Construction Model” view and choose the elements that has been completed at the consruction site. Go to "Properties" , find “Phasing” parameter and switch from “Project Model” to “Into the work procution”. Elements should be "green" now.


2. After that, the completed elements will appear in the "3. Construction model (Navisworks)". If you need to display the element part, go to the next step.
Create parts
4.1. Parts tool
4.1.1 If you have Revit 2020, select an element. If "Create parts" button is active -- press and the following skip to the 4.2.

4.1.2 Create parts.
You can devide any element. Choose “3. Construction model (Navisworks)”.
Select the elements and clic "Create parts"

4.2 Create parts 3D
4.2.1. Select the element and click "Divide parts".

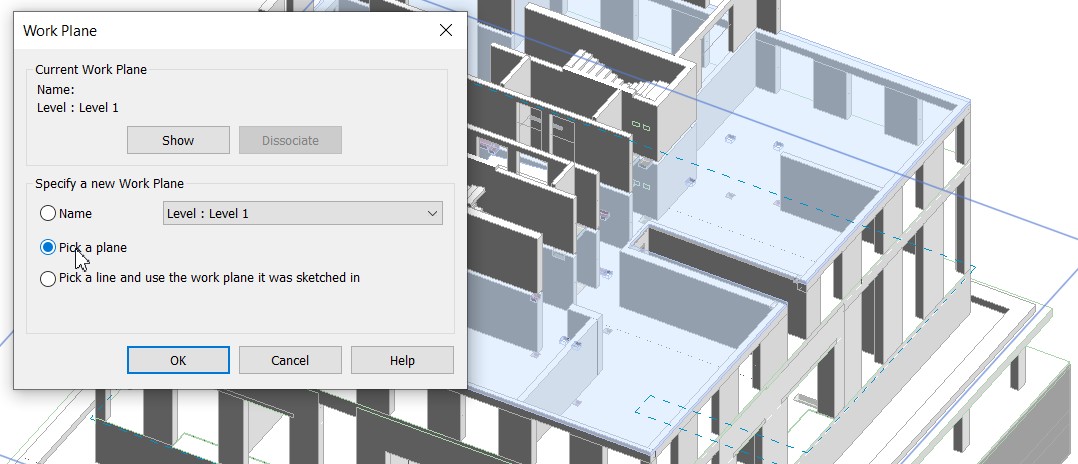
4.2.2. Set the work plane


4.2.7. Выбрав разделенную часть, Вы можете выполнить одно из трех действий.


Temporary files management and export to NWC
If the construction model file starts to work slowly, clear the temporary information.
Go to "Manage" - “Purge Unused”. Click “ОK”.

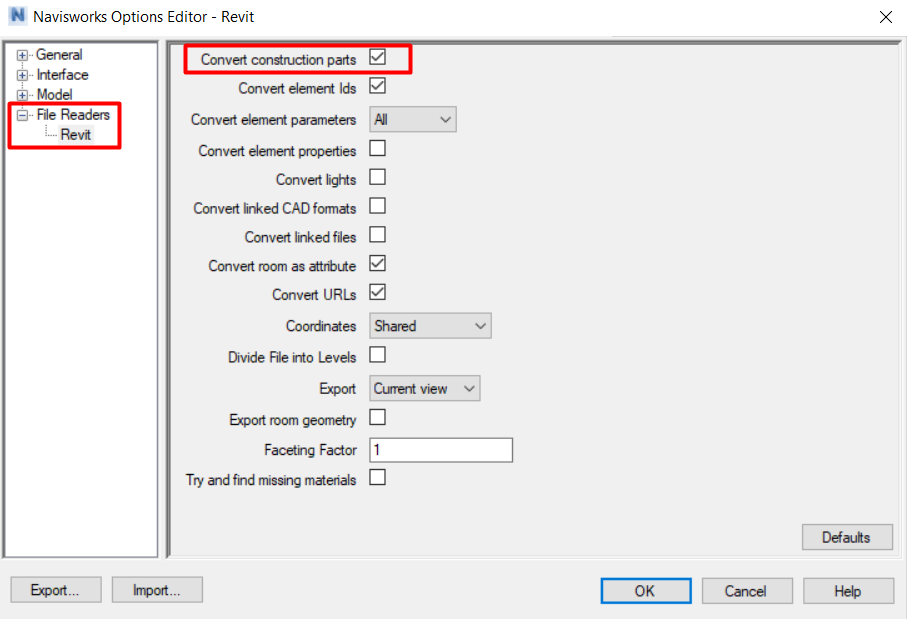
To include element parts to export:
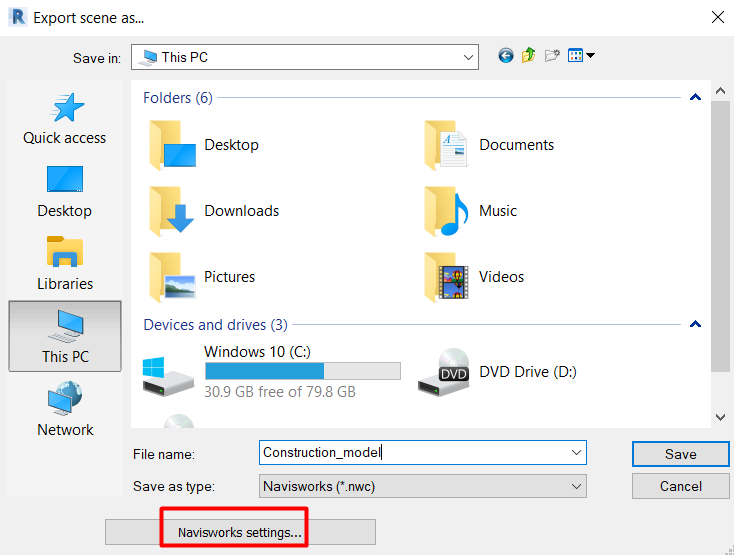
Before exporting to NWC сcheck the "Navisworks Settings". On the left in the "Reading files" - "Revit" should be a checkmark "Convert construction parts". This setting must be enabled once during the first export. After that, it will be active during the other exports.
No Comments