3.4.1.3. Construction BIM Model Workflow Methodology
Setup Navisworks before you start
Design/Construction model display settings for reporting
This instruction is for specialists who prepare models and generate daily (weekly, monthly) reports on the completed works at construction sites.
The reports include the following sections:
- Scope of work completed in all phases: Plan, In Progress, Accepted, Issues, Closed
- Schedule (4D model)
- Implementation Plan-Actual-Remaining
- Statistics according to the Work Inspection Reports
Initial Data:
1. Design or Construction model in Navisworks Manage format (other supported Navisworks Manage formats can also be utilized);
2. Information from Designer, Consultant, and Contractor. Project Engineer and QA/QC Inspection departments;
Software:
Autodesk Navisworks Manage 2020-2025
Display settings in Navisworks Manage:
It is necessary to configure the standard view of the model display (for all objects).
In the "SIGNAX" tab, click the "Panel" button, then click "APPLY STANDART VIEW" button.
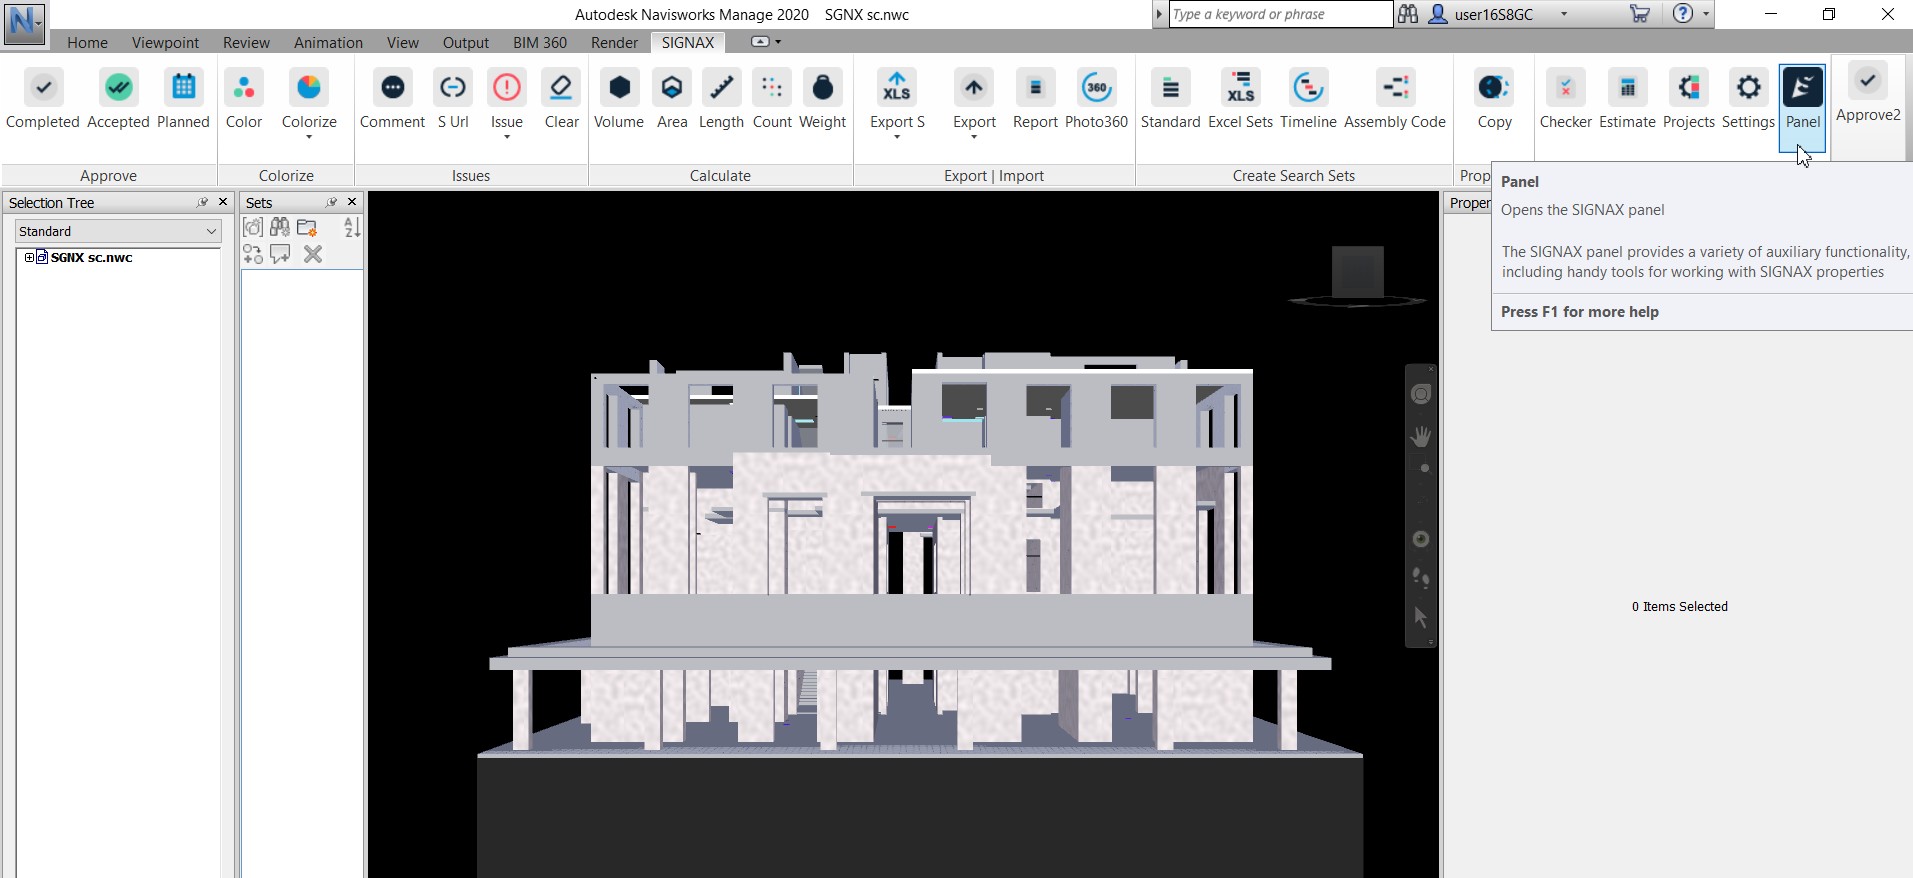

You can adjust view if necessary.
Go to "Viewpoint" and move the "F.O.V." slider by n⁰.
Select the object plane (wall), which will be the front.
Adjust the optimal scale for each .nwf file(with the mouse wheel). Save your settings.
To set the rendering style, in the "Viewpoint" - "Render Style" tab, click the "Lighting" button. Next select "Scene Lights". Click the "Mode" button in the same tab and select "Shaded".
To set the background, right-click on an empty area of the screen, then select "Background". Next, switch "Mode" - "Plain", "Color" select white and press "OK".
In addition to displaying the view, you can show a detailed/local object display (floor plans at certain elevations, sections, etc.). To save custom views, you must save them as viewpoints.
Go to the "Viewpoint" - "Unsaved Viewpoint" tab to save the view for further work. Then, click the "Manage Saved Viewpoints" button.
Next, right-click on an empty area of the "Saved Viewpoints" panel and click the "New Viewpoint" button.
Construction model preparation in Navisworks
There are three file types in Navisworks.
NWC(external data files) - contain geometry and information (model) exported from Revit to Navisworks.
NWF(working files). They are used for various actions with models. The NWF files contain only the Navisworks information. This format also includes the NWC files links containing information so that you can update, modify, and save NFW files.
NWD files are for report publishing only. There is no way to update the NWC links inside the NWD file, making it impossible to work with new versions of NWCs. You need to save the construction model as an NWD file in Navisworks to create a 3D Volume card(SIGNAX DASHBOARD).
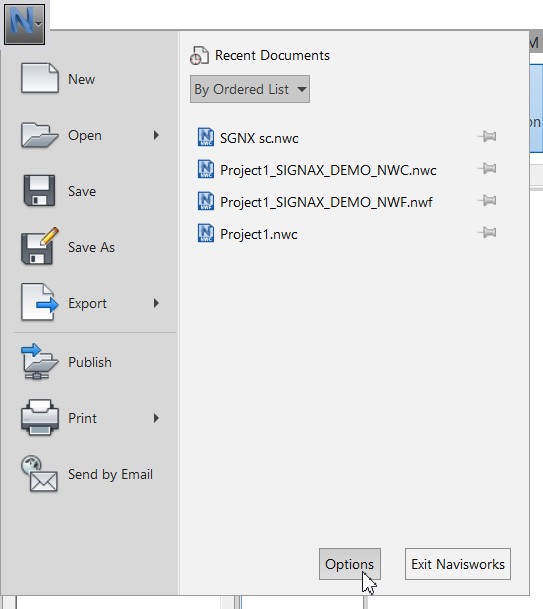
Click "N" at the top left and choose "Options"
In "Options Editor" choose "Model" - "Perfomance". Enable "Close NWC/NWD files on load".
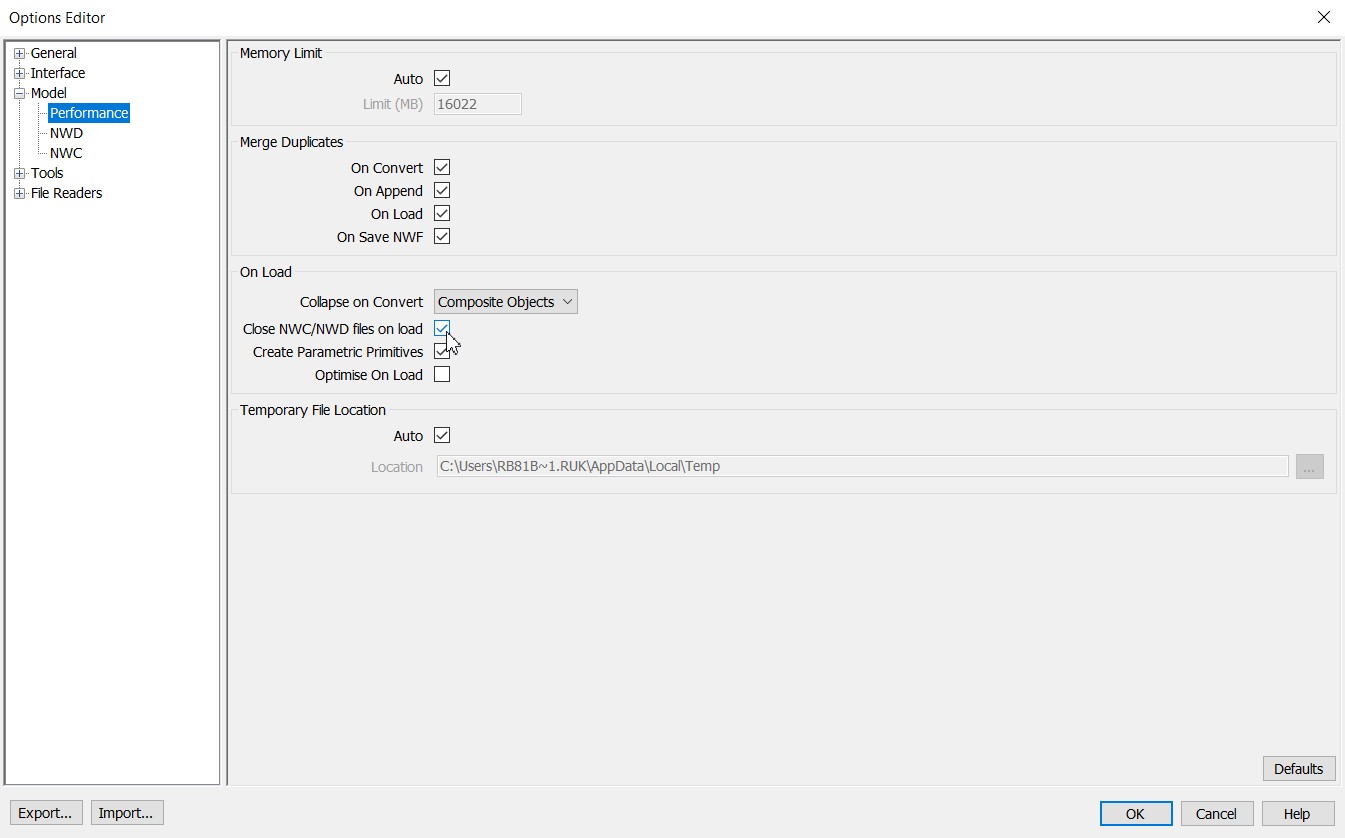
You need to do this once. Now it's permanent untill you disable it. This parameter allows you to update NWC without Navisworks reload( in case if you need to import new NWC from Revit to current NWF file).
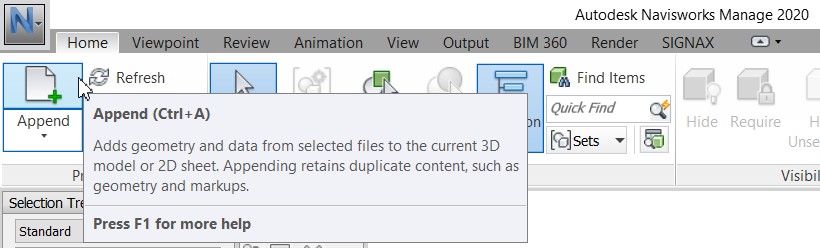
Create new NWF file
Open Navisworks click "Append" and add NWC you created at SIGNAX for Revit 5.Temporary files management and export to NVC

In the new file, configure the correct display according to the company standard. In the "View" tab, click "Background". Next, switch "Color" to white, "Mode" to "Plain" and click "OK".

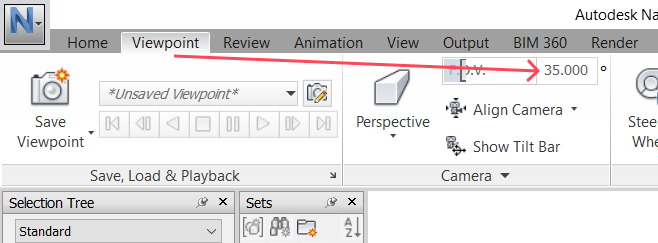
After that, in the "Viewpoint" tab, switch the angle in the "F.O.V." to 35°.
Save file. Click "N" at the top left, and "Save as" .nwf
Work with the NWF file
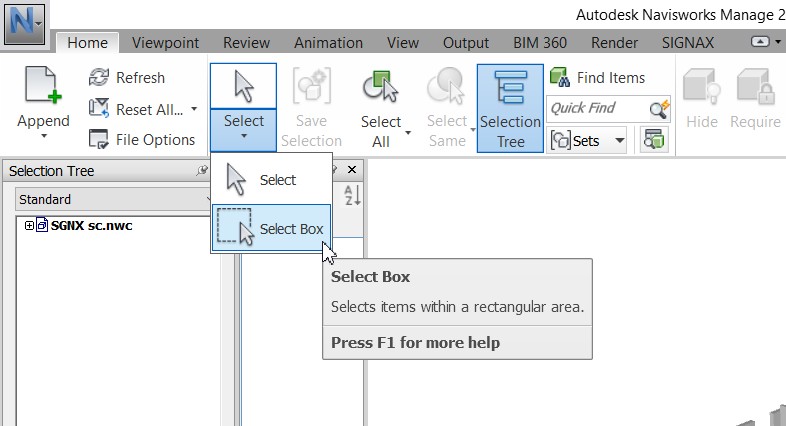
In the "Home" tab you can switch elements selection mode. Choose "Select Box" to select the group of elements.
Select the elements for setting the completion date.
When the elements are highlighted in blue, go to the "SIGNAX" tab and click the "Completed" button. Next, select the due date in the menu and click "OK".

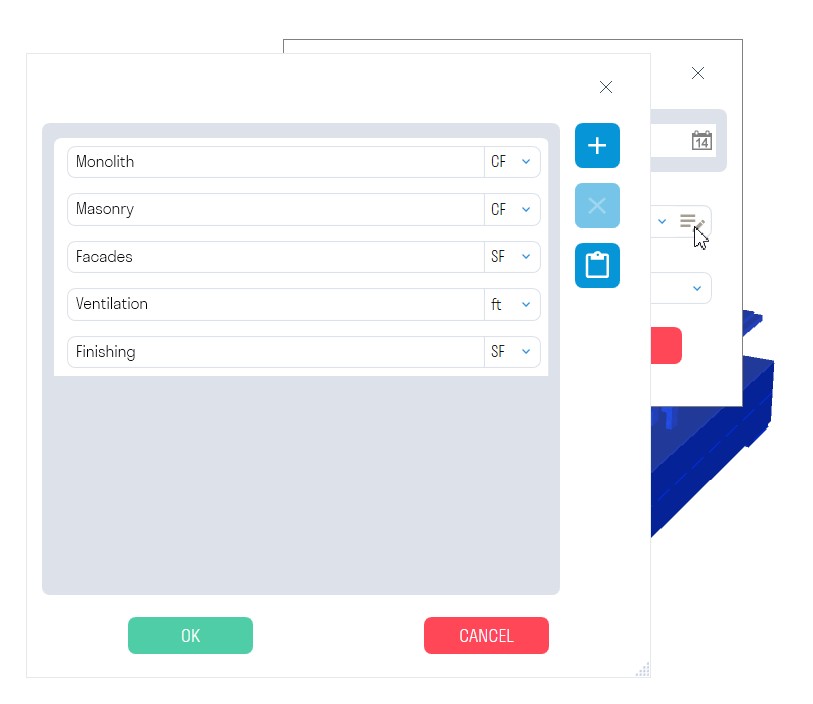
Choose the Work type
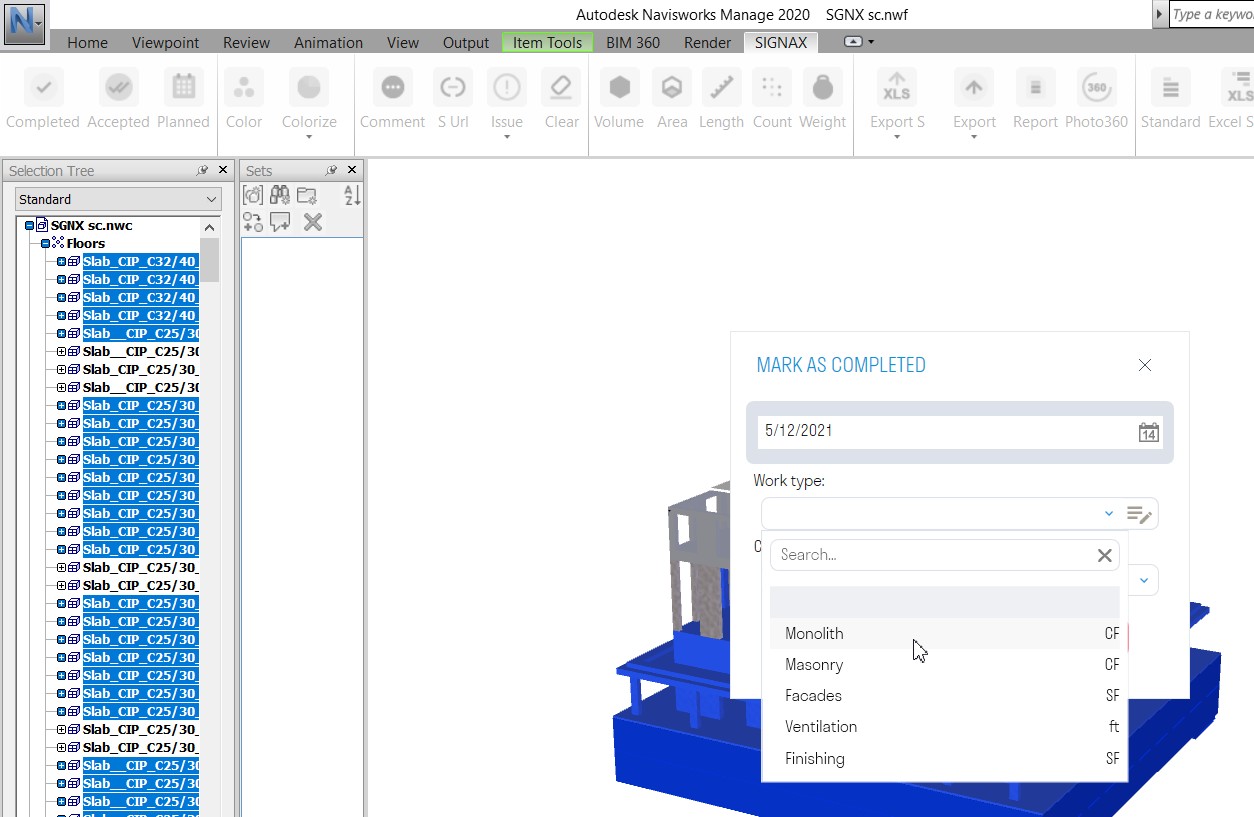
Choose the Work type
Set the Work types
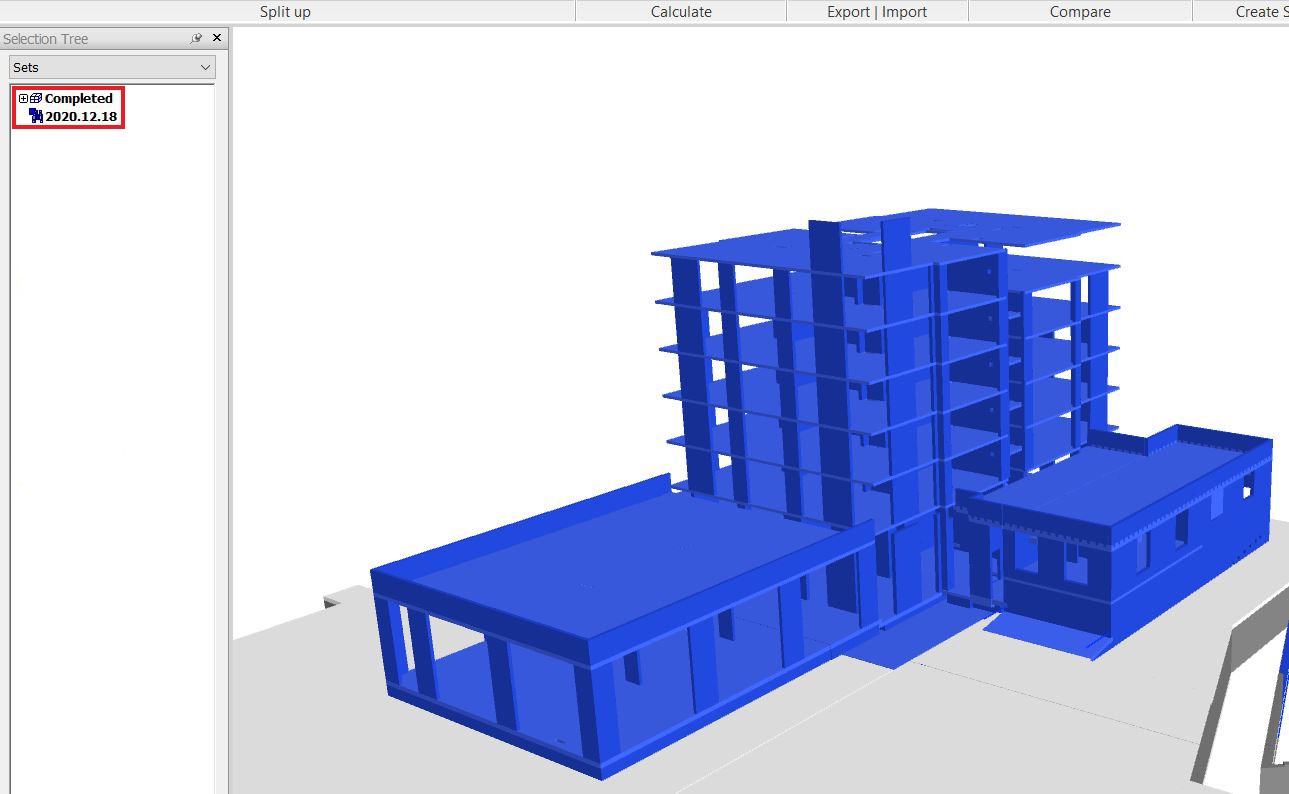
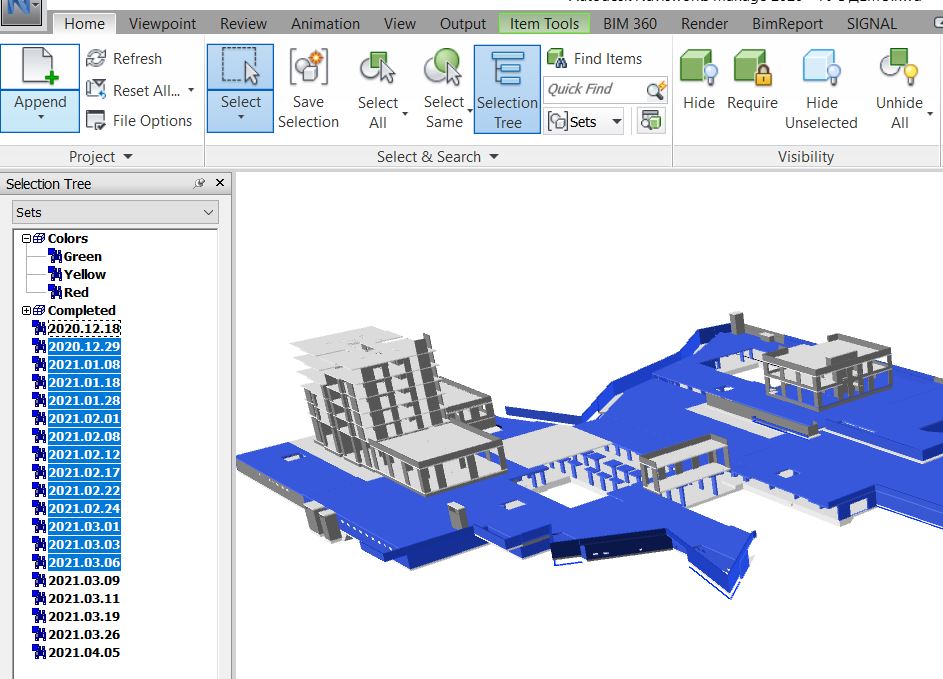
The Completed folder will appear in the "Sets" tab on the left side of the screen. Now you have the search set for the date you've selected. If you click on this set, Navisworks will highlight the completed elements on a particular date.
Select the elements for setting the completion date.
When the elements are highlighted in blue, go to the "SIGNAX" tab and click the "Completed" button. Next, select the due date in the menu and click "OK".
Choose the Work type
Choose the Work type
Set the Work types
The Completed folder will appear in the "Sets" tab on the left side of the screen. Now you have the search set for the date you've selected. If you click on this set, Navisworks will highlight the completed elements on a particular date.
Repeat this action to create all necessary date Search Sets.
In the next section, you'll find a detailed description of all the SIGNAX for Navis functions.
After filling in all the dates:
-
1.Press the "N" button in the upper left corner.
-
2.Select Save As.
-
-
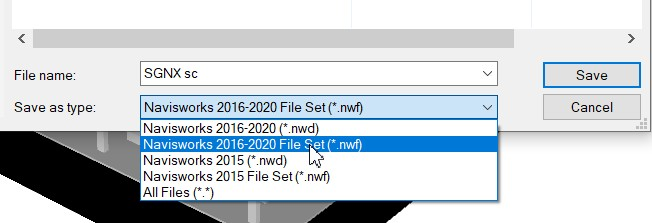
3.Switch the format to the .nwd and click Save.
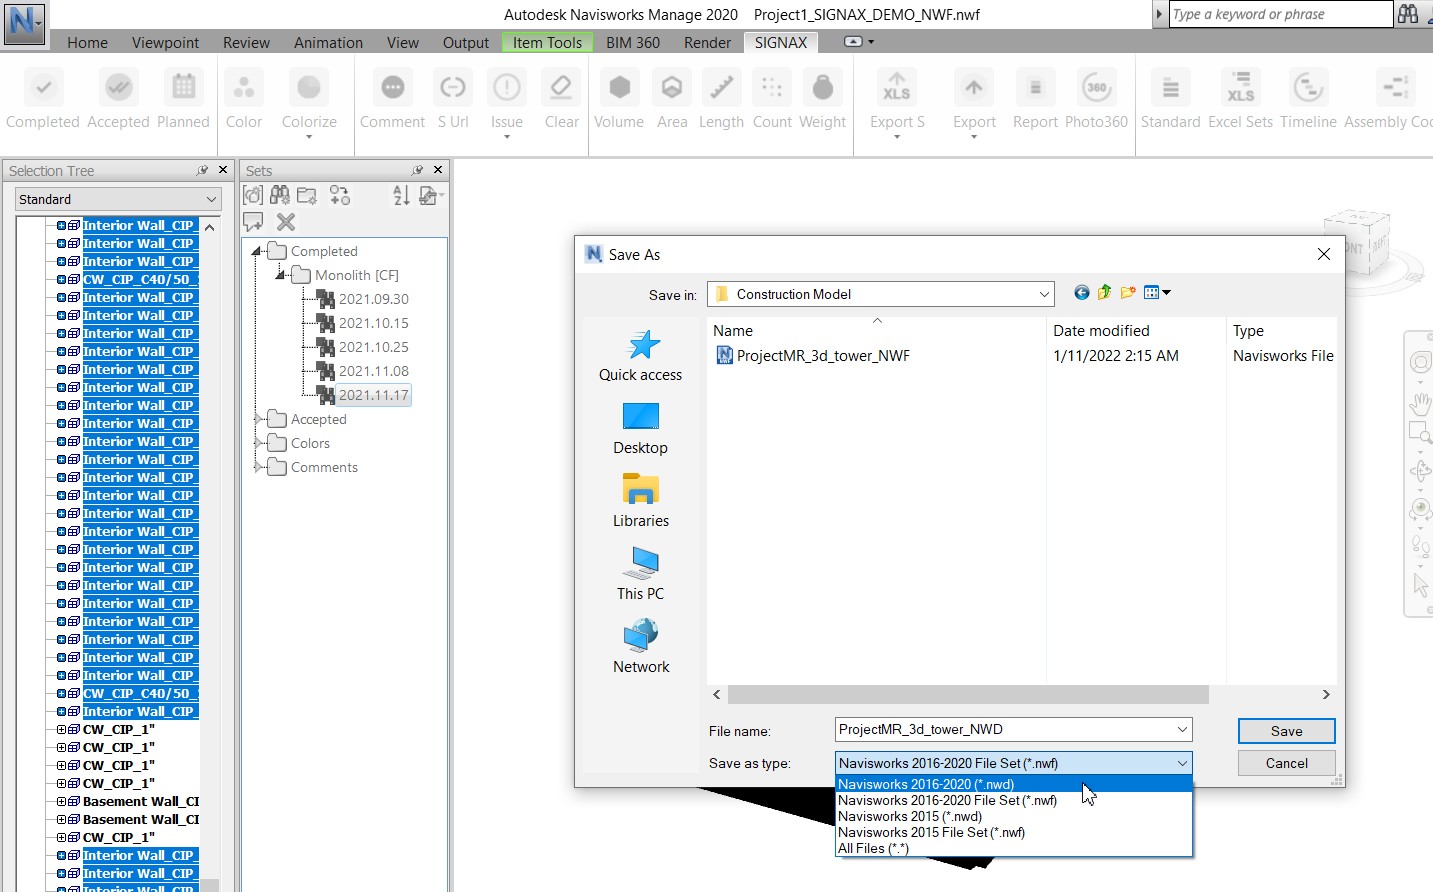 Upload the NWD file to Autodesk Docs to further use the model in the DASHBOARD.
-
No Comments