< DOCS. Introduction | DOCS. Documents >
The features described here are only available to the Administrator of the company
See also ** Company settings in SIGNAX HUB **
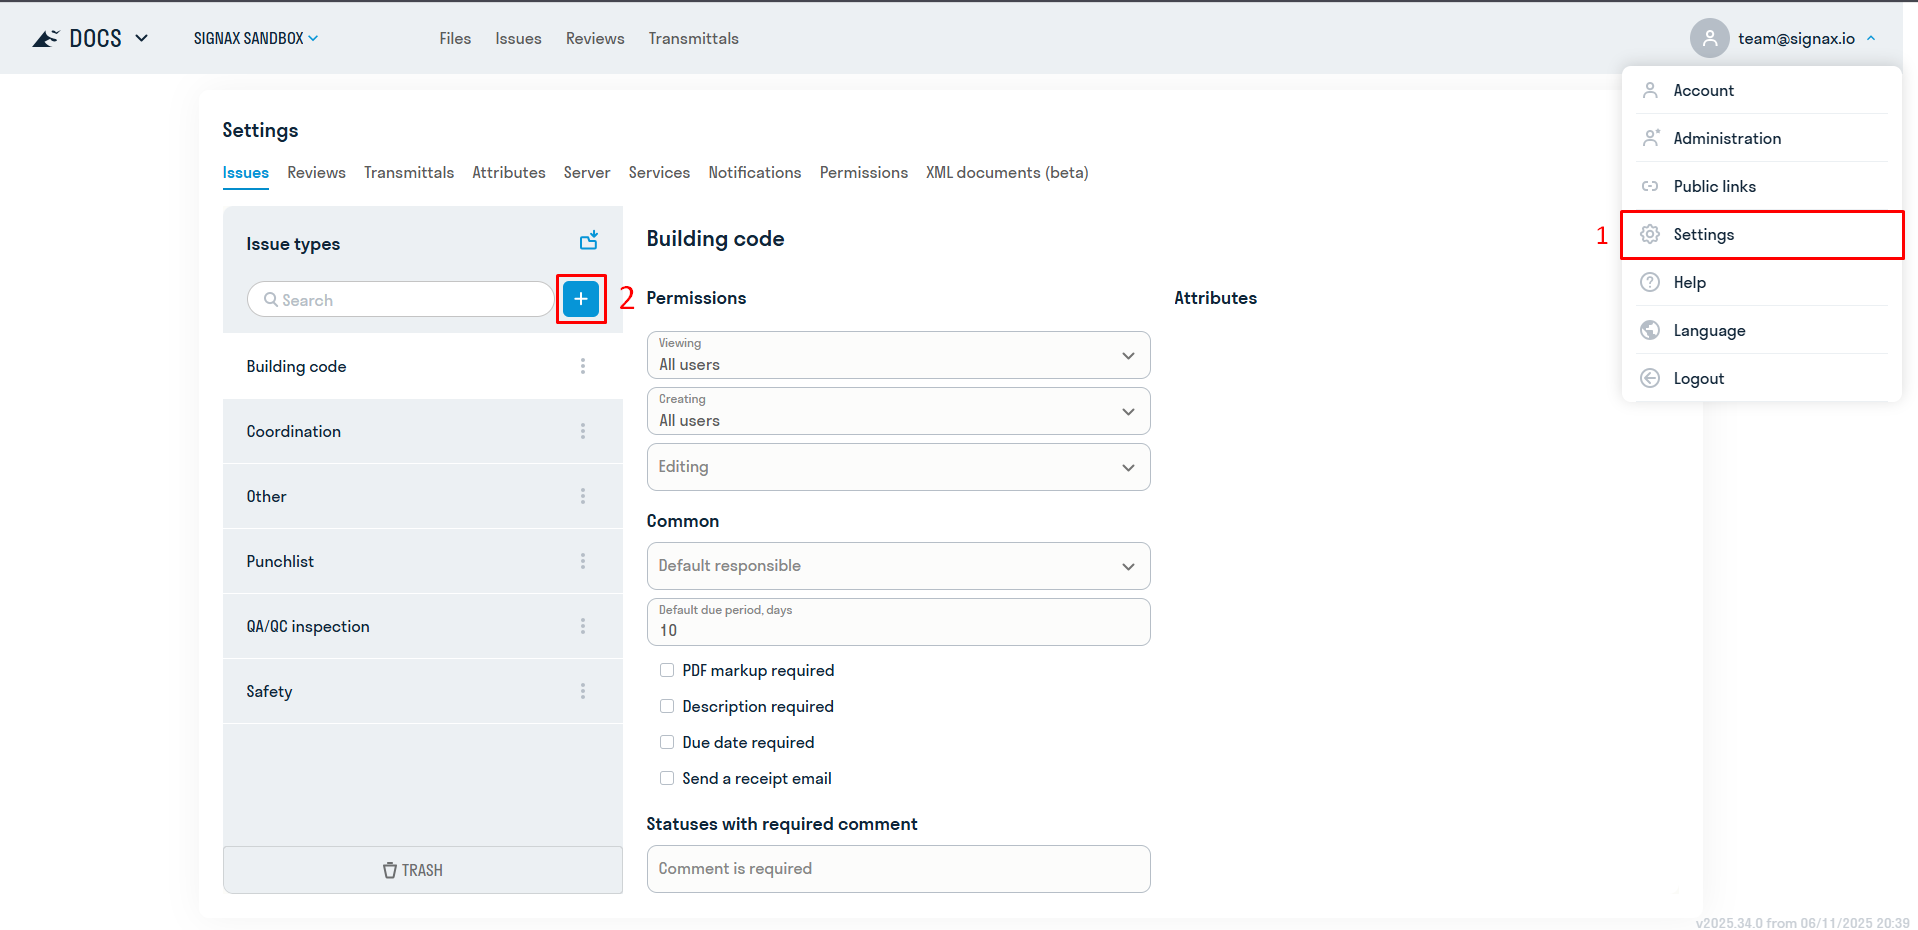
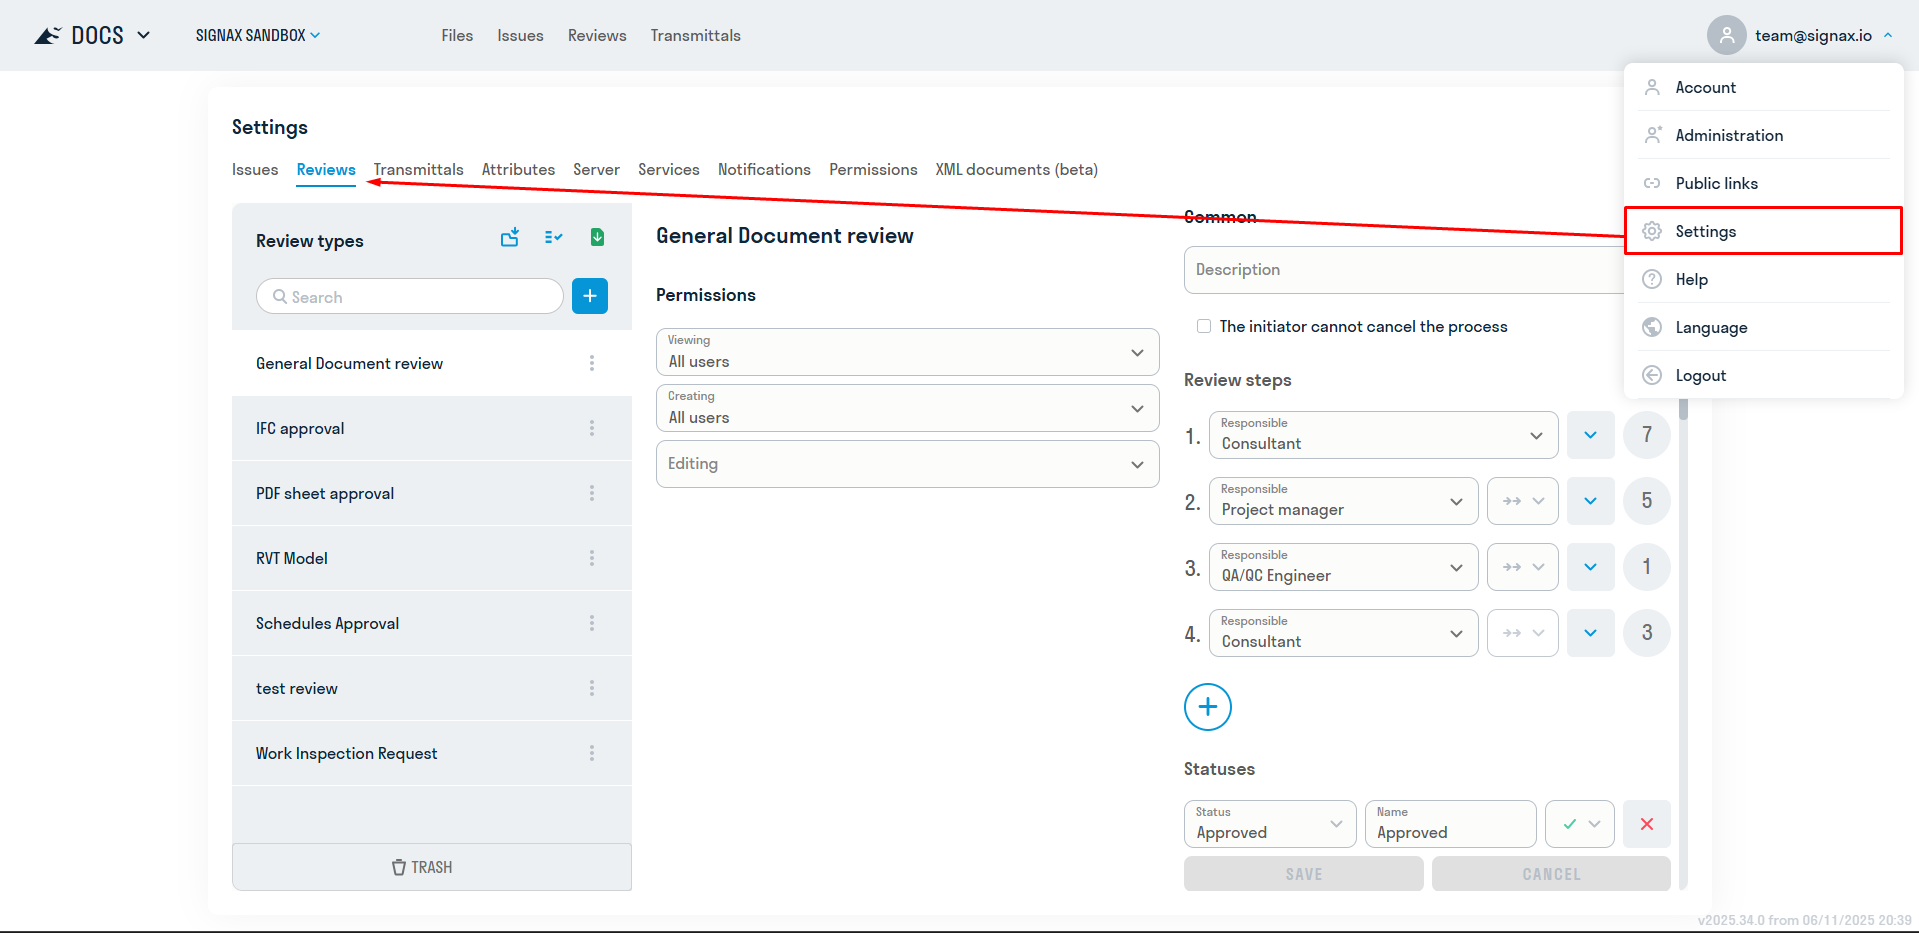
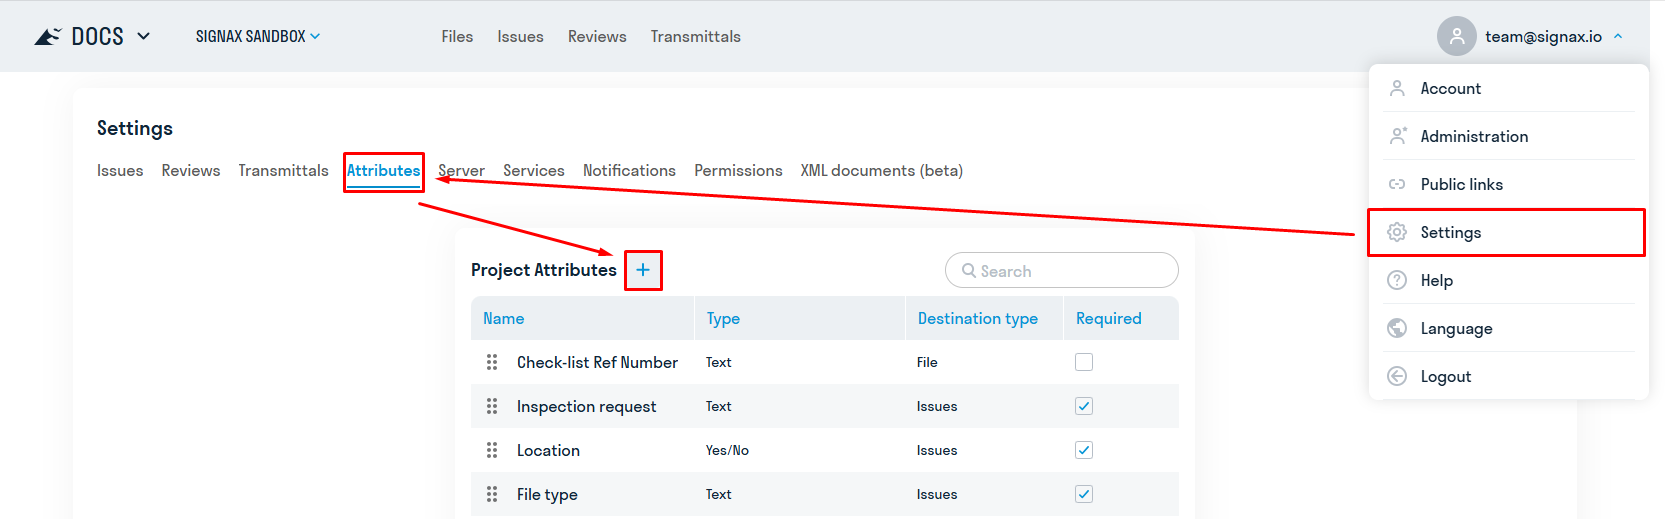
To access Project Settings in the SIGNAX DOCS interface, click on your profile in the upper right corner → Settings. Changes are saved immediately. All changes you make affect only the current project (displayed in the upper left corner).
¶ 1. Issues
See also the video tutorial on setting up issues and attributes: Telegram YouTube
The project administrator has access to both the project issue settings and to editing any issue (see Instructions for handling comments for the user ).
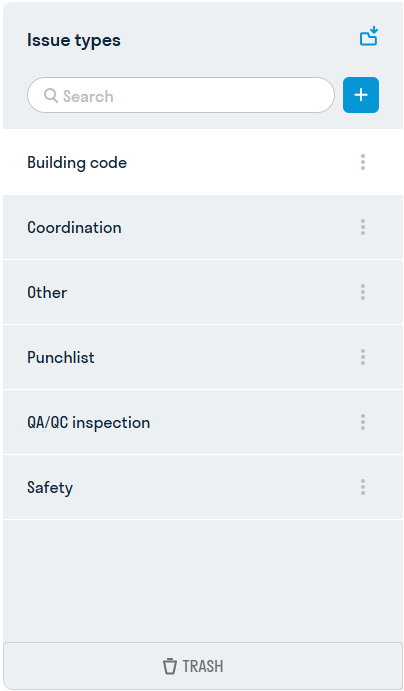
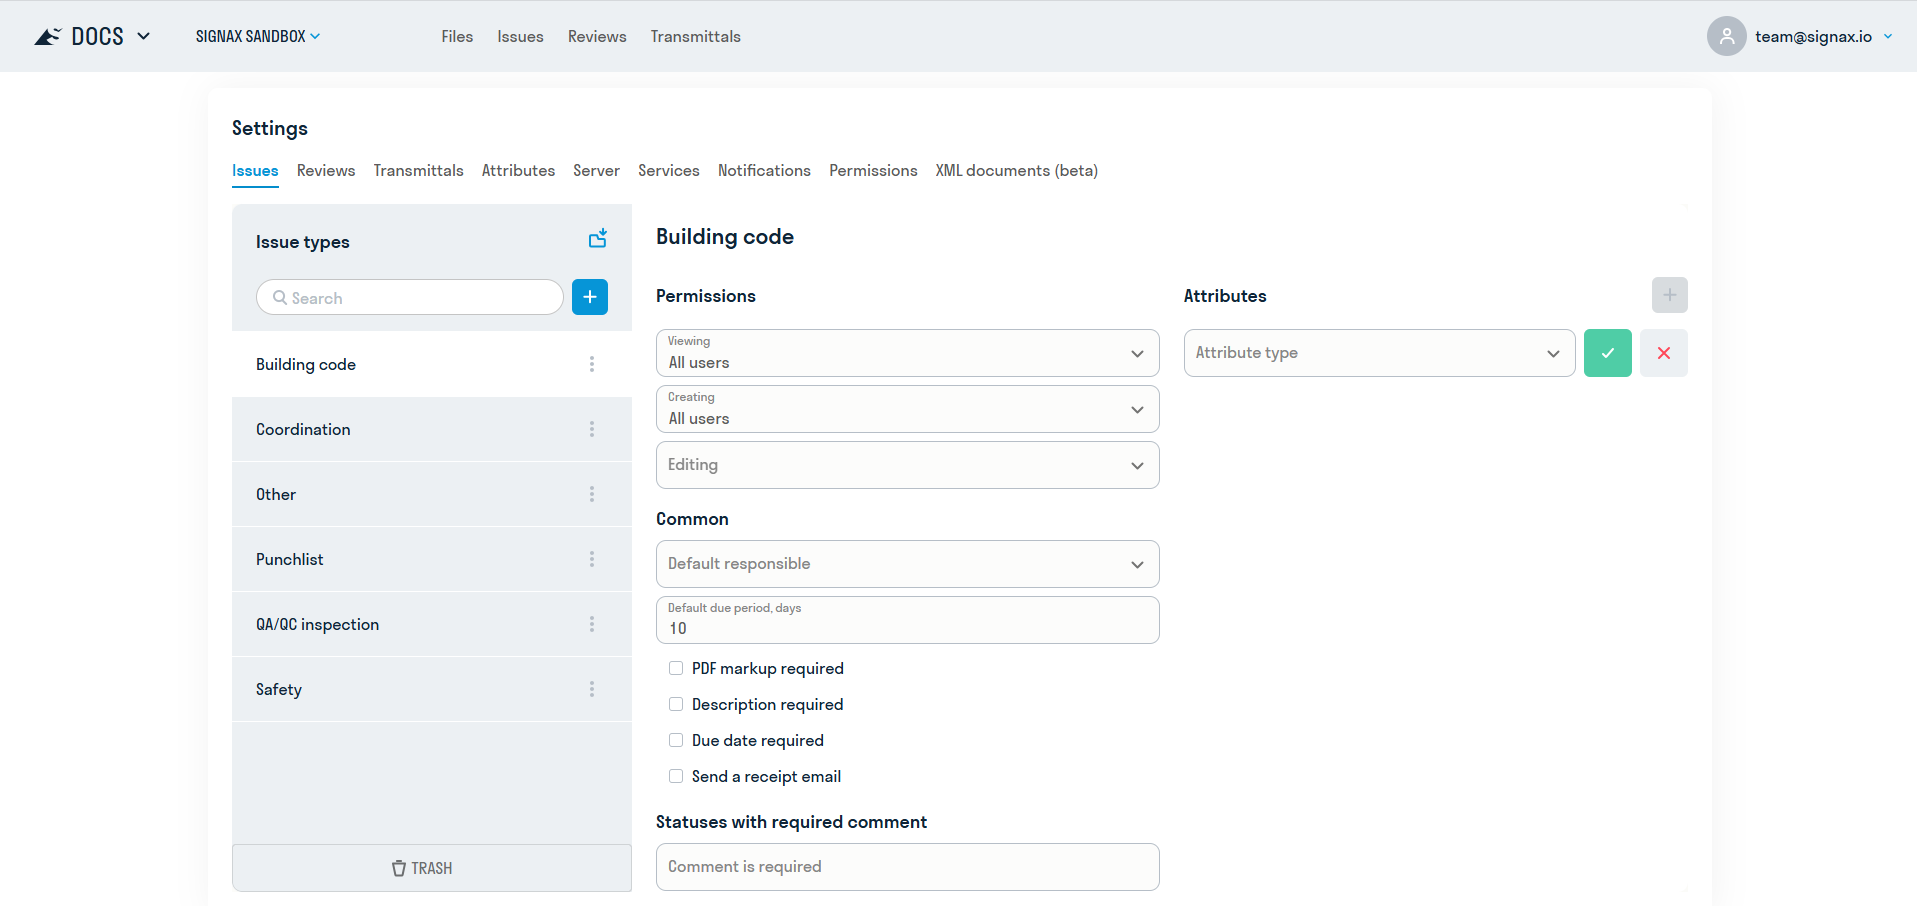
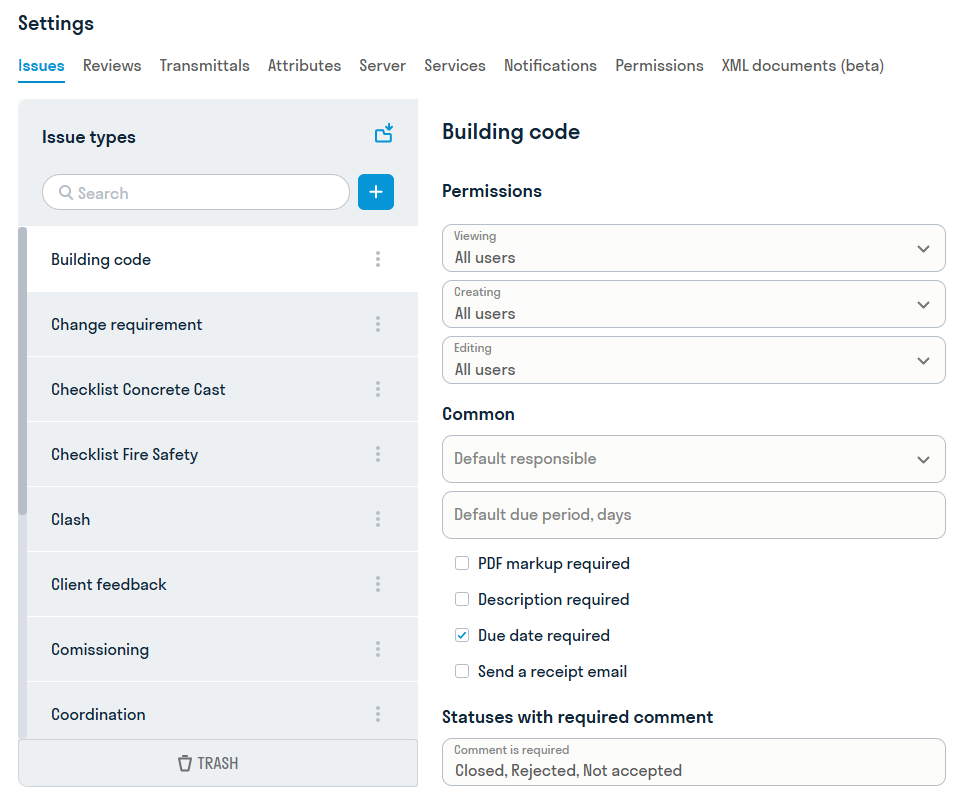
Manage project note types, role-specific access to them, settings, and attributes. Selecting a note type on the left displays its properties on the right.
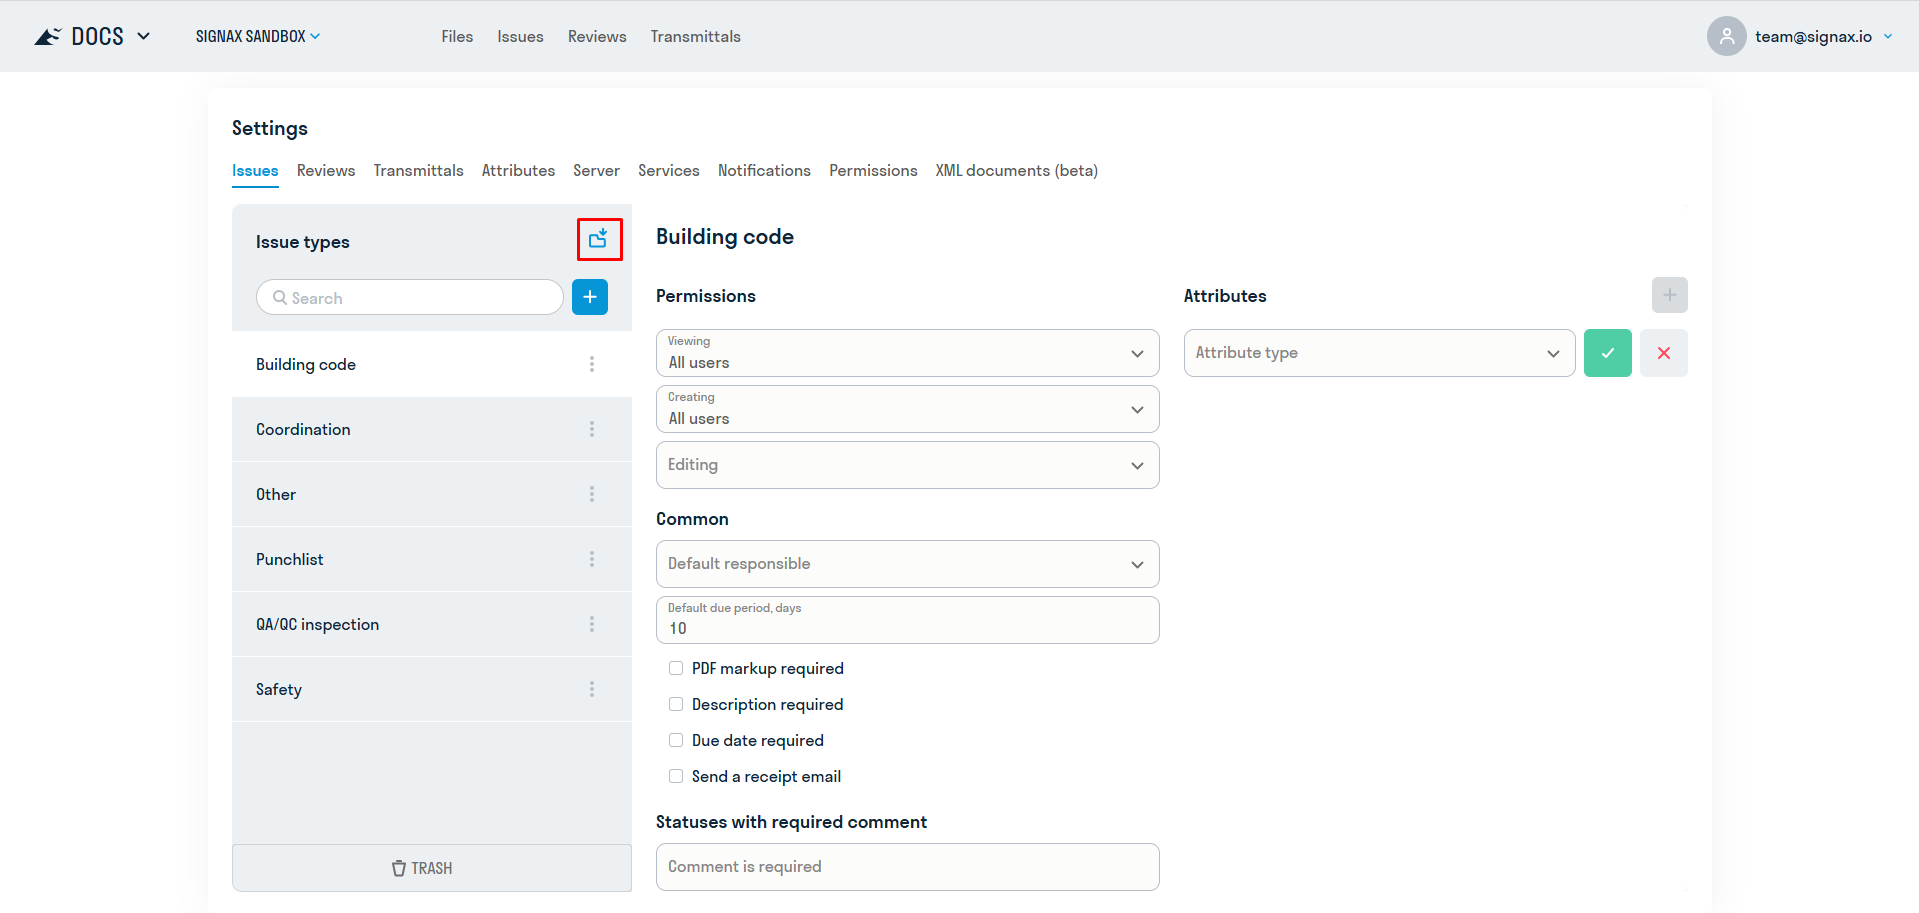
You can update settings from another project if the types in that project have the same name. See 10. Updating Settings
You can add, rename, copy and delete any types of notes:
See also the video instruction on role-based access to notes: Telegram YouTube
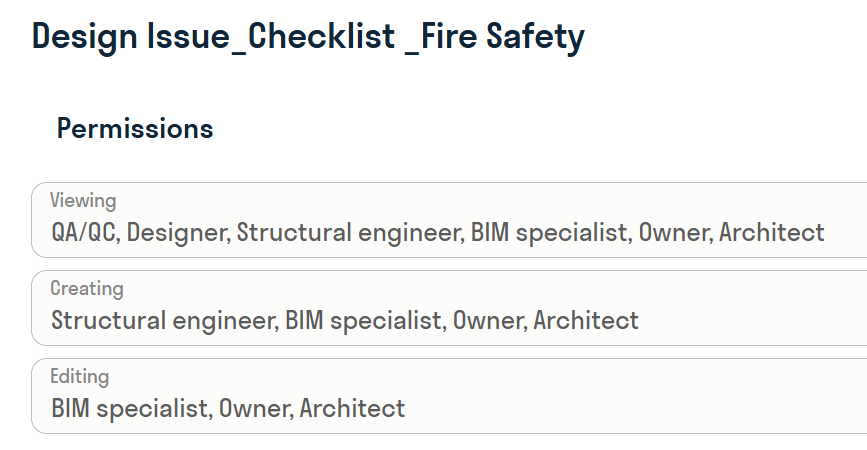
Access to the note type is determined by the user's role (see HUB. Administrator → Creating roles ) and his assignment to the note.
The user can see the following notes in the registry:
• assigned to him (responsible)
• assigned to him (author)
• in which he is an observer
• available for his role (viewing, creating and editing)
The user can create the following notes:
• available for his role (creating and editing)
The user can fully edit (fill in attributes, attach files, change status) the following notes:
• available for his role (editing)
Access rights are based on escalation logic, meaning that if a role has edit access, it has both creation and viewing access by default.
The author and the person responsible for creating a comment have edit rights for that specific comment, regardless of their role.
The following general settings are available for the comment type:
- Default Responsible — you can assign a role or a specific user. In this case, the field in the comment card of this type will be filled in automatically
- Default resolution period - if necessary, the number of days to resolve the comment is specified. The final date will be generated using the formula
- The mark is mandatory in PDF files
- Description is mandatory — if the user does not fill in the field in the comment card, the system will not allow saving the comment
- Date of resolution is mandatory — if the user does not fill in the field in the comment card, the system will not allow saving the comment
- Statuses with mandatory comment

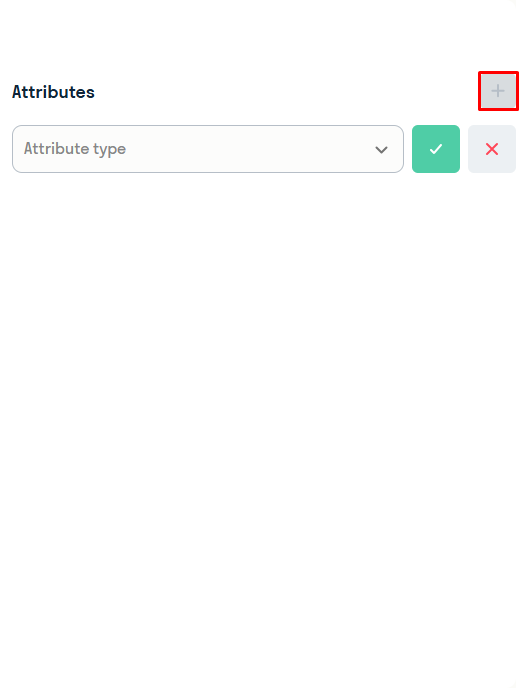
Attributes Each type of note can be assigned attributes in which the user can specify additional information about the note. Attributes are added from a general list, which is configured for the current project (see below 4. Attributes).
¶ 2. Reviews
See also the video instruction on setting up Review workflow: Telegram YouTube
In the Review settings, the Administrator creates Review routes for the current project. In the routes, Review access levels and Review stages with users responsible for reviewing the documentation are assigned. Statuses, stamping, signing, copying, and notifications are also configured. See also Instructions for handling reviews for the user .
Settings can be updated from another project if the types in it have the same name. See further 10. Updating Settings
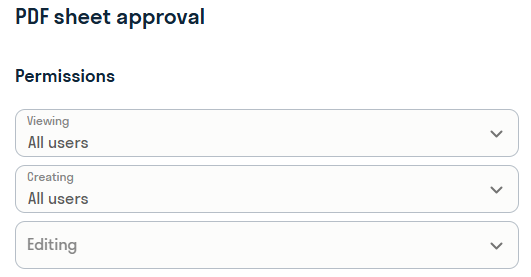
For each Review route, you can assign access rights: who will see sets in the Review registry, who can initiate reviews, who can edit review sets.
The user can see the following kits in the registry:
• Assigned to him (responsible for any stage)
• Assigned to him (Initiator) (can initiate only with create and edit access)
• Available for his role (view, create and edit)
The user can create (add files, update versions, delete files, restart) the following kits:
• Available for his role (create and edit)
The user can fully edit the following kits:
• Available for his role (edit)
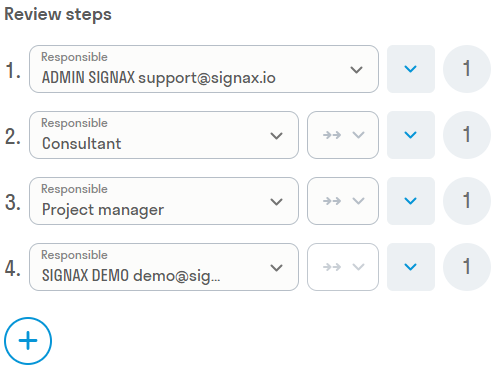
Users or roles responsible for reviewing documentation are assigned here. During the review process, each specified responsible person reviews documents from the set at their own stage and assigns them the appropriate statuses. Up to 20 responsible persons can be specified.
The review period is set in the circle opposite the responsible person (up to 31 days).
If the responsible person with the enabled lock

rejects a document in the set as not having passed review, the document will be locked and the responsible persons will not be able to assign a status to this document at the following review stages. If the lock is disabled, then if the file is rejected, it will still be reviewed by the next responsible person.
By default, the review process is sequential


For example, in this case, stage 2 will be run together with stage 1.
In the "Status" field, select the status type, which is a logical option responsible for moving the document to the next review stage: Approved or Rejected. Thus, an approved document moves to the next review stage, and a rejected document does not.
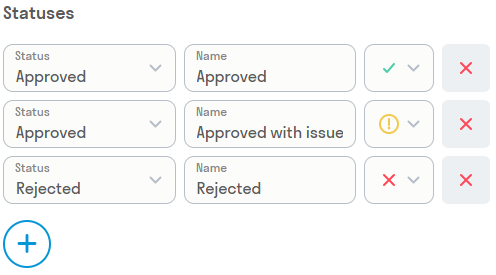
The following fields indicate the name and icon of the status that will be displayed to users during the review process. You can add up to 10 statuses.
At the "Stamping" stage, stamps and QR codes are affixed to documents in the set.
First, select the stamping type from the list:
- Stamp - only the Stamp will be affixed
- QR code - only the QR code will be affixed
- Stamp and QR code - both the Stamp and QR code will be affixed
- Do not stamp
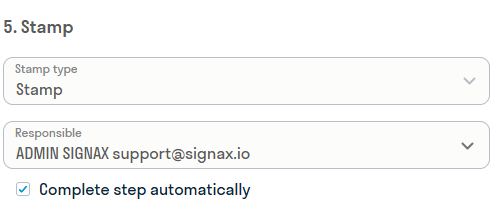
Then, select the Person Responsible for the stamping stage, who checks the correct stamping of the documents.
- If the "Complete stage automatically" option is selected, then upon successful processing of all files (stamping), the stage automatically proceeds to the next one. However, if an error occurs with at least one file, the Person Responsible receives an email notification of the error. In this case, the Responsible Person must take appropriate action: either resend the file for stamping or continue review without this file.
- If the "Complete stage automatically" option is not selected, then after the files are stamped, the Responsible Person always receives an email notification about the stage's completion. They check the correctness of the stamps and decide whether to continue review. If everything is in order, they can proceed to the next stage. If there are errors, the Responsible Person resends the files for stamping or continues review without them.
For QR and Stamp, fill in the overlay pages (the pages on which the stamp and QR will be applied). For Stamp, also fill in the Company, Full Name, and Job Title fields.
By default, the "Scale," "Offset," and "Size" fields are filled in with optimal values for stamping and QR. Change these values if necessary.

At the signing stages, users or roles responsible for signing documents with a digital signature are assigned. The document signing period is also specified (up to 31 days).
A document can be signed in two ways: with an embedded signature or a separate .sig file. Only PDFs can be signed with an embedded signature.

Like the review stages, signings can occur sequentially or in parallel
At this stage, you specify the folder to which you want to copy the stamped documents from the set.
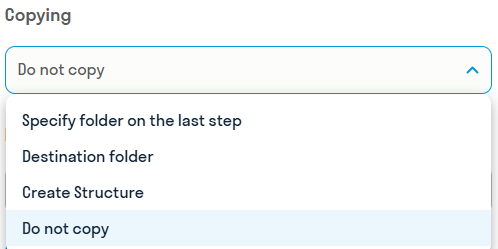
You can select several copying options:
- Do not copy
- Copy to a specific folder - The folder for copying is specified in the review settings
- Build structure - Two folders are specified: the outgoing folder is the one relative to which the path to the approved and copied file is read. The incoming folder is the folder in which a similar folder structure is duplicated for storing the copied files.
- Specify folder at the final review stage - The person responsible at the final review stage specifies the folder where the files from the
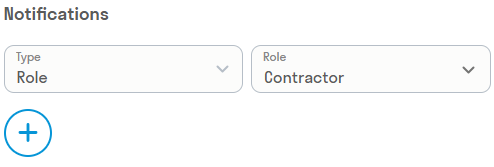
The Notifications option allows you to specify a user, role, or Email address to which the full review report will be sent after its completion
¶ 3. Transfer
¶ 4. Attributes
See also the video tutorial on setting up comments and attributes: Telegram YouTube
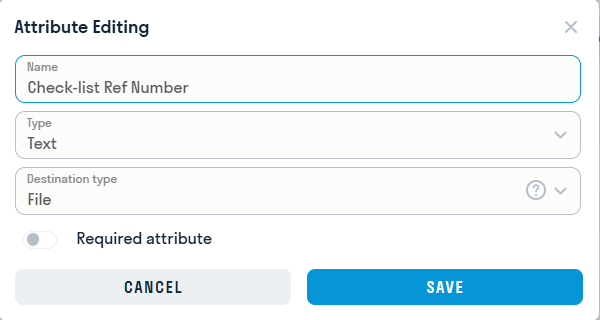
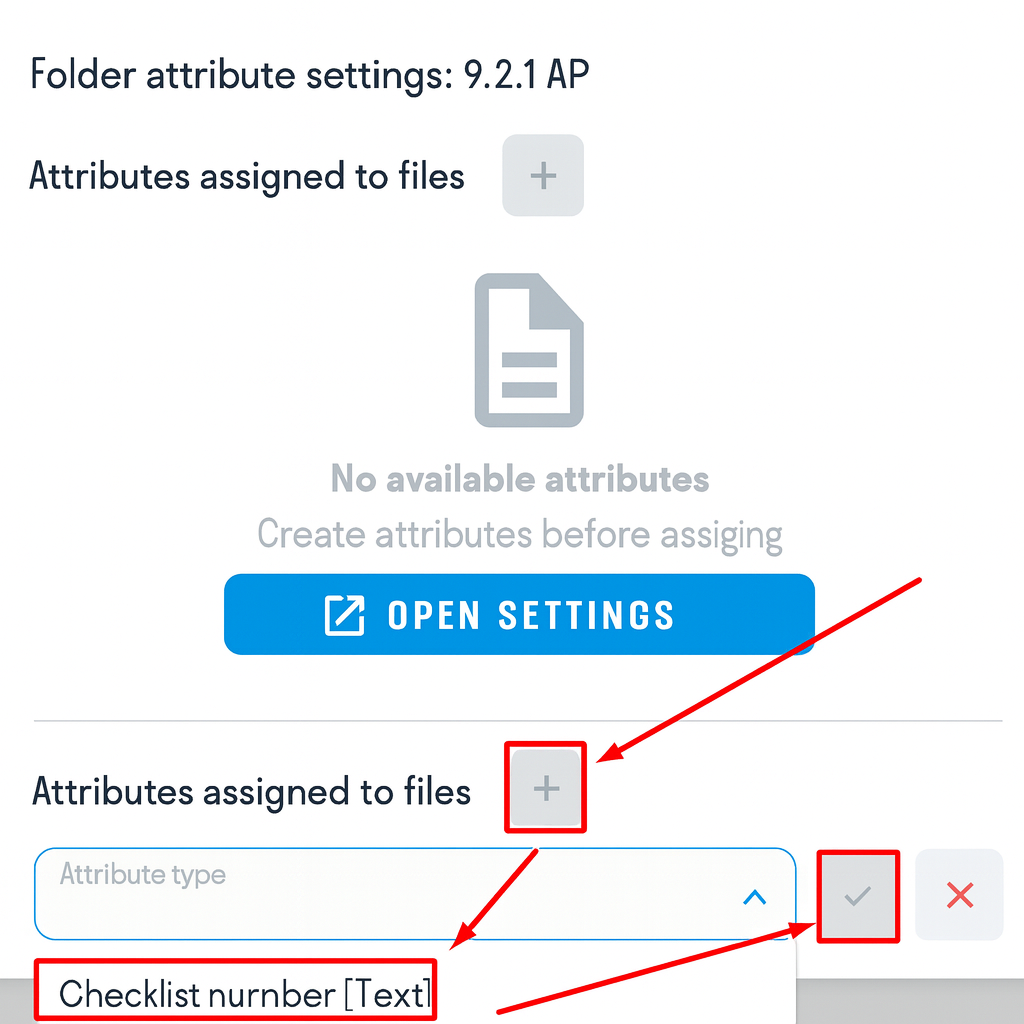
Attributes -- additional fields for filling in information about comments, folders, and files.
Attributes are created by the administrator.
Fill in the fields:
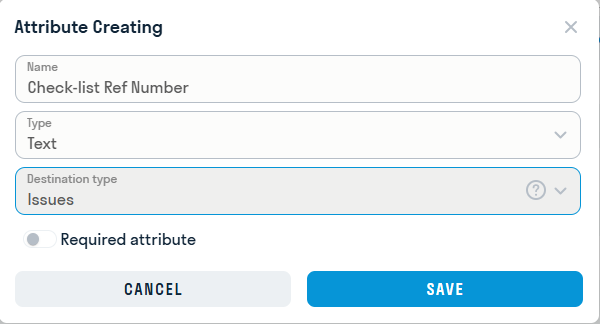
Attribute types:
- “Text” allows the user to enter free text to provide additional information, clarification, or comments to the issue.
- “Yes/No” is a logical value that allows the user to select one of two answer options: “Yes” or “No”. It is used to obtain a simple answer to the question.
- “List” is used to provide the user with a list of predefined answer options, for example, to select the type of work, type of violation, etc.
- "Date" allows the user to select a date or enter it manually. It is used to specify timestamps or due dates associated with the note.
Assignment Type:
- File - the attribute is assigned to a folder, but is populated for each file individually within the folder. The attribute value will be copied to notes for files in the folder if this attribute type is added to the specified note type.
- Folder - the attribute can be added to a folder and edited as a folder property. The attribute value will be copied to notes for files in the folder if this attribute type is added to the specified note type.
- Missing - attribute for notes only.
Each attribute can be required or optional. The

switch is responsible for this ### Example:
Create attribute
Add attribute to issue type

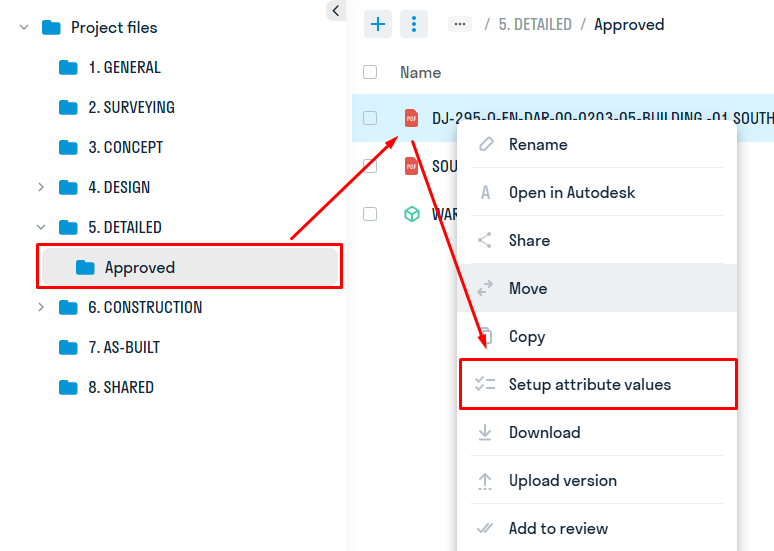
Assign attribute to folder
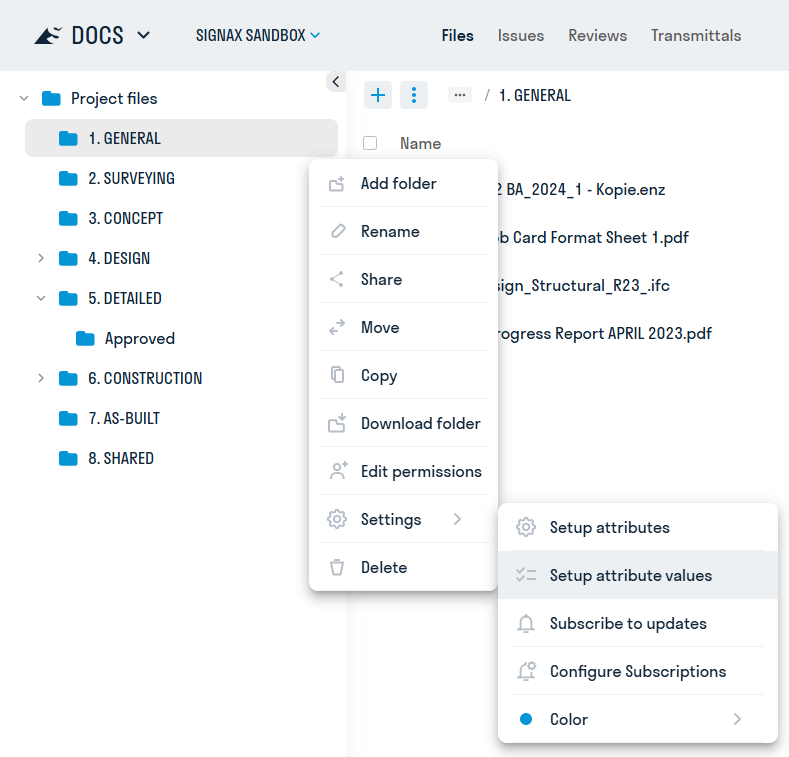
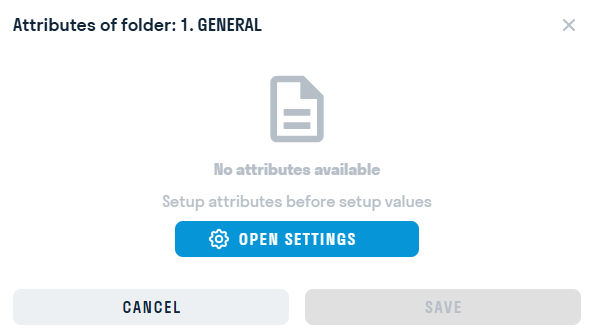
Open settings
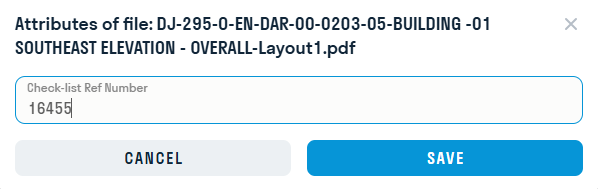
Assign an attribute to a file in the folder
Enter the value:
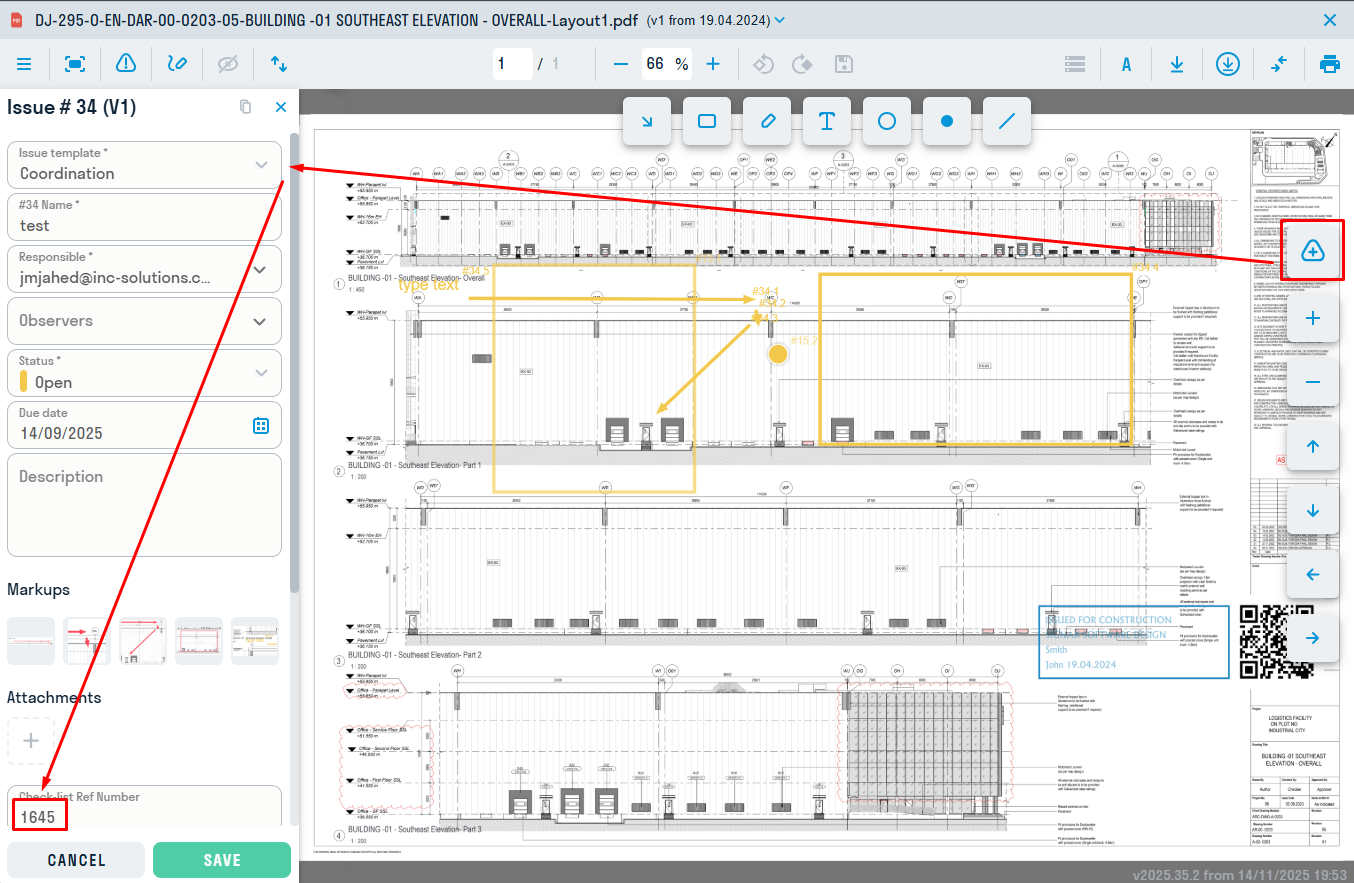
Create a note about the file. The attribute will be filled in automatically
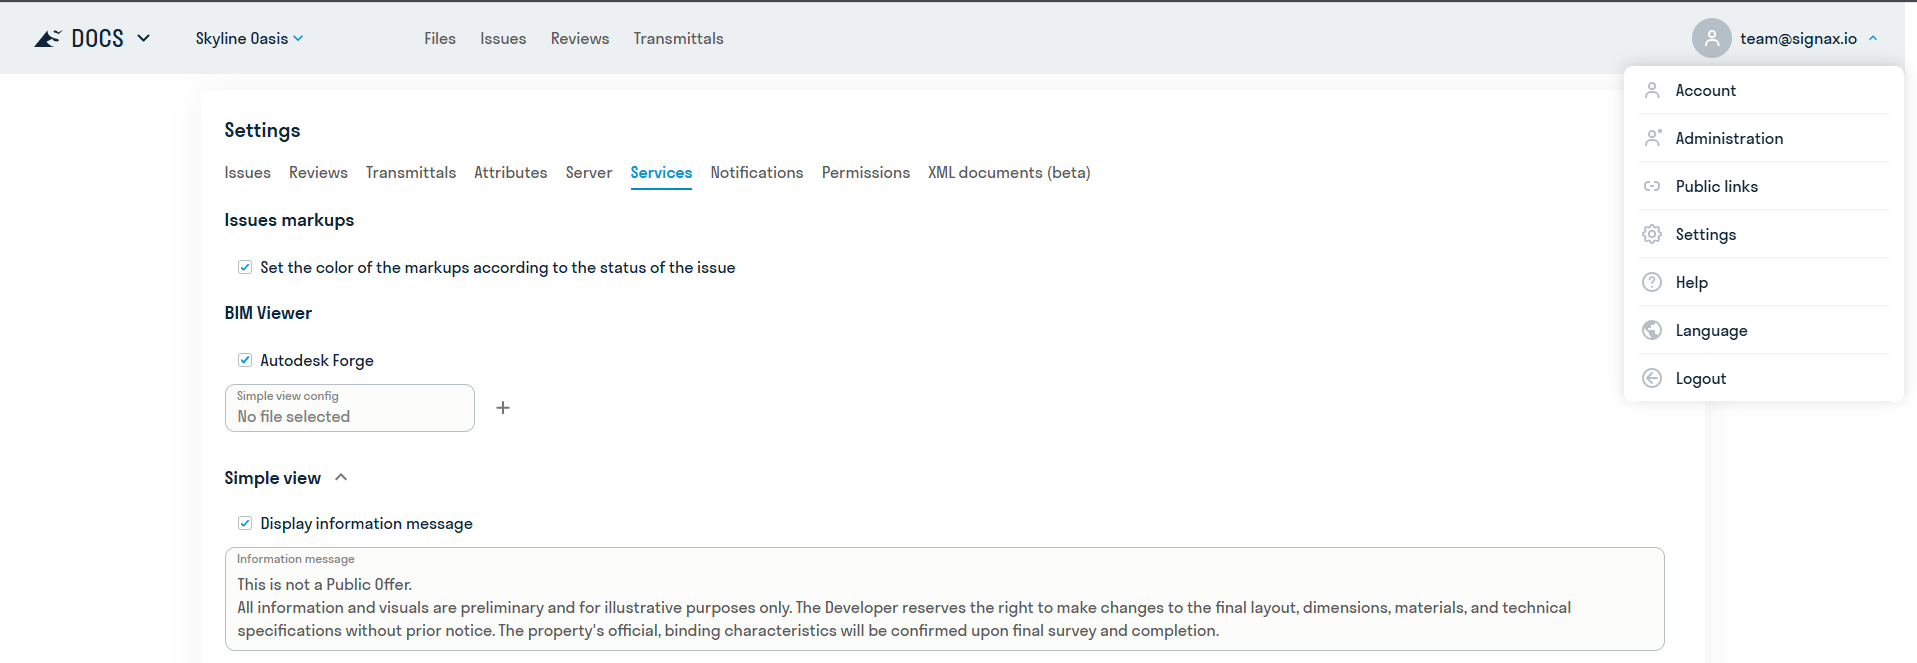
¶ 6. Services
See also video instructions for other settings: Telegram YouTube
For viewing 3D models in the SIGNAX DOCS service, Forge Viewer and/or Tangl Viewer are used. The project administrator can choose which viewer to use for viewing models for each project. The switch is located in the "Settings" section of the "Services" section.
Forge Viewer allows you to view the following file formats:

Tangl Viewer allows you to view the IFC format and RVT (using a plugin).
¶ 9. Access rights
See also the video tutorial for setting up access rights: Telegram YouTube
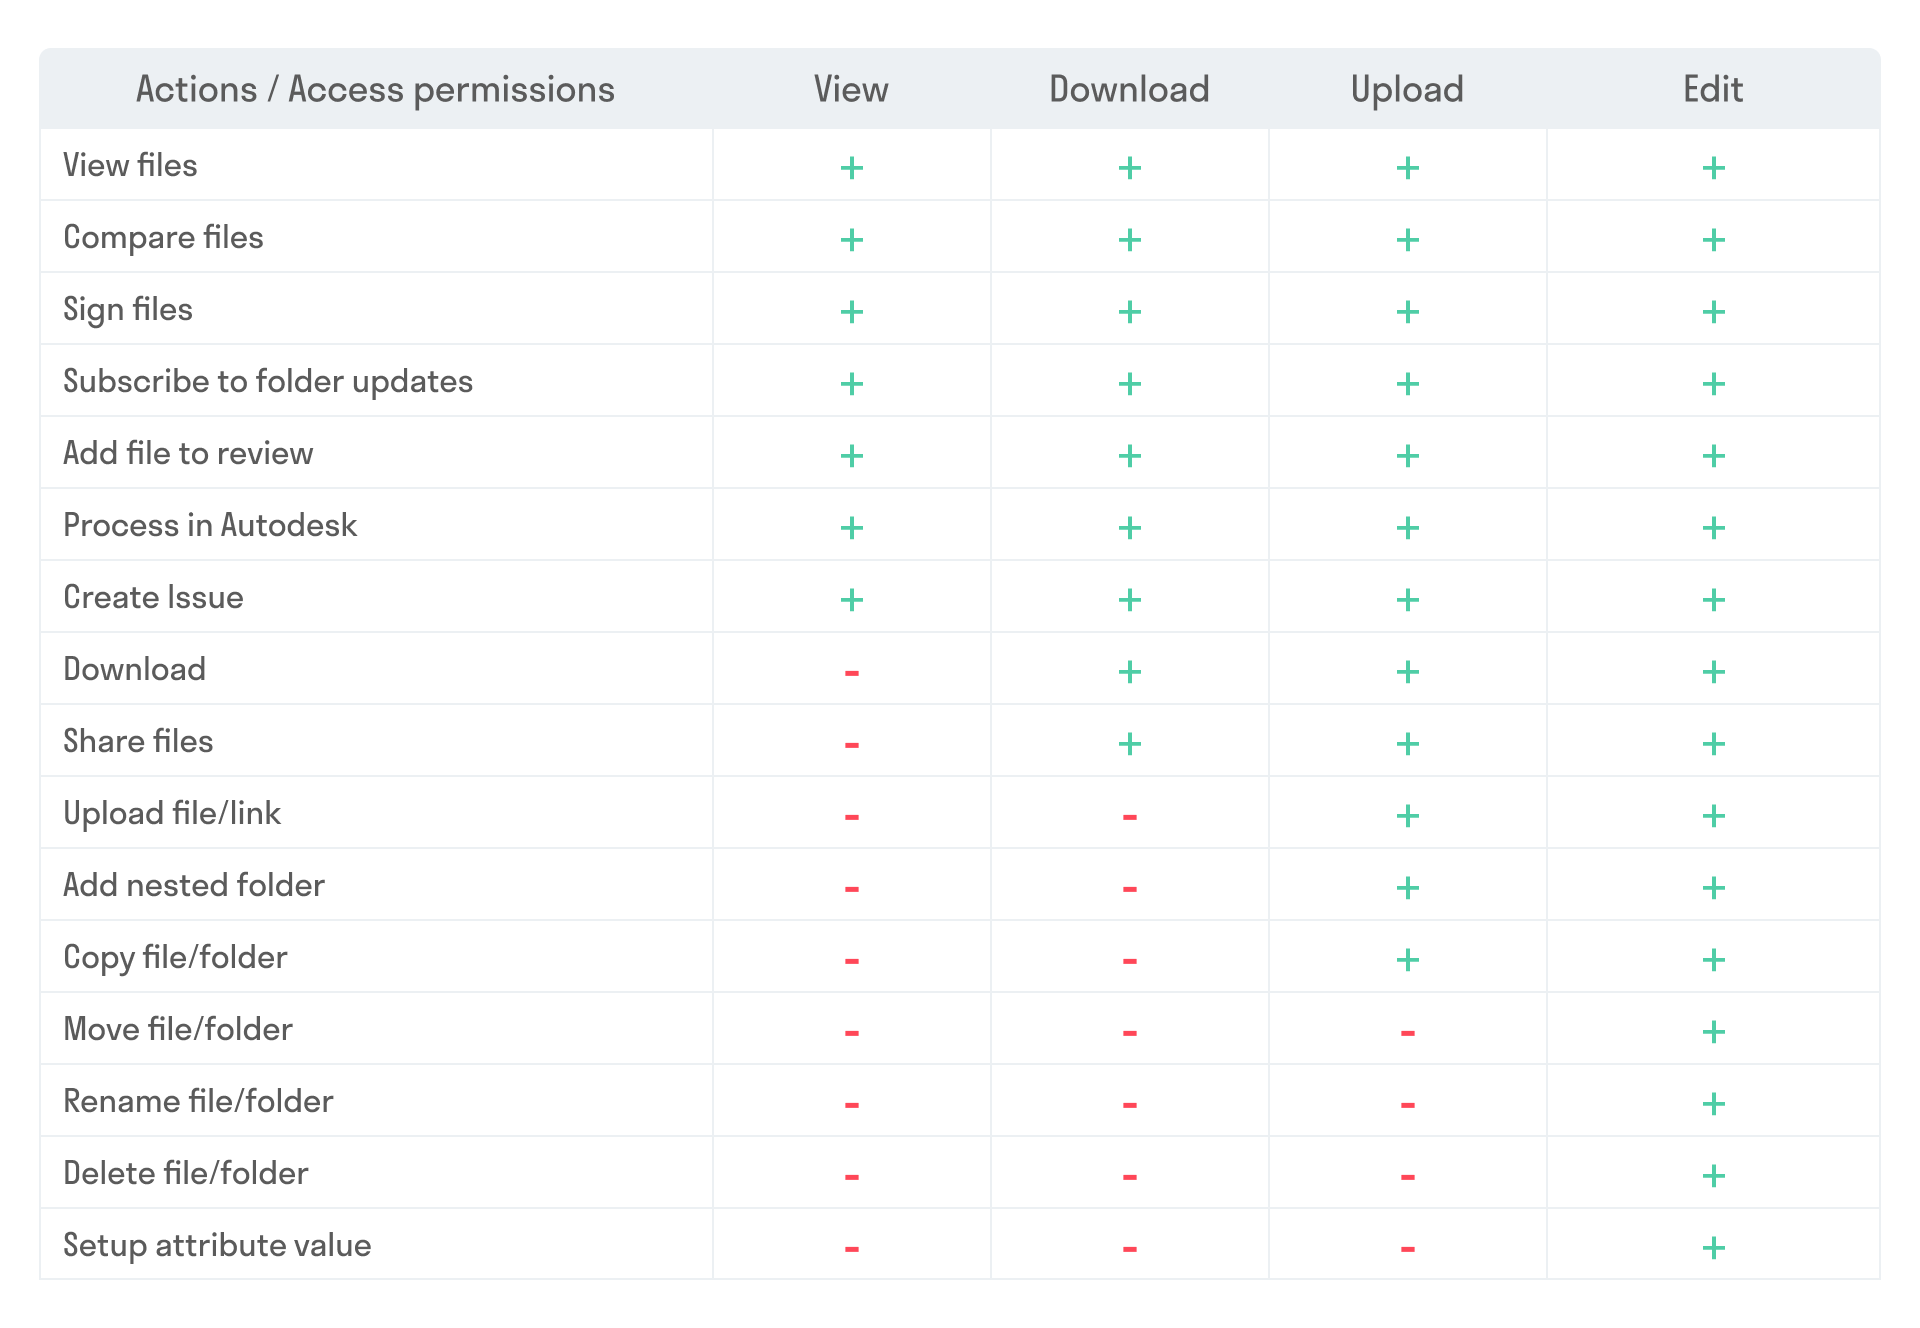
In SIGNAX DOCS project administrators can grant different access rights to users and roles for specific folders.
- View - users can only open and view files in folders
- Download - users can download files from folders
- Upload - users can upload their files to the folder
- Edit - users have full access to edit files in the folder (delete, rename, etc.)
¶ Method 1. Access rights settings in the
settings 1. Go to “Settings” section “Access rights”
2. The rows represent the project's folder structure. The columns indicate the access level. In the cells, select roles according to their access to the

¶ Method 2. Setting up access rights via the
folder structure > See DOCS. Documents → Project tree → Configuring access rights to folders
¶ 10. XML documents
Create a schema type, set up viewing, creating, and editing access, and upload the required XSD files (XML templates), for example from Ministry of Construction website .
¶ 11. Updating settings
When working in SIGNAX DOCS, the administrator can update the parameters of comments and Reviews of the current project from another (for example, template) project.
- In the template project, in the administrator settings, edit the issue or review and configure its necessary parameters:
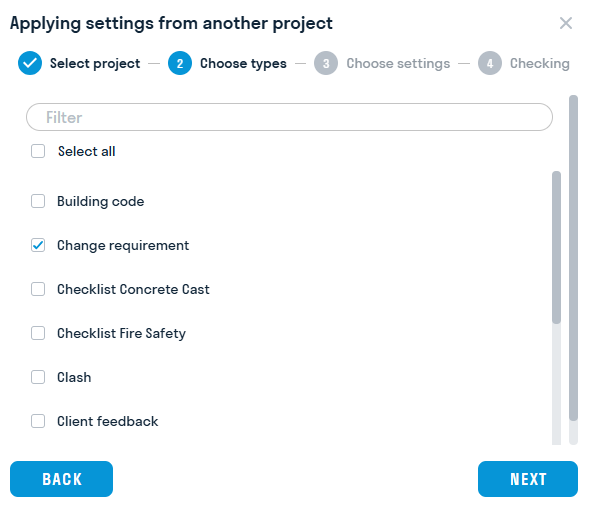
- Go to another project, create a issue / review with the same name as in the template project and click Update settings from another project:
- Select the template project and the necessary types of issue / review whose settings you want to update:
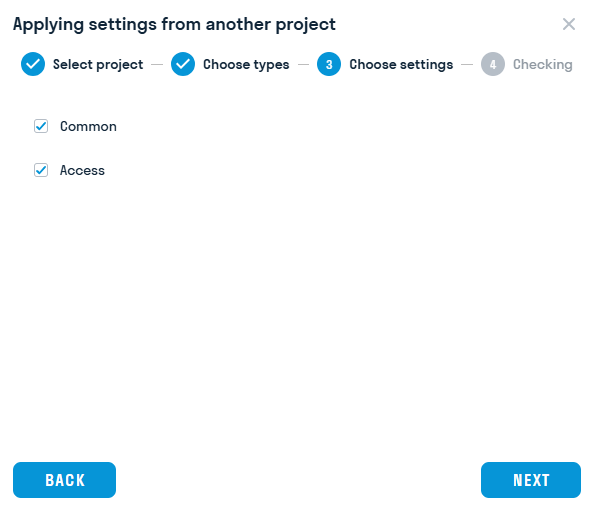
- Select which parameters need to be updated:
- Click Finish, after which the selected parameters will be updated in the comments / Reviews of the current project:
The Accesses and General settings are available for transfer comments
The following settings are available for transfer Reviews: Accesses, Stages, Statuses, Signatures, Notifications