< HUB. Introduction | HUB. User >
The functions described here are available only to the Administrator of the company
See also the video instruction on SIGNAX HUB administration: ** Telegram YouTube **
¶ 0. Services and links
0.1. The “Services” tab in the drop-down ribbon, when clicking on an account, takes the user to a window with all available SIGNAX information materials, as well as technical support
¶ 1. Account
1.1. On the authorization page, click Create an account or go to link :

1.1.2. Enter the email address that will serve as the Administrator account:

1.1.3. Within a few minutes, you will receive an email with a confirmation code. Enter this code in the Code: field


1.1.4. Then create a password longer than 8 characters, containing a capital letter and a number. If necessary, you can fill in your full name:

1.1.5. Complete registration:

1.1.6. After completing registration, you will be redirected to the main page https://hub.signax.io/ . Click LOGIN and enter your registration information:

1.1.7. You will find yourself in the personal account of the account you created:

1.2.1. Account settings are located in the upper right corner where your account is written. Click on the account and a section feed will appear.
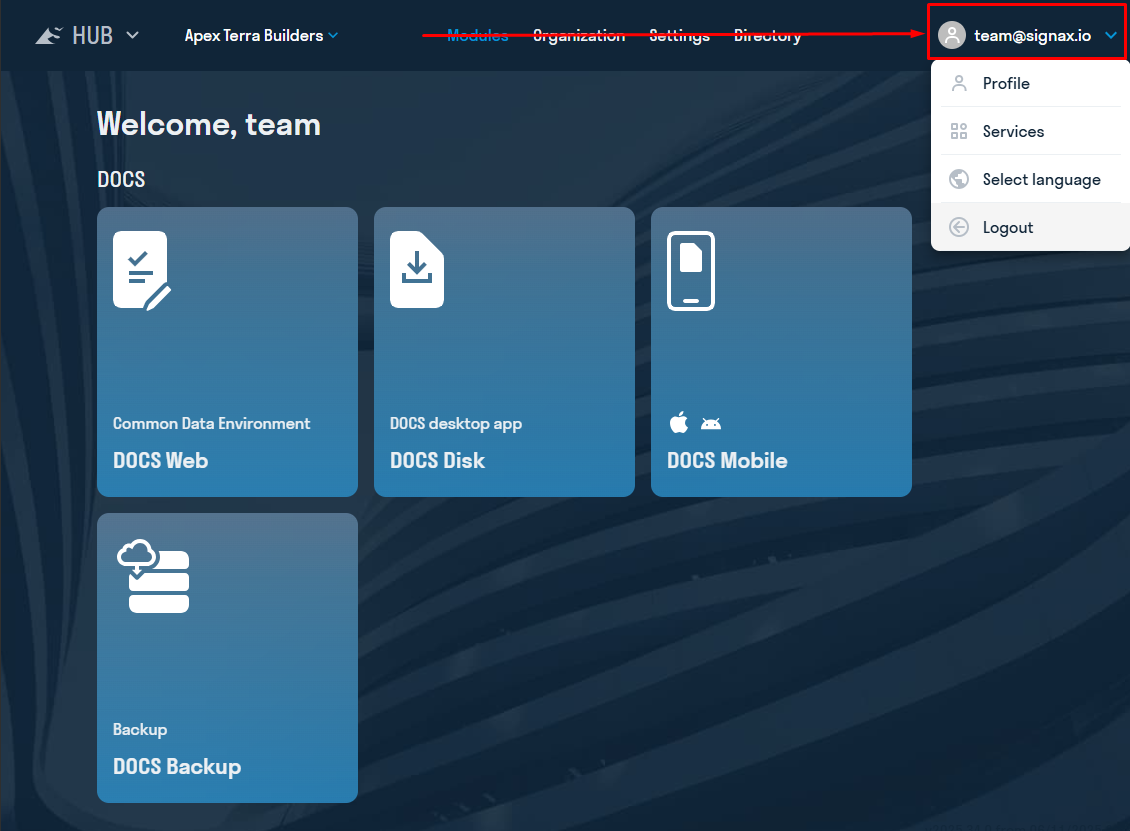
1.2.2. The “Profile” tab contains the “My Companies” sections, which list the companies where your account exists.
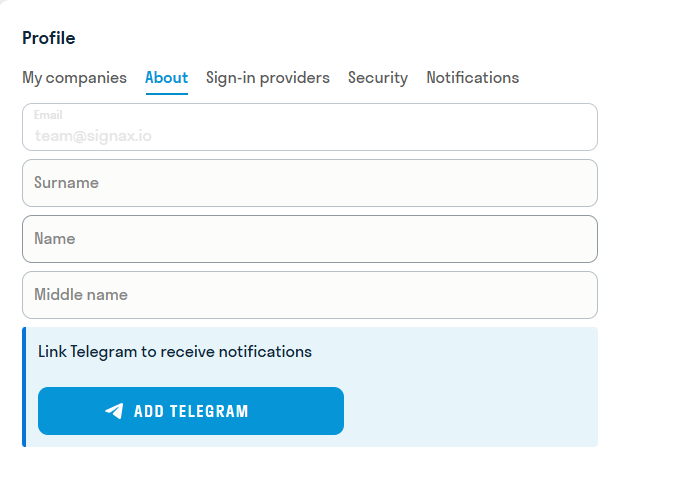
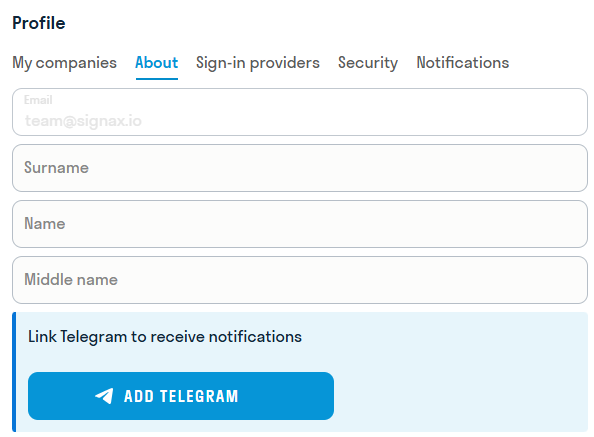
1.2.3. The “About Me” section contains information about your account. Here you can edit your full name, as well as link your Telegram account for future project notifications.
1.2.4. “Alternative Login” links your other accounts to the SIGNAX service.
1.2.5. In the “Security” section, you can update your password to a new one.
1.2.6. The “Notifications” section contains notification buttons. Notifications can be sent either by email or telegram, and can be disabled if necessary
¶ 2. Organization
2.1. In the SIGNAX HUB, in the upper left corner of the screen, click “Select a company”, then create a company using the + button:

2.2. Enter the Company details and click ADD:

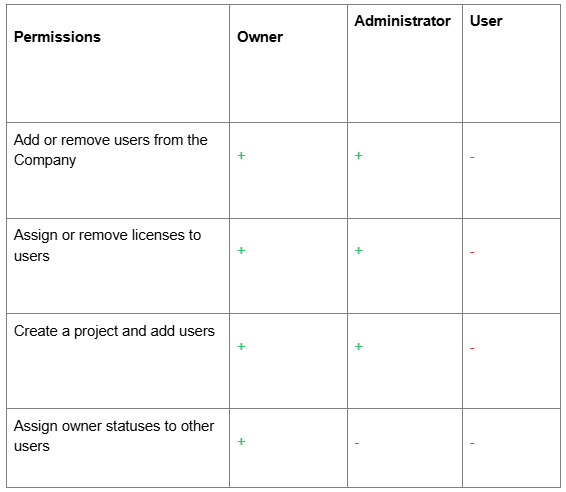
The Account that creates a Company becomes its Owner and Administrator. It can add other Users as Owners and/or Administrators. Added Owners can remove the original creator from the Company. This may apply in cases where a User created and configured a Company as a technical support service and that is where their functions end
One account can create no more than four Companies
Add all the required Users to the created company. This can be done in two ways: one by one or in bulk.
2.2.1. To add one user, select the created company and click ADD:

2.2.2. To add multiple users, click the icon

2.2.3. Specify the email of the User to be added:

2.2.4. A notification will be sent to the specified email of the User.
If the user has not previously registered in the SIGNAX system, an account will be created automatically. An email with a login and an automatically generated password will be sent to the specified email. If necessary, the password can be changed in the PROFILE tab.

If the user is already registered in the SIGNAX system, an email will be sent notifying them of their addition to the company.

2.2.5. Immediately after adding, the Administrator will see the added User in the company list. It will be possible to assign a role to him and issue the corresponding licenses.
¶ An Excel window will open for bulk adding.
2.2.6. In the window that opens, download the Excel template with an example of filling out:
[[
2.2.7. Fill in the following fields in Excel and save it:


- Email of the user
- Password must be at least 6 characters long and contain at least one number and one uppercase letter. If you leave the field blank, a password for a previously unregistered user will be generated automatically.
- First Name - optional field
- Last Name - optional field
- Middle Name - optional field
The permitted number of users in a company is calculated based on the number of licenses in the company plus 5 users. In total, if a company has 100 licenses, then 105 users are allowed to be added.
2.2.8. Upload the completed template by clicking UPLOAD. All specified users will appear in the window. The Status column shows whether the user is a member of the company or not. Click Add to add users.

2.2.9. Users will receive a notification at the specified email address.
If the user has not previously registered with the SIGNAX system, an account will be created automatically. An email with a login and an automatically generated password will be sent to the specified email address. If necessary, the password can be changed in the PROFILE tab.
If the user is already registered with the SIGNAX system, they will receive an email notifying them of their addition to the company.
2.2.10. Immediately after adding, the Administrator will see the added Users in the company list. They can be assigned a role and issued the corresponding licenses
2.3.1. The Administrator must send a request to info@signax.io with the following text:
Please assign Licenses:
- Name of the legal entity requesting Licenses (indicate the Name of the created Company)
- Number of Licenses to connect
2.3.2. Wait for technical support to confirm that the Licenses have been assigned. This happens within the same day.
The number of issued Licenses can be seen in the Organization → Licenses section.

2.4.1. Go to the Organization → Users section.
2.4.2. To assign a license to a User, click on the User — Application intersection:

2.4.3. All SIGNAX services can be licensed for Users or Administrators. Administrators have expanded access to SIGNAX services.
¶ 2.5. Projects
A created Company can have multiple projects. Create projects, add users to them, and assign roles to users.
2.5.1. Go to hub.sgnl.pro → ORGANIZATION section → Projects tab and click +

2.5.2. In the window that appears, fill in the fields and click Add.
You can create a project based on a previously created project (template). To do this, select the project to copy the settings to in the corresponding window.

When creating a project based on a template, the following will be copied:
- Folder structure settings
- Access rights settings
- Attributes assigned to folders
- Approval types
- Comment types
If the approval types in the template project contain users rather than roles in the route, then in order for these users to participate in approval routes in the new project, it is necessary to follow the sequence:
- when creating a project, you must specify a template project to copy the settings
- add users to the project
- Open the created project in DOCS (at this point the settings will be copied)
2.5.3. The project is created. Now add users to the project. Click ADD:

2.5.4. In the window that appears, select a user from the list and click Add:

When issuing a license with the DOCS administrator access level (see above 5. Assigning Licenses), the user receives Edit level rights to all folders, access to creating types of comments, approval routes, setting up access rights to folders, as well as to the project recycle bin.
2.5.5. Users have been added, now you can assign them roles.
Roles are used to configure project participants' access to additional modules and system elements depending on their responsibilities.
Access rights are based on escalation logic, i.e. if a role has edit access, then by default it has both create and view access.
2.6.1. To create a role, go to the hub.sgnl.pro website → ORGANIZATION section → Roles tab and click ADD:

2.6.2. In the window that appears, specify a name for the role and click ADD:

2.6.3. After creating all the necessary roles, go to the USERS tab,** click on the three dots in the Role column and assign the appropriate role to the user. Now the user will be automatically assigned a role when adding him to a new project. The same role can be assigned to different users, for example, Designers.

To change a user's role in an existing project, go to the PROJECTS tab, click on the three dots in the Role column and assign the corresponding role to the user in this project:

7.4. After that, the roles will become available in Access rights settings in SIGNAX DOCS .
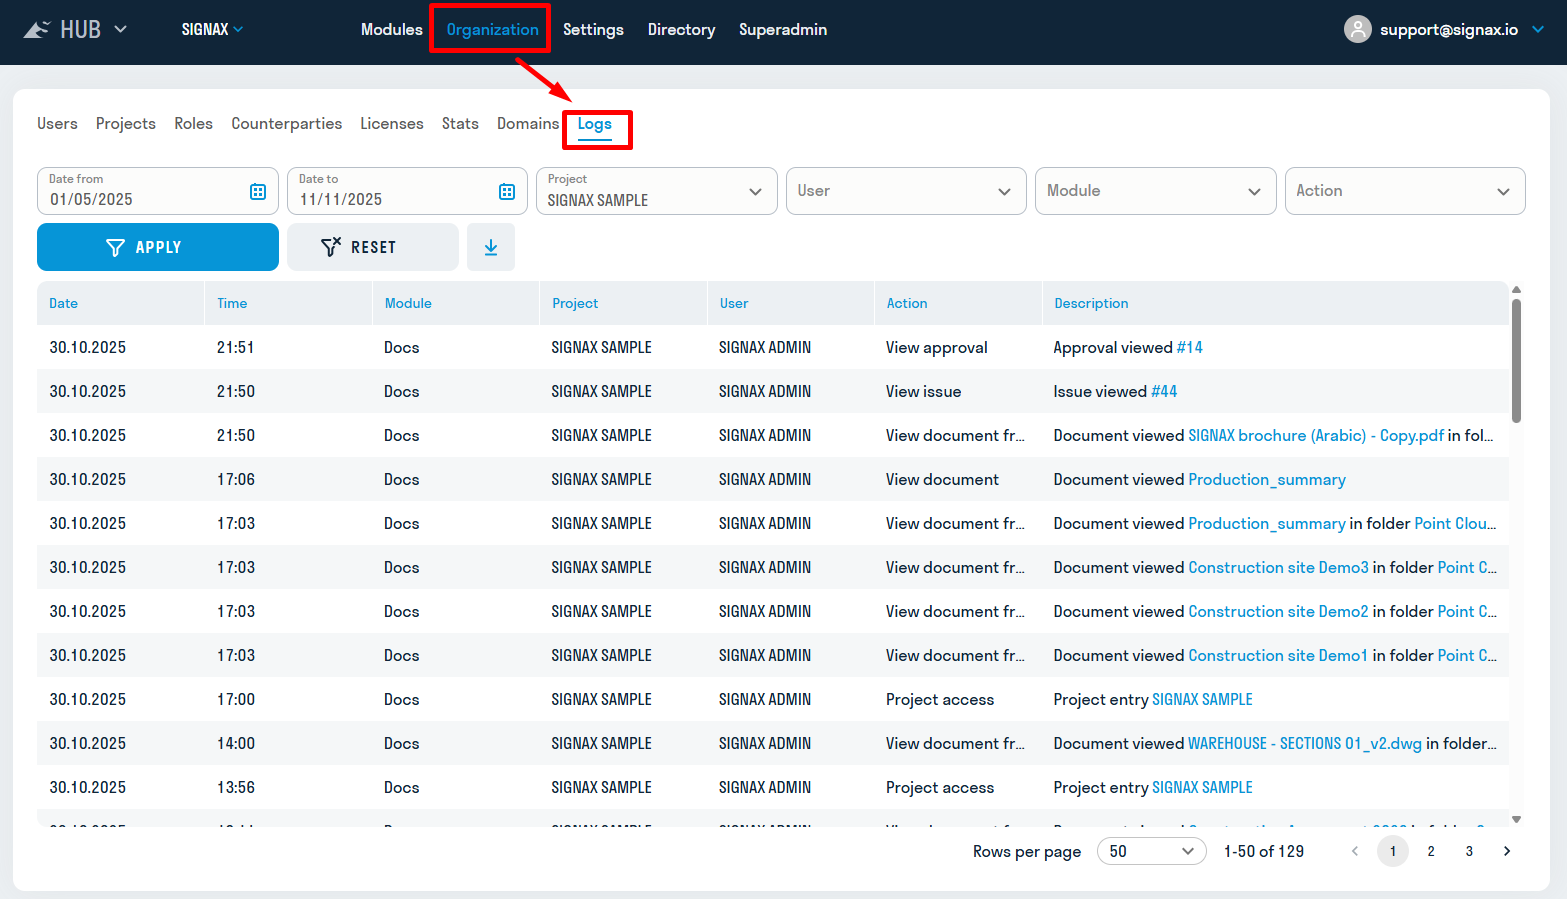
2.7.1. To monitor user actions in projects, open the "Logs" tab in the "Organization" section.
2.7.2. Filters are shown at the top of the window that opens. They can be used to filter the period from which to which the log should be displayed, for which project, which user, in which module, and what action was performed.
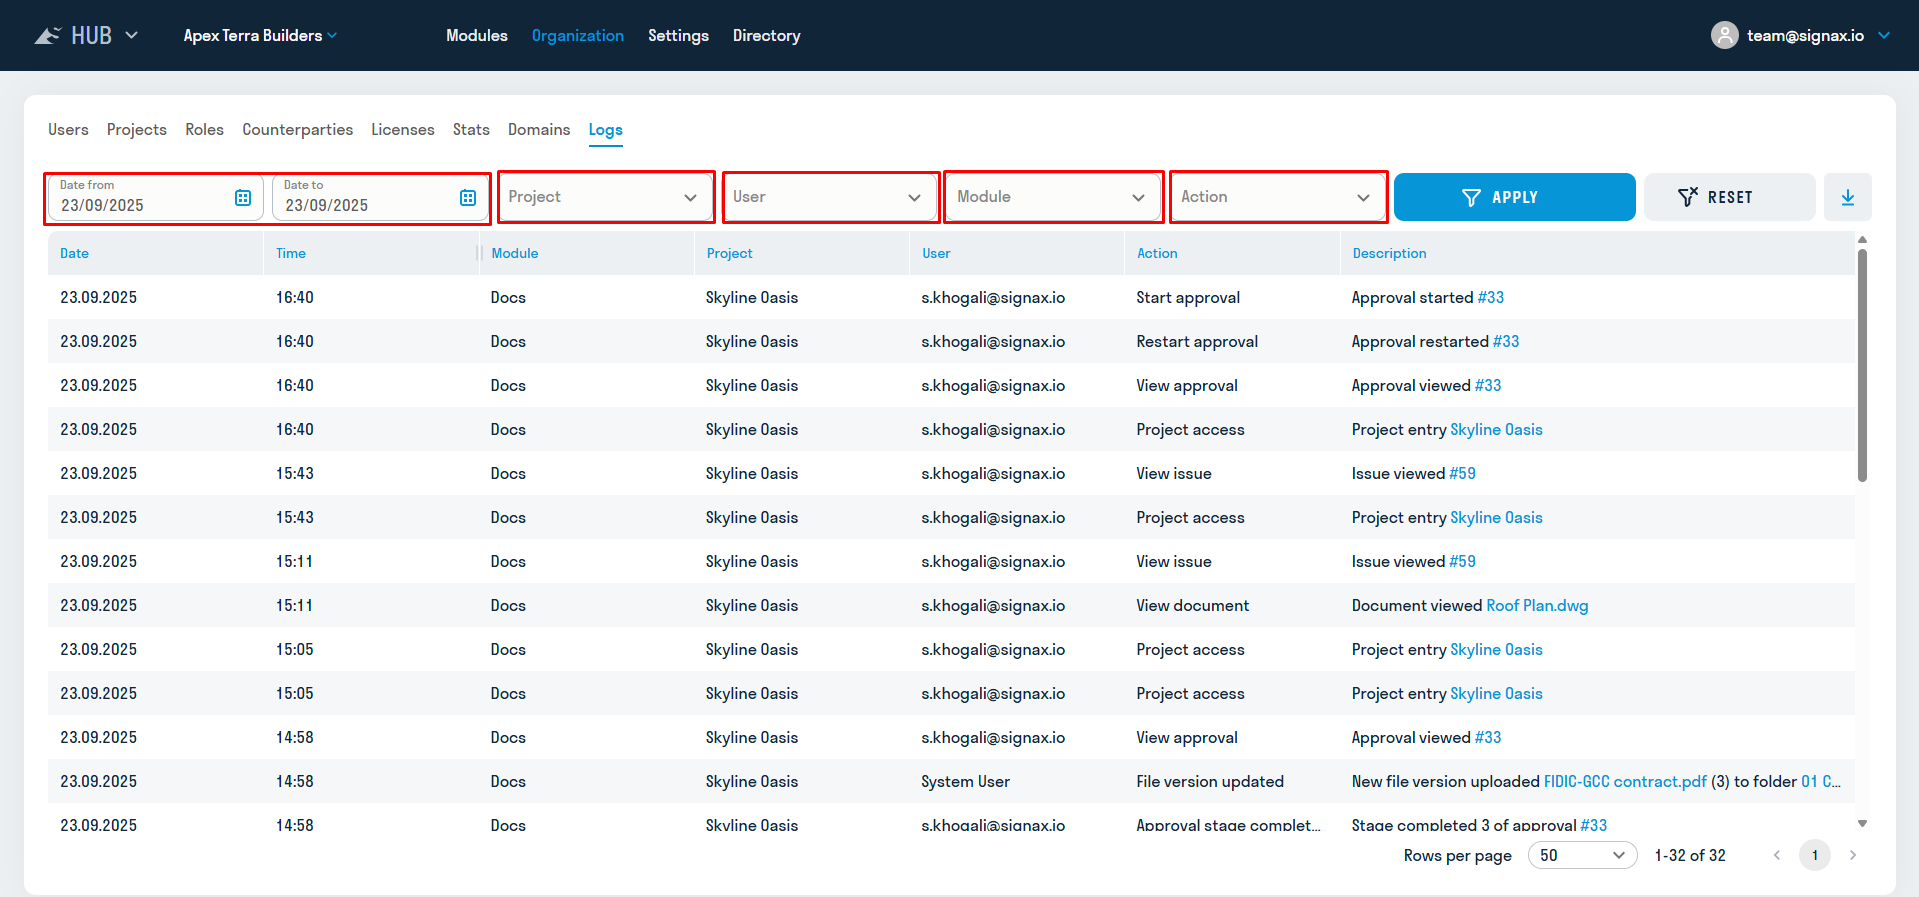
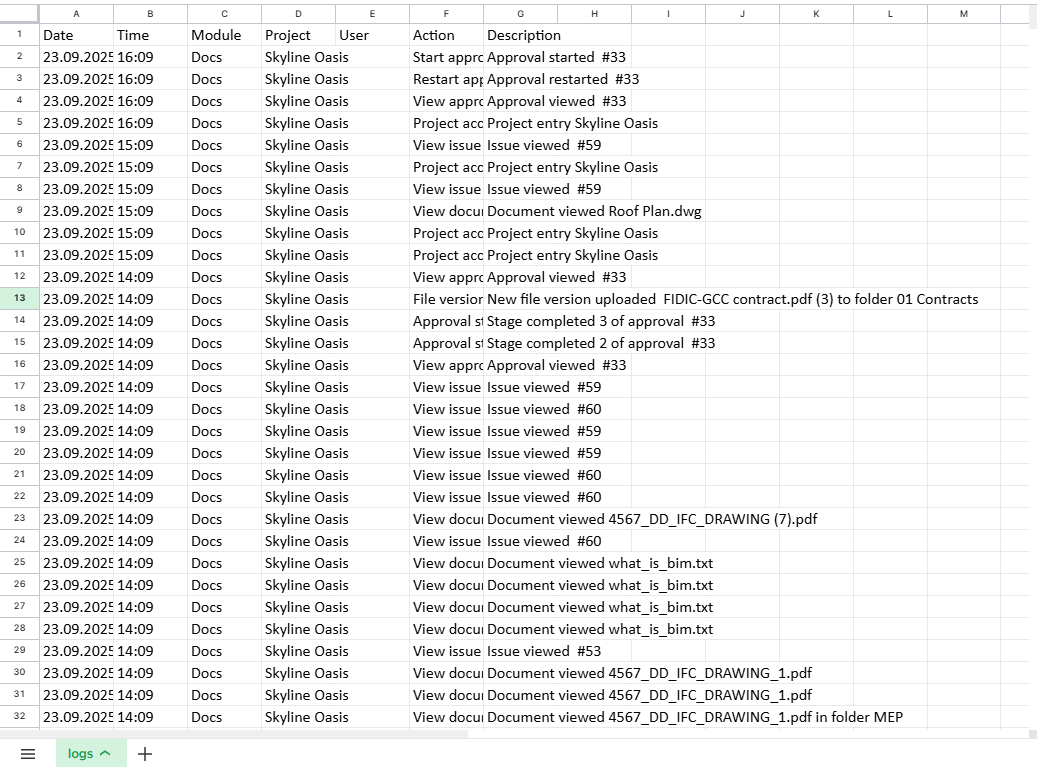
2.7.3. After filtering, an action log called "Logs" will be displayed. A maximum of 200 lines can be displayed on one page. They can be downloaded by clicking on the download icon  An Excel document with the log table will then be downloaded.
This material is under development.
¶ 3. Settings
This material is under development.
The Calendar allows you to specify working and non-working days adopted in your organization. The calendar affects the project approval schedule. The number of days at each approval stage is calculated taking into account the non-working days specified in the calendar.
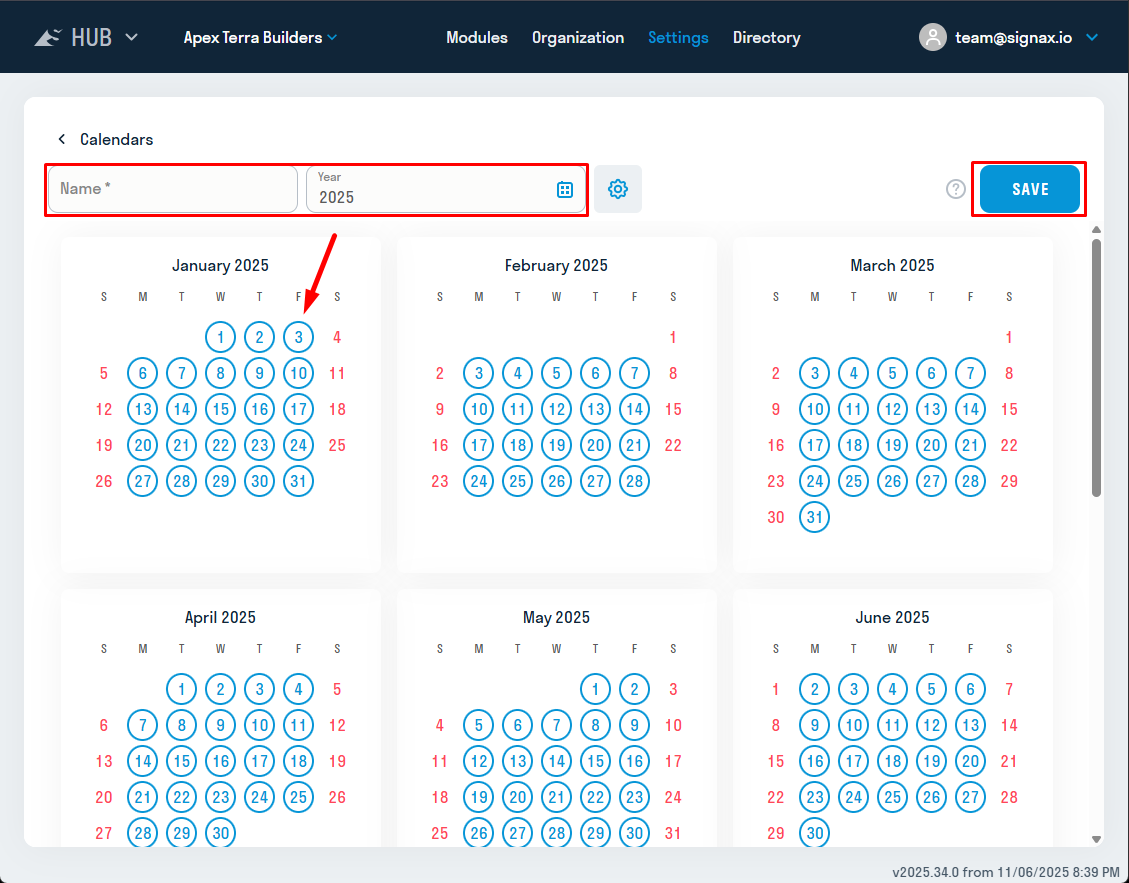
3.2.1. By default, a system calendar is created automatically; it corresponds to the production schedule of the Russian Federation, but the user can create their own calendar if necessary. To create a calendar, go to the “Settings” section, “Calendars” tab.
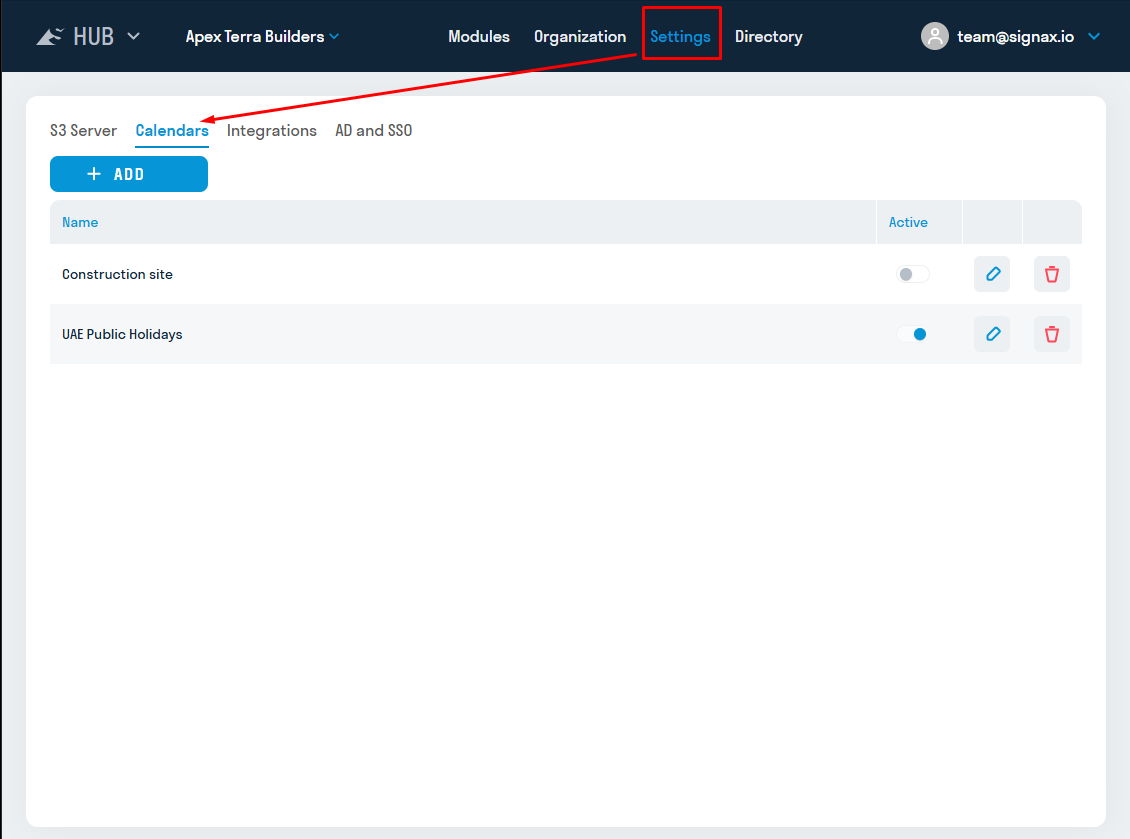
3.2.2. In the window that opens, enter the calendar name, year, and adjust the weekend/working days. Days in blue circles are considered working days. Press SAVE:
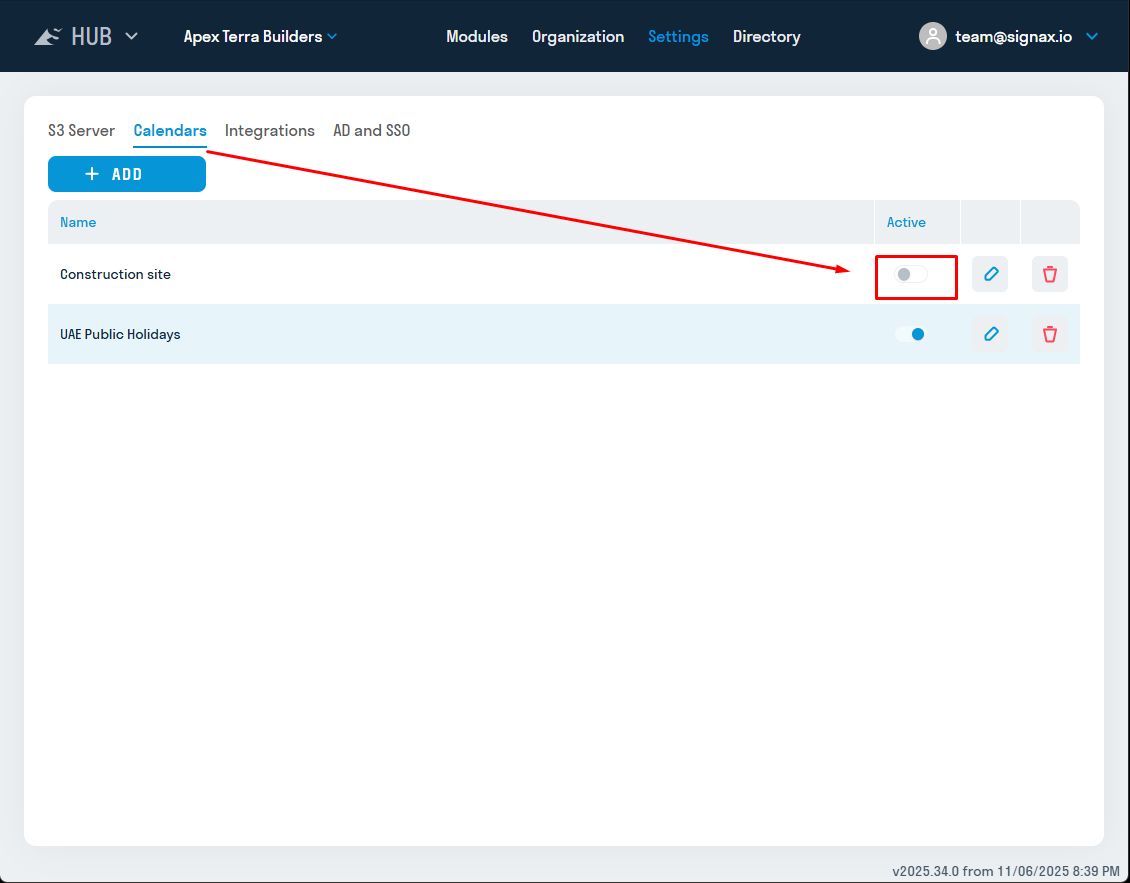
Return to the list of available calendars and activate the calendar you need for work. The selected calendar will be offered by default when creating new projects:
This material is under development.
This material is under development.