< DOCS Disk | DASHBOARD. Introduction >
¶ 1. DOCS Backup
In SIGNAX DOCS, you can set up backup of project files to the company server. To do this, download Backup Client and fill out the settings file.
1.1. Download Backup Client and unzip it to the backup folder.
Attention! The backup folder must be located on a disk with sufficient free space
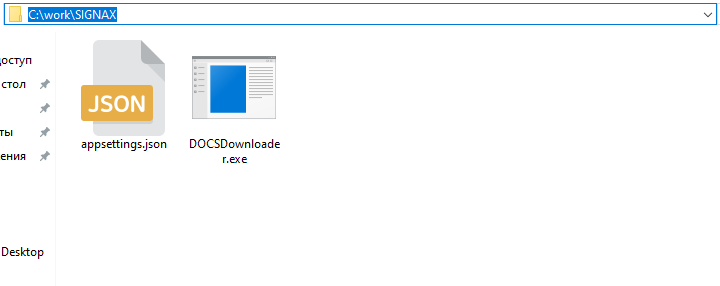
1.2. Fill in the settings file appsettings.json. You can open it using a standard notepad
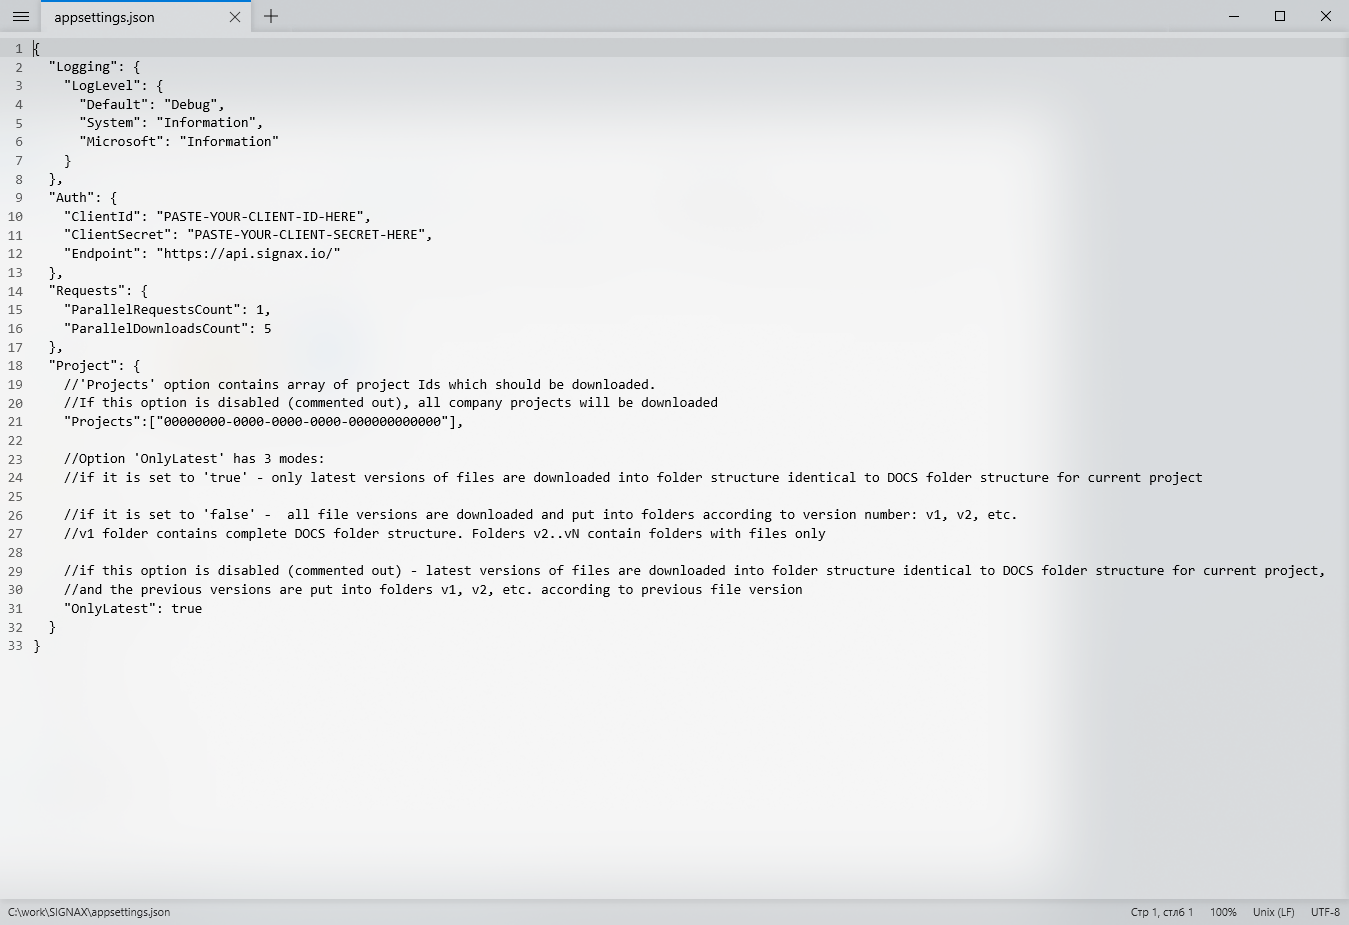
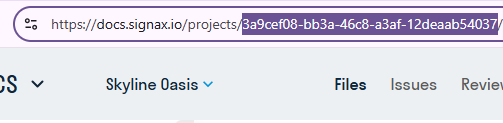
1.3. “"Projects":["00000000-0000-0000-0000-000000000000"]” must be replaced with the project ID from DOCS. To do this, go to the desired project in DOCS and copy its ID from the address bar.
1.4. Data for the fields “YOUR_CLIENT_ID” and “YOUR_CLIENT_SECRET” must be obtained on SIGNAX HUB in the "Settings" tab, “Integrations” section
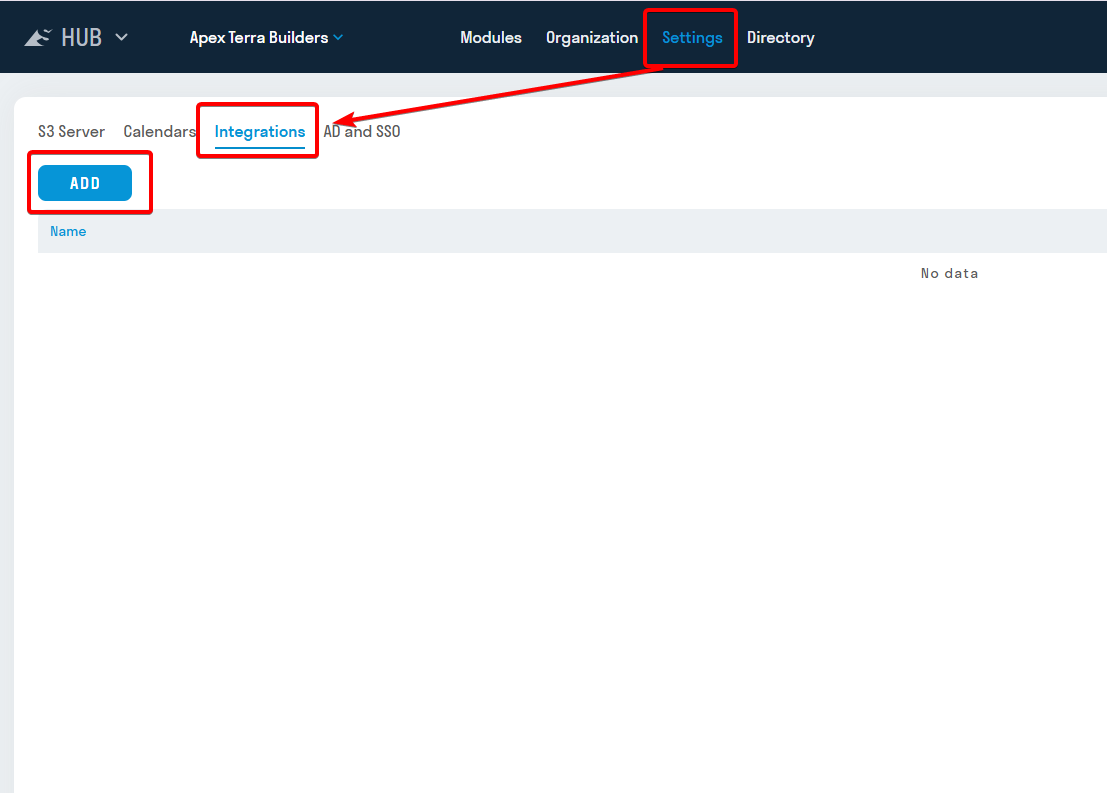
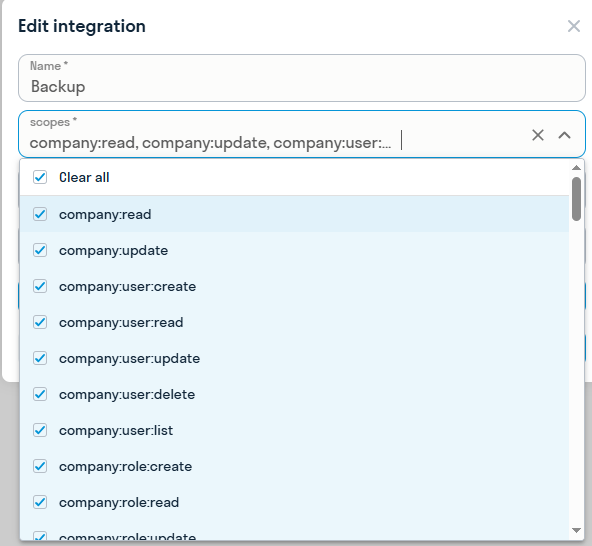
1.5. Click “Add”, write the name and select all the methods in the “Scopes” line.
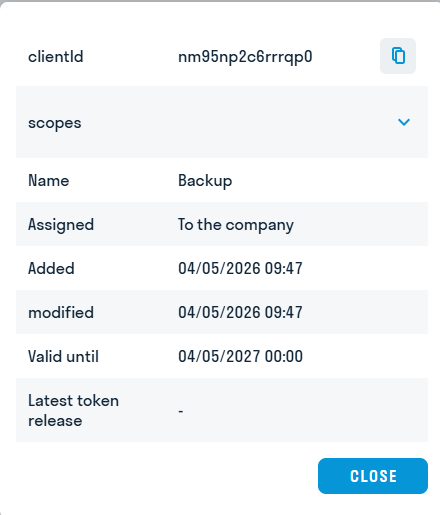
1.6. After creating the integration, “YOUR_CLIENT_SECRET” will appear, copy it to the settings file

1.7. Select the created integration and click In the window that opens, there will be “YOUR_CLIENT_ID”, copy it to the settings file.
- Save the completed settings file and run the backup client, the files will begin downloading to the previously created folder.

¶ 2. DOCS Mobile Applications
The DOCS mobile applications for iOS and Android can be downloaded from the applications page: https://hub.signax.io/hub/apps.
The main purpose of the application is to provide stable access to project files in the absence of a stable Internet connection (for example, at a construction site). To do this, the necessary files or the entire project must be downloaded in advance.
You can also view images and PDF files in the application and upload images to the project from a mobile device.
¶ 3. Installing MinIO on Linux
The first step is to download Minio. We will be using Ubuntu Server 22.04.
3.1.1. Download and install the MinIO package from https://min.io/docs/minio/linux/index.html

3.2.1. Create a user under which the application service will run:
sudo groupadd -r minio-user
sudo useradd -M -r -g minio-user minio-user
3.2.2. Let's add full rights to the directory where your data will be stored for this user:
sudo chown -R minio-user:minio-user /mnt/data/
3.2.3. Let's download the service file for the application so that MinIO can run in the background:
wget https://raw.githubusercontent.com/minio/minio-service/master/linux-systemd/minio.service
3.2.4. Let's move the downloaded file to the services directory:
sudo mv minio.service /lib/systemd/system/
3.2.5. Enable autoloading of the service:
sudo systemctl enable minio.service
3.2.6. Let's edit the service configuration file:
sudo nano /etc/default/minio
Insert the following text into the file:
# Volume to be used for MinIO server.
MINIO_VOLUMES="/mnt/data"
# Use if you want to run MinIO on a custom port.
MINIO_OPTS="--address :9000 --console-address :9090 --certs-dir /home/administrator/.minio/certs/"
# Root user for the server.
MINIO_ROOT_USER=minioadmin
# Root secret for the server.
MINIO_ROOT_PASSWORD=miniopassword
# set this for MinIO to reload entries with 'mc admin service restart'
MINIO_CONFIG_ENV_FILE=/etc/default/minio
3.2.7. IMPORTANT! A certificate must be installed. See section “2. Connecting the SSL Certificate” below for details. Then proceed to step 2.8.
3.2.8. Start the service:
sudo systemctl start minio.service
3.2.9. Check the startup status:
systemctl status minio.service
3.2.10. Let's set the superuser name and password:
Open the file in the editor:
sudo nano /etc/environment
Add two lines:
MINIO_ROOT_USER=minioadmin
MINIO_ROOT_PASSWORD=miniopassword
ATTENTION! It is recommended to specify a more complex password.
3.2.11. Let's launch the application in the console:
sudo minio server --console-address :9090 --certs-dir /home/administrator/.minio/certs /mnt/data/

3.2.12. The application is launched, you can proceed to configuring MinIO
You need to purchase a commercial certificate for the domain name of your storage in advance from specialized centers. For example, if the storage address is s3.YOURDOMAIN.COM, then the certificate is required either directly for the address s3.YOURDOMAIN.COM, or a WIldcard domain certificate (*.YOURDOMAIN.COM).
The received data must be saved in two files:
- certificate in the public.crt file
- private key in the private.key file
Both files must be placed in the certs folder in the user profile on the server where the MinIO application will be running. For example, /home/administrator/.minio/certs/
After launching Minio, you can go to the storage web interface. To do this, open a browser and go to: https://localhost:9090
Enter the superuser login and password. In the previous steps (step 2.3) of the instructions, we specified them as minioadmin and miniopassword.

¶ Creating an Access Key
An access key in Minio is used to authorize access to object storage from the DOCS service. An access key consists of a user ID (Access Key) and a secret key (Secret Key), which is used to authenticate the user and ensure data security. Without an access key, it is impossible to access objects in the Minio storage.
3.4.1. To create an access key, go to the Access Keys tab ➤ Create access key

3.4.2. Fill in the Access Key and Secret Key fields yourself or leave them as is. Remember these fields, as you will need them to connect to DOCS. Click Create.

3.4.3. Access key created

¶ Creating a Bucket
To store files in Minio, you need to create buckets. Buckets are containers that hold files and folders.
3.4.4. To create a new bucket, go to the Buckets tab ➤ Create bucket

3.4.5 Enter a name for the bucket, turn on the Versioning toggle and click Create Bucket

3.4.6. The bucket is created.

To connect to the DOCS service, this server must be published to the Internet on ports 9000 and 9090. An A record must be created in the external DNS zone of your domain specifying the IP address where the server with the MinIO application is published.
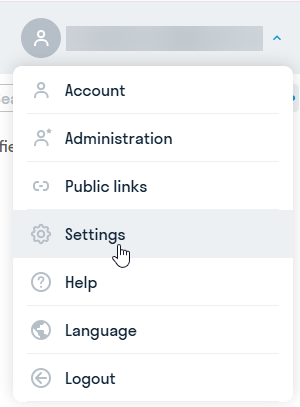
Open the docs.signax.io service. Go to the service settings: to do this, click on the profile ➤ Settings
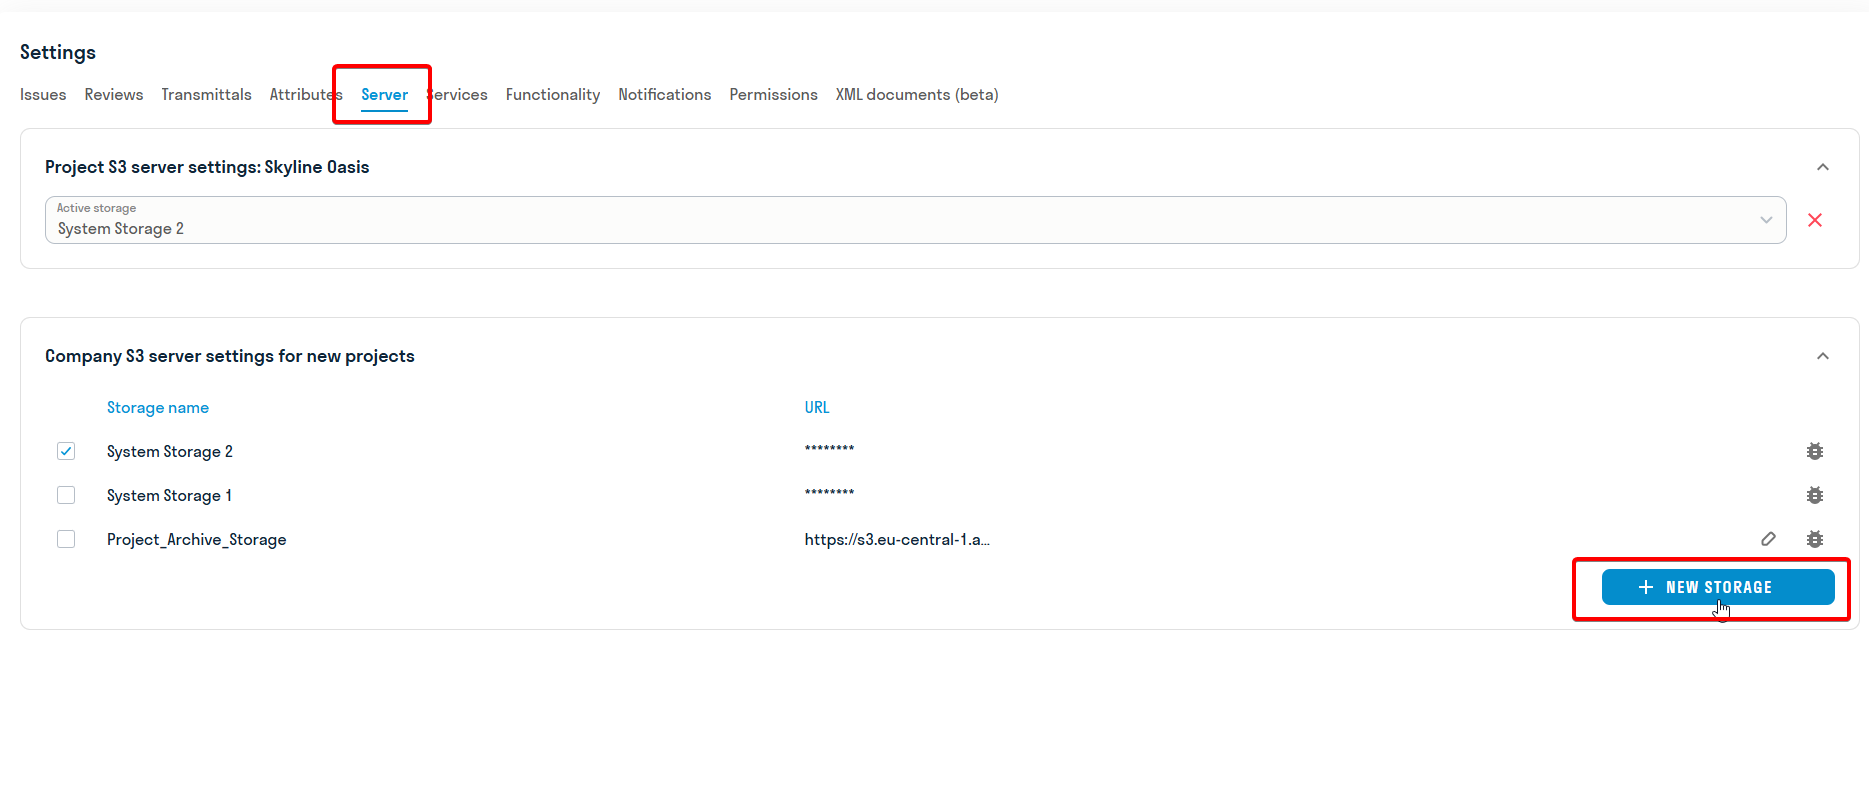
3.5.1. Click Add new storage
3.5.2. Fill in the data in the window that appears and click Save:
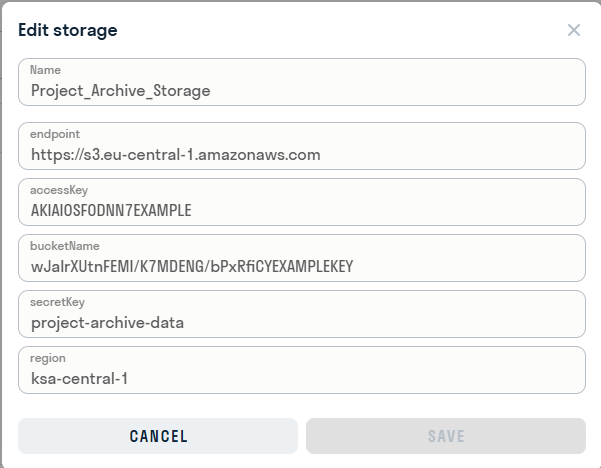
Required fields:
- In the “Name” line, enter the name of the storage for the DOCS service
- In the “EndPoint” line, paste the link to the server with port 9000, for example https://s3.YOURDOMAIN.RU:9090
- In the “Access Key” line, paste the access key
- In the “Secret Key” line, paste the secret key
- In the “Bucket Name” line, enter the bucket name
Optional fields
- In the “Region” line, enter the server region
- Done. Now you can use the service
¶ 4. Installing MinIO on Windows
You can use different servers to deploy your S3 storage. We recommend MinIO - this open-source software allows you to create your own S3 storage on your server or in the cloud. With MinIO, you get a secure and reliable solution, as well as quick installation and ease of use.
If you plan to use a different server, please contact info.signax.io, and our specialists will help you set up the server and connect to the DOCS service.
In this tutorial, we'll look at how to install MinIO on Windows and Linux and connect it to the DOCS service
Create a Windows user (or Active Directory user) under which you will run the MinIO application. For example, CONTOSO\minio.
Add the created account (user) to the local Administrators group on the server where MinIO will run.
Connect to the remote desktop of the CONTOSO\minio user on this server.
Go to the official Minio website ( https://min.io/download ), select the Windows version and download the minio.exe file.

It is recommended to place the minio.exe file on the C: drive. Therefore, create a MinIO folder on the C:\ drive.
4.2.1. Launch the Windows command prompt (cmd).
To change to the directory where the minio.exe file is located, enter the command cd SPACE FOLDER PATH. For example, cd C:\MinIO

4.2.2. Create a folder to store the application data with the following command:
mkdir data
ATTENTION!
This folder will store all your files in the future. Therefore, it is important that the server on which the MinIO application will run is located (installed) on a fault-tolerant RAID disk array and that backups of the server (or at least this folder) are created on a regular basis.
4.2.3. Next, create a superuser account and password in the system to administer the application. This can be done with the following commands:
setx MINIO_ROOT_USER minioadmin
setx MINIO_ROOT_PASSWORD miniopassword
ATTENTION!
It is recommended to specify a more complex password.

4.2.4. An important aspect in connecting the server to the DOCS service is the HTTPS protocol. It ensures the security of data transmission between the client and the server, protecting it from interception and modification. Therefore, it is necessary to install an SSL certificate on the server where the application is hosted. See how to do this in section 3. Connecting the SSL Certificate, and then proceed to step 2.5.
4.2.5. Launch the MinIO application using the command:
minio.exe server C:\MinIO\data --console-address :9090

4.2.6. The application is launched, you can begin configuring it.
You must purchase a commercial certificate for the domain name of your storage in advance from specialized centers (for example, https://www.reg.ru/ ). For example, if the storage address is s3.YOURDOMAIN.RU, then a certificate is required either directly for the address s3.YOURDOMAIN.RU, or a WIldcard domain certificate (*.YOURDOMAIN.RU).
The received data must be saved in two files:
- certificate in the public.crt file
- private key in the private.key file
Both files must be placed in the certs folder in the user profile on the server where you will be running the MinIO application.
To do this, create a .minio folder in the CONTOSO\minio user profile folder (usually C:\Users\minio) using the following command in the command line:
mkdir C:\Users\minio\.minio

And inside it, create a certs folder using the following command in the command line:
mkdir C:\Users\minio\.minio\certs
And move the public.crt and private.key. files into it

After launching Minio, you can access the storage web interface. To do this, open a browser and go to: https://localhost:9090
Enter the superuser login and password. In the previous steps (step 2.3.) of the instructions, we specified them as minioadmin and miniopassword.

¶ Creating an Access Key
An access key in Minio is used to authorize access to object storage from the DOCS service. An access key consists of a user ID (Access Key) and a secret key (Secret Key), which is used to authenticate the user and ensure data security. Without an access key, it is impossible to access objects in the Minio storage.
4.4.1. To create an access key, go to the Access Keys tab ➤ Create access key

4.4.2. Fill in the Access Key and Secret Key fields yourself or leave them as is. Remember these fields, as you will need them to connect to DOCS. Click Create.

4.4.3 Access key created

¶ Creating a Bucket
To store files in Minio, you need to create buckets. Buckets are containers that hold files and folders.
4.4.4. To create a new bucket, go to the Buckets tab ➤ Create bucket

4.4.5 Enter a name for the bucket, turn on the Versioning toggle and click Create Bucket

4.4.6. The bucket is created.

To connect to the DOCS service, this server must be published to the Internet on ports 9000 and 9090. An A-record must be created in the external DNS zone of your domain specifying the IP address where the server with the MinIO application is published.
4.5.1. Open the docs.signax.io service. Go to the service settings: to do this, click on the profile ➤ Settings
4.5.2. Click Add new storage
4.5.3. Fill in the data in the window that appears and click Save:
Required fields:
- In the “Name” line, enter the name of the storage for the DOCS service
- In the “EndPoint” line, paste the link to the server with port 9000, for example https://s3.YOURDOMAIN.COM:9090
- In the “Access Key” line, paste the access key
- In the “Secret Key” line, paste the secret key
- In the “Bucket Name” line, enter the bucket name
Optional fields
- In the “Region” line, enter the server region
4.5.4. Done. You can now use the service