< DOCS. Working in files | DOCS. Approvals >
See also the video tutorial on working with comments: ** Telegram YouTube **
The SIGNAX DOCS service now allows you to create comments for files of any format. Comments are created both in the document itself and from the comment register without linking it to a document.
¶ 1. Creating comments on documents
A SIGNAX DOCS user can create a comment. The Comment Author, the Person Responsible for Resolving the Comment, and the Project Administrator have access to editing the comment.
To create a comment without linking it to a document, go to the "Comments" section and click

in the upper left corner. In the window that opens, fill out the comment form.

To create a comment linked to a document, open any file and on the right side of the screen click


A comment form will open on the left side of the screen, which you need to fill out:
- Comment type - types are configured by the project administrator. Each type has its own purpose and custom attributes.
- Title - the short name of the comment, displayed in the comment register and related in meaning to the type.
- Responsible - specifies the user or role, who is a project participant, responsible for resolving the comment. The responsible person will be sent an email notification about the comment creation.
- Observers - specifies third-party roles and users who will be able to track the comment and write comments.
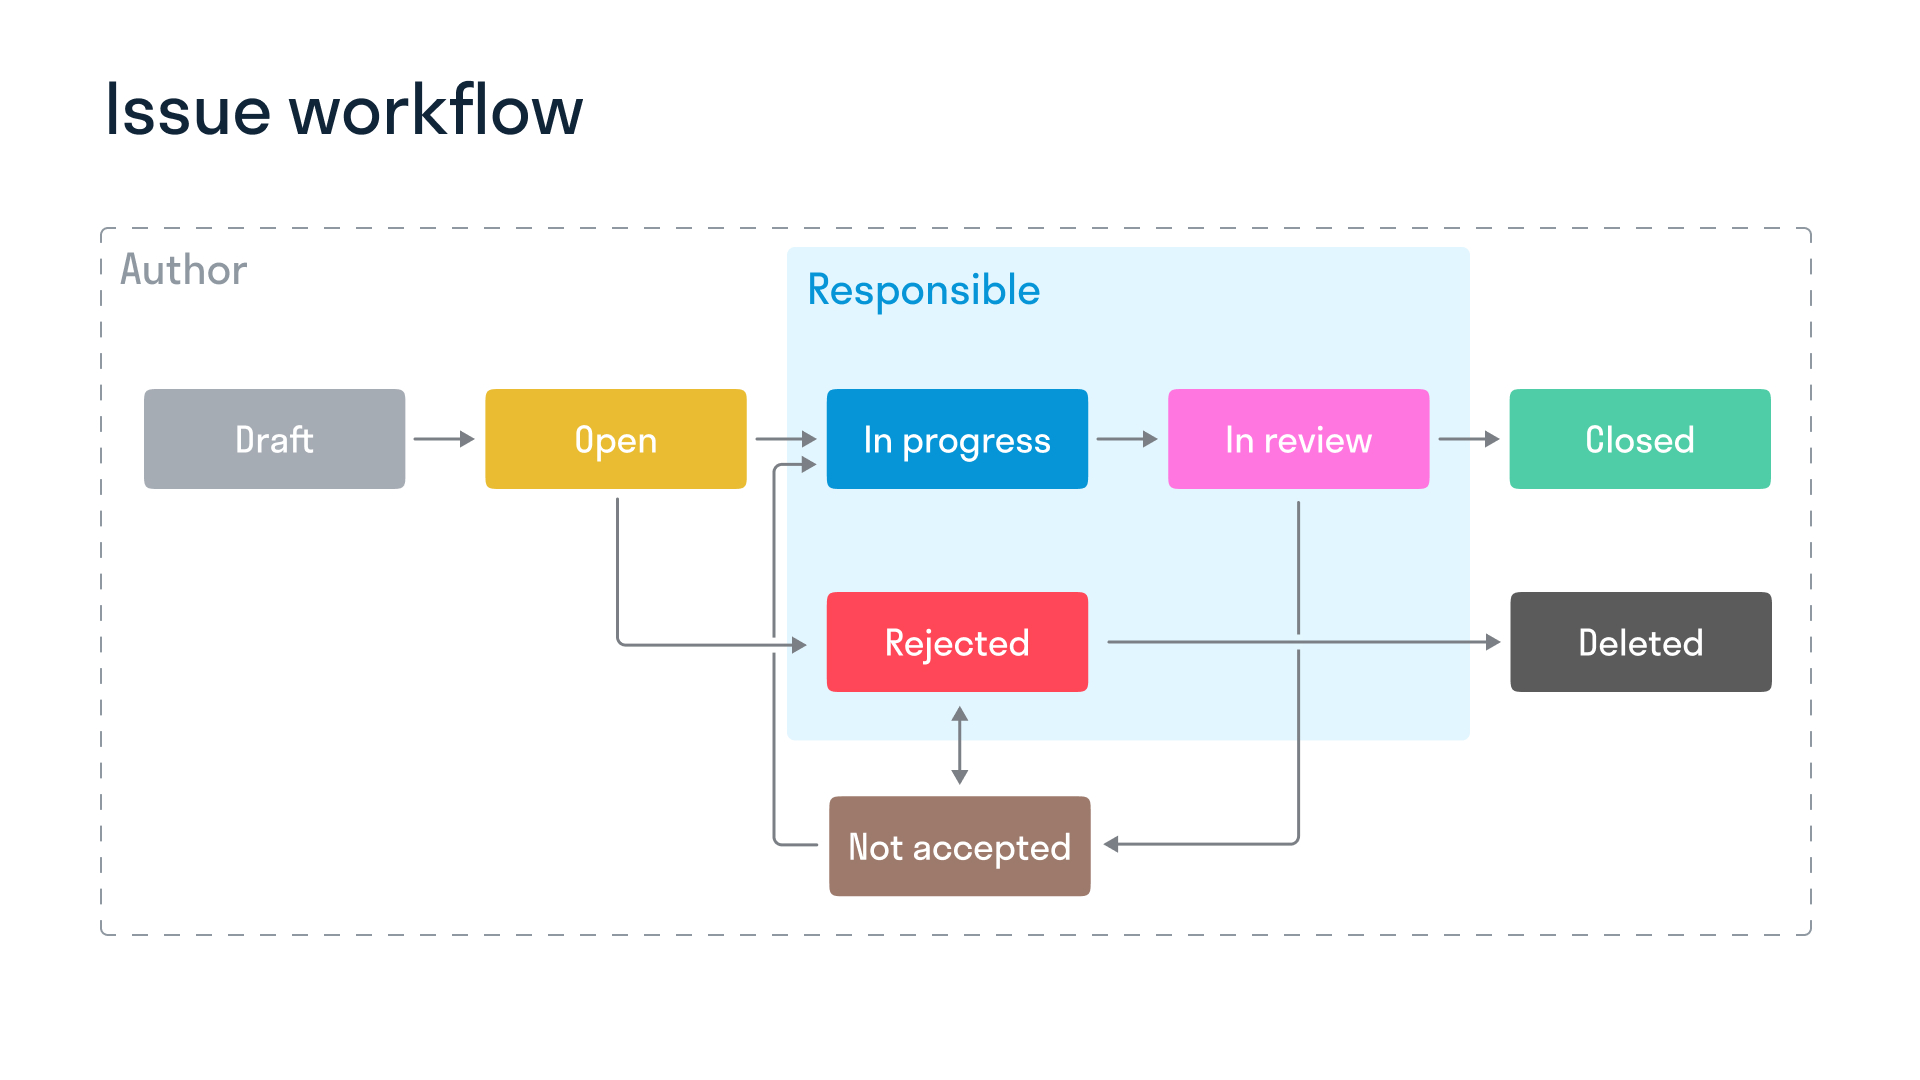
- Status - indicates the stage of work on the comment. When the status changes, the auditor, the responsible person, and observers receive an email notification.
- If the status is “Draft”, the responsible person will not receive an email.
- If the status is “Open”, the responsible person will not receive an email.
- The “In Progress” status is set by the person responsible if they agree with the issued comment and are taking it into work.
- The “Rejected” status is set by the person responsible if they disagree with the issued comment and also write a comment in the field.
- The “Under Review” status is set by the person responsible after the comments have been resolved and a new version of the document has been uploaded for review.
- The “Closed” status is set by the auditor if the comment has been resolved.
- The “Not Accepted” status is set by the auditor if they are not satisfied with the resolution of the comment.
- The “Deleted” status is set by the auditor if the comment was created in error.
- Description - filled in for a more detailed description of the comment.
- Resolution Date - specifies the date by which the comment must be processed
- Attachments - adding additional files to the comment (local, from DOCS or URL links).
- Custom Attributes (if any) - created by the project administrator and used to add additional information to the comment, such as Violation Type, Work Type, Category, etc.
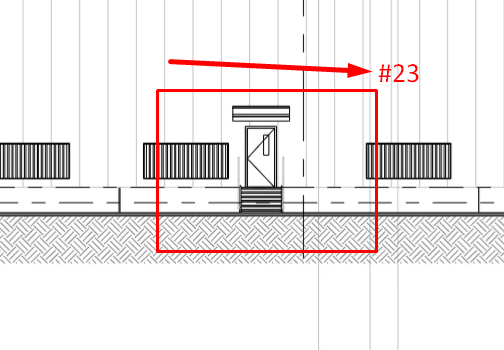
In PDF and Image documents, you can leave annotations for each comment. There are 5 annotation types to choose from: Arrow, Rectangle, Pencil, Text and Ellipse. The annotations you leave are saved in all versions of the document.

The ID number of the comment to which this note was left is displayed next to the mark in the document.
After a comment is created or its status is changed, the responsible user and the author of the comment will receive an email notifying them of the creation or change of the comment's status.

By clicking the link in the email, the user can open the document and review the comment assigned to them in more detail.
To open or close the list of comments in the current file, click

at the top of the document.

The responsible person can change the status of comments to “In progress”, “Under review”, “Rejected”.
¶ 2. Creating comments to models
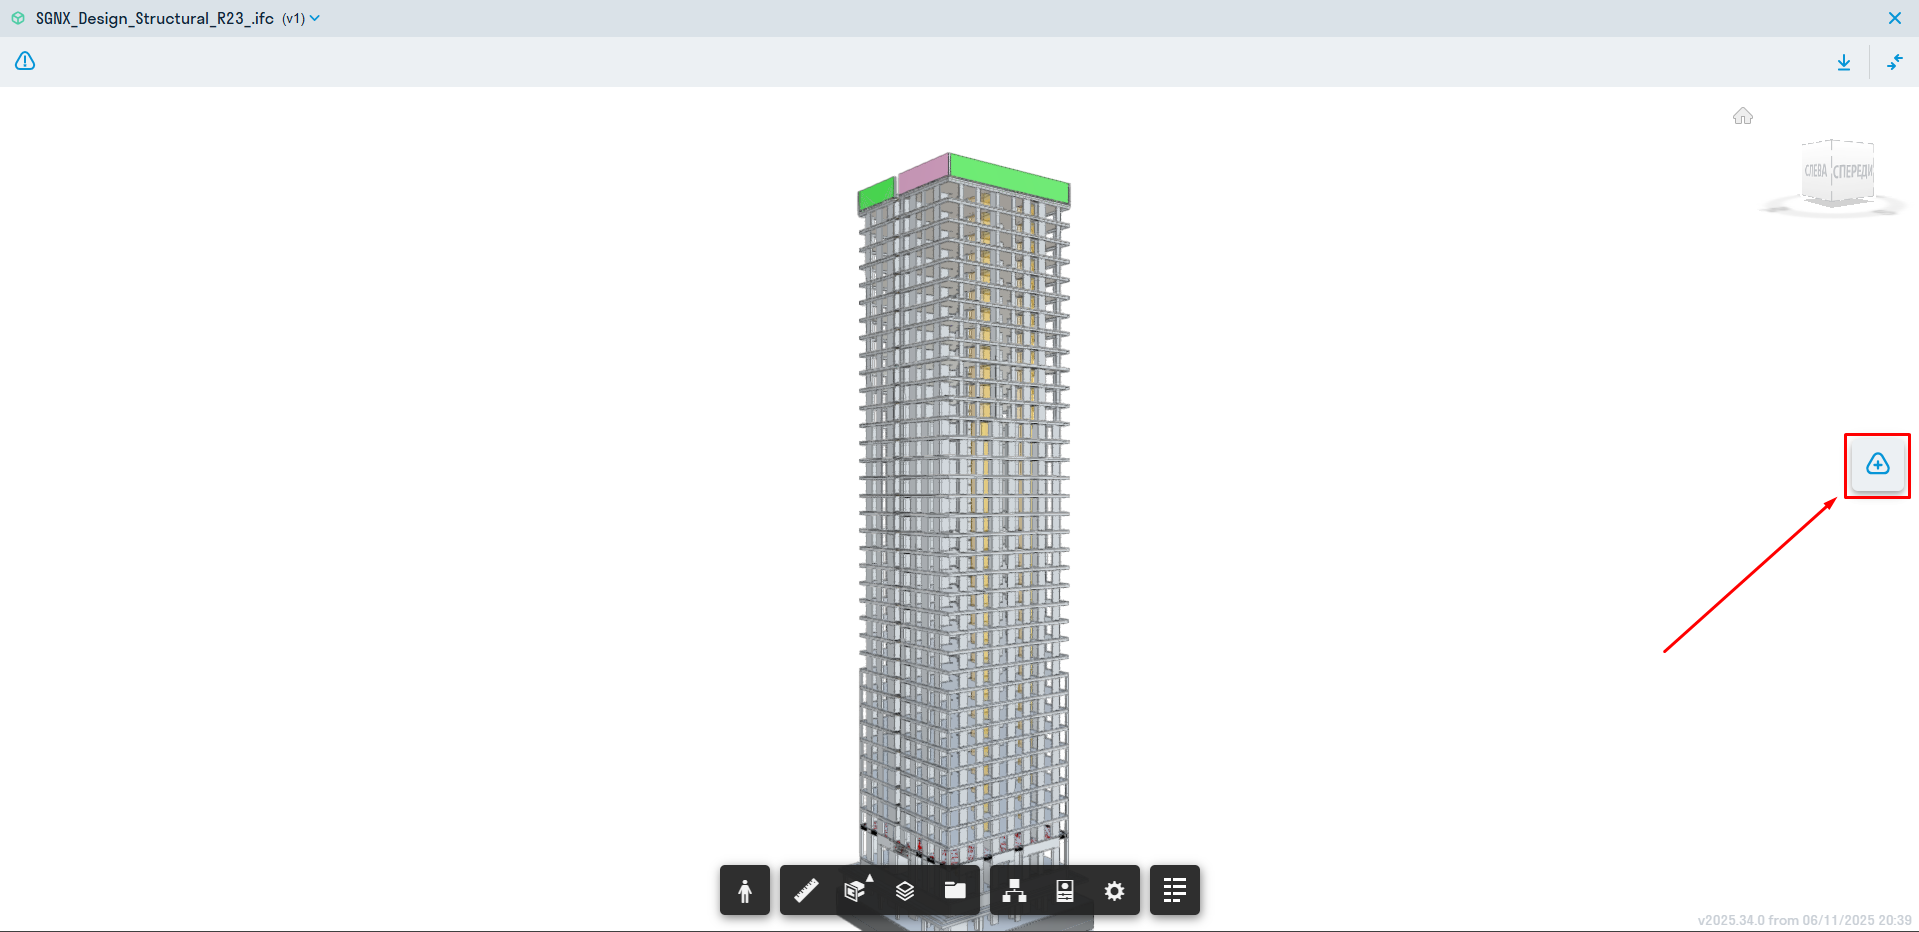
To create notes, open the model file through Forge Viewer and on the right side of the screen, click


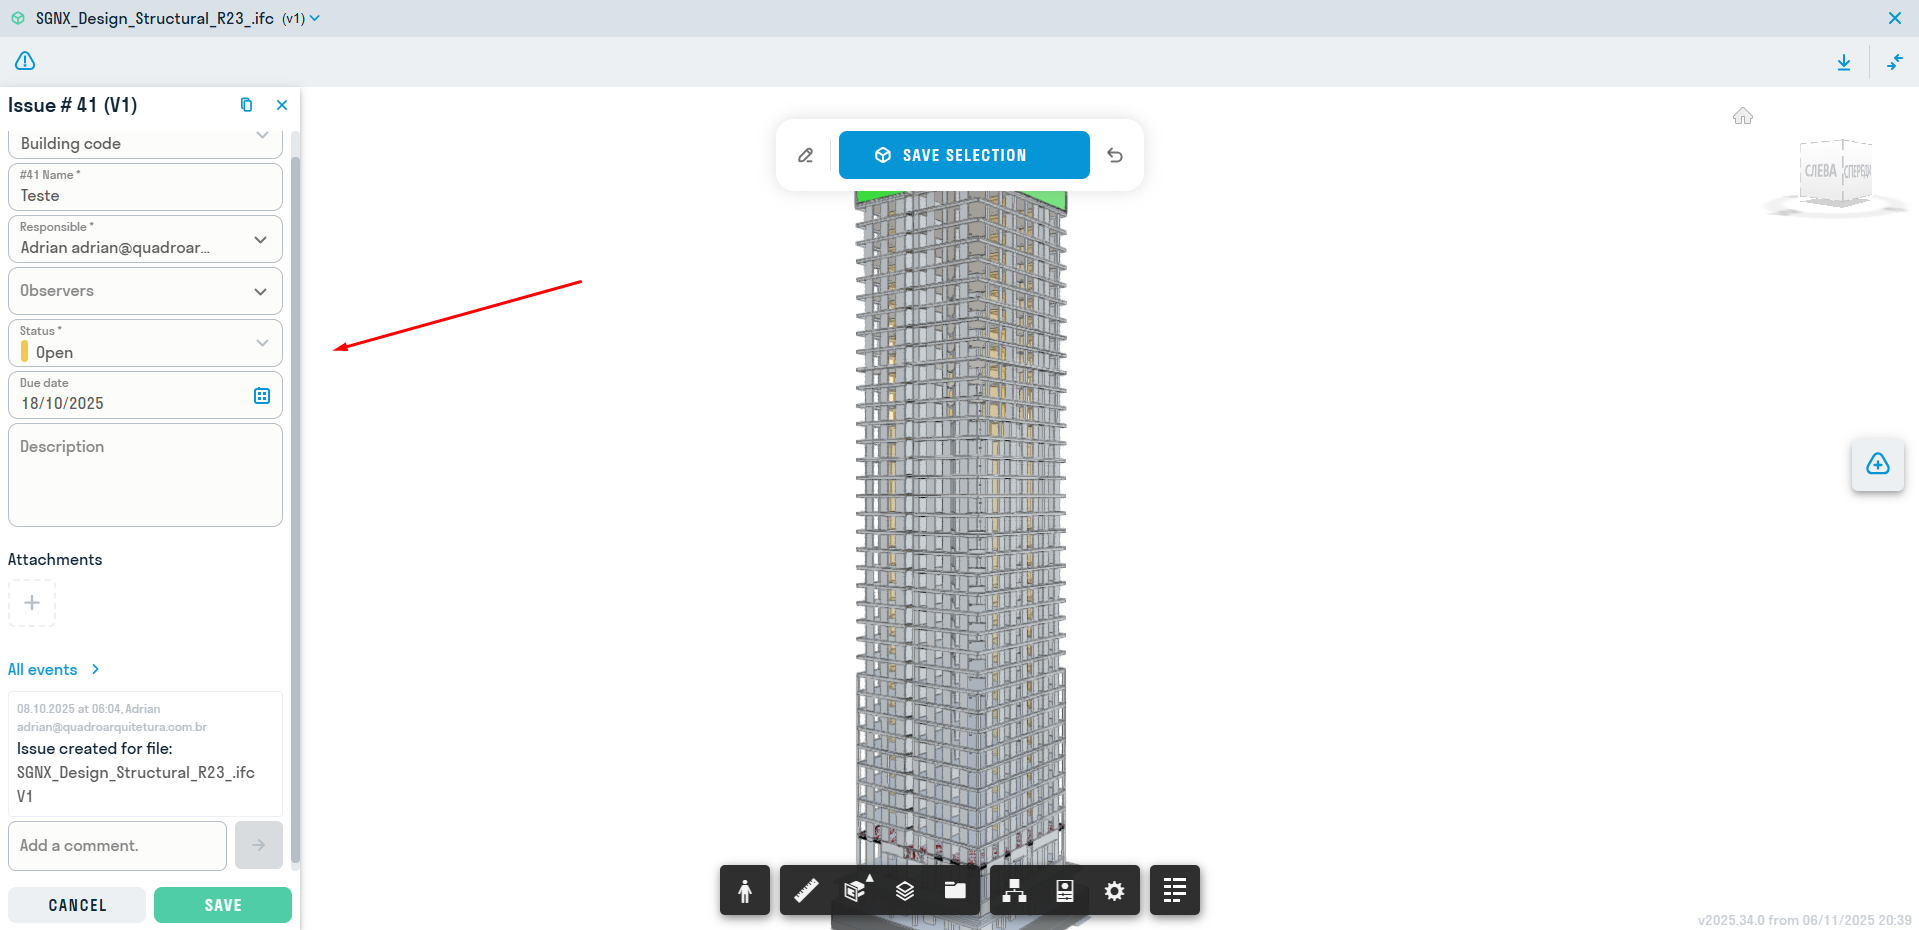
Fill in the fields, if necessary, select one or more elements (using Ctrl) to which the note will be attached, click save selection. After this, the element IDs will be displayed in the note body. You can select elements in the model by clicking


In addition to attaching a note to elements, you can make notes on the view. To do this, click

on the pre-configured view and make notes. The note with the view image will appear in the attached files to the note.
To create notes, open the model file via Tangl Viewer and on the right side of the screen, click
Fill in the note fields.
¶ 3. Comments register
See also the video instruction on working with the comments register: Telegram YouTube
All comments created in the project are stored in a table form in the “Comments” section.

The registry displays the necessary information about comments:
-
Comment number and status
-
Comment type
-
Name - Description
-
Person responsible for resolving the comment
-
File - clicking on the field opens the document to which the comment is assigned
-
Version number of the file to which the comment belongs
-
By whom the comment was added
-
Date of the last change to the comment
To view and edit a comment, click on the comment line in the registry.

To open the document in which the note was created, click on the file path in the "Document" field
To navigate the registry, you can use the search by note title, its description, and file name, as well as filters in the upper right corner of the screen.
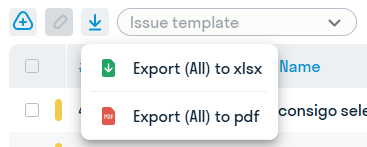
All notes/filtered notes can be exported in Excel and PDF formats
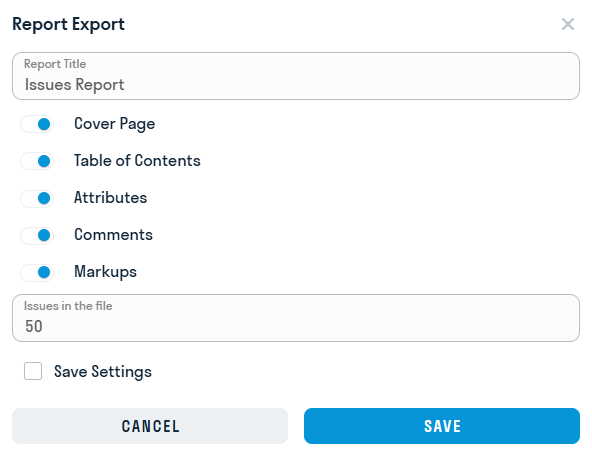
When exporting to PDF, a window opens with settings for the exported fields. The maximum number of notes in one file is limited to 100 units.
From the Excel registry, you can jump to the document in which the comment was issued by clicking on the file.

¶ Batch transfer of markups between PDF sheets
Sometimes a situation arises when the order of sheets has changed in a new version of the documentation, causing marks created previously to end up on different sheets. To quickly return marks to their original positions, DOCS has a batch transfer function.
To use it, go to the file and click

in the upper left part of the screen. The markup movement window will open:
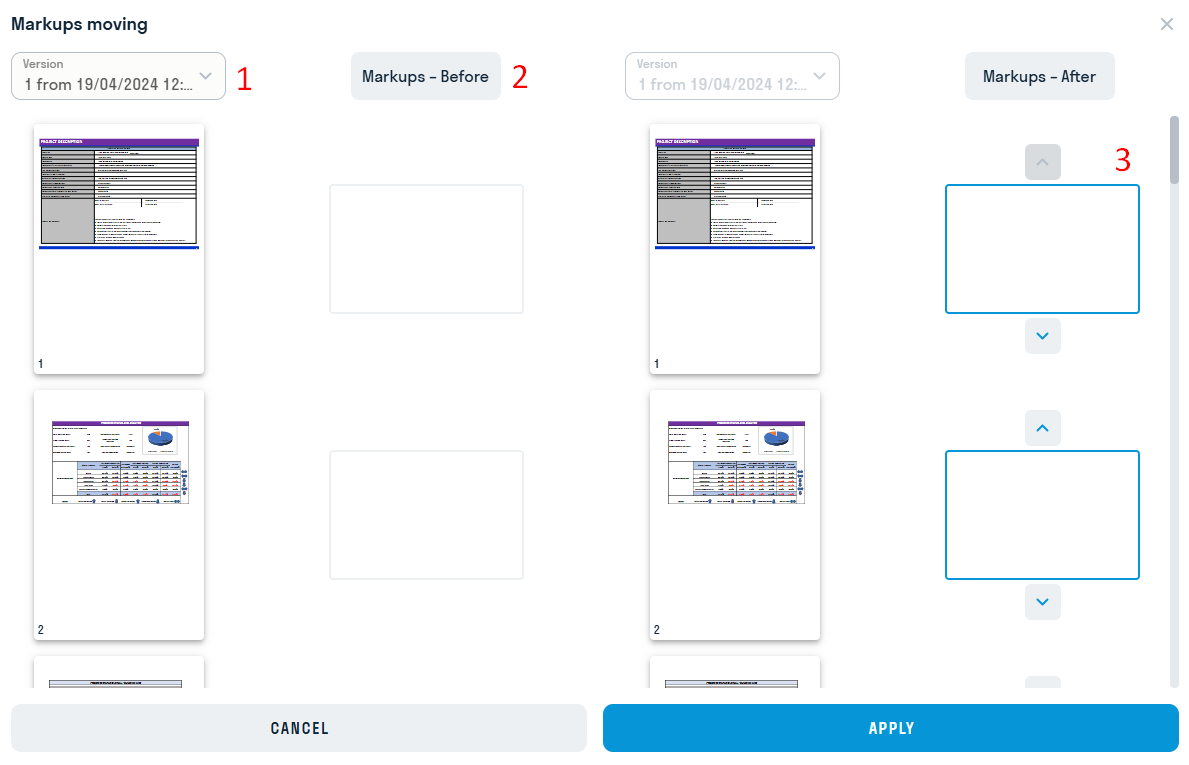
1 - Select the previous version of the file with the correct markup location
2 - Markup location on the previous version
3 - Move the markup to the desired sheets using the arrows