3.3.1 INSPECTION Web Service
This manual helps the on-site and office personnel who accomplish daily/weekly inspections and check construction site work performance.
360-degree photos help preserve the work's chronology and compare finished work volumes for a certain period.
Initial data
- 360-degree pictures (JPG format)
- Project drawings/plans (JPG/PNG formats)
Tools
- Ricoh Theta or Insta360 cameras
- Monopod, tripod, or hardhat mount
Software
- SIGNAX INSPECTION web service
- Photomaker mobile apps iOS app / Android app


Using the Service to View 360 Photos
INSPECTION users can view photos at pa.signax.io.
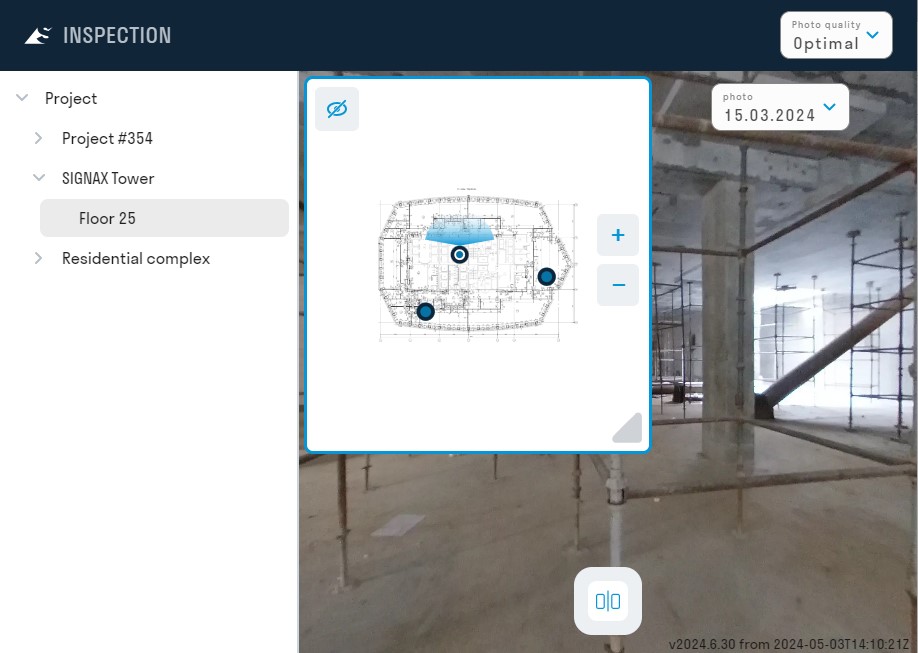
User interface
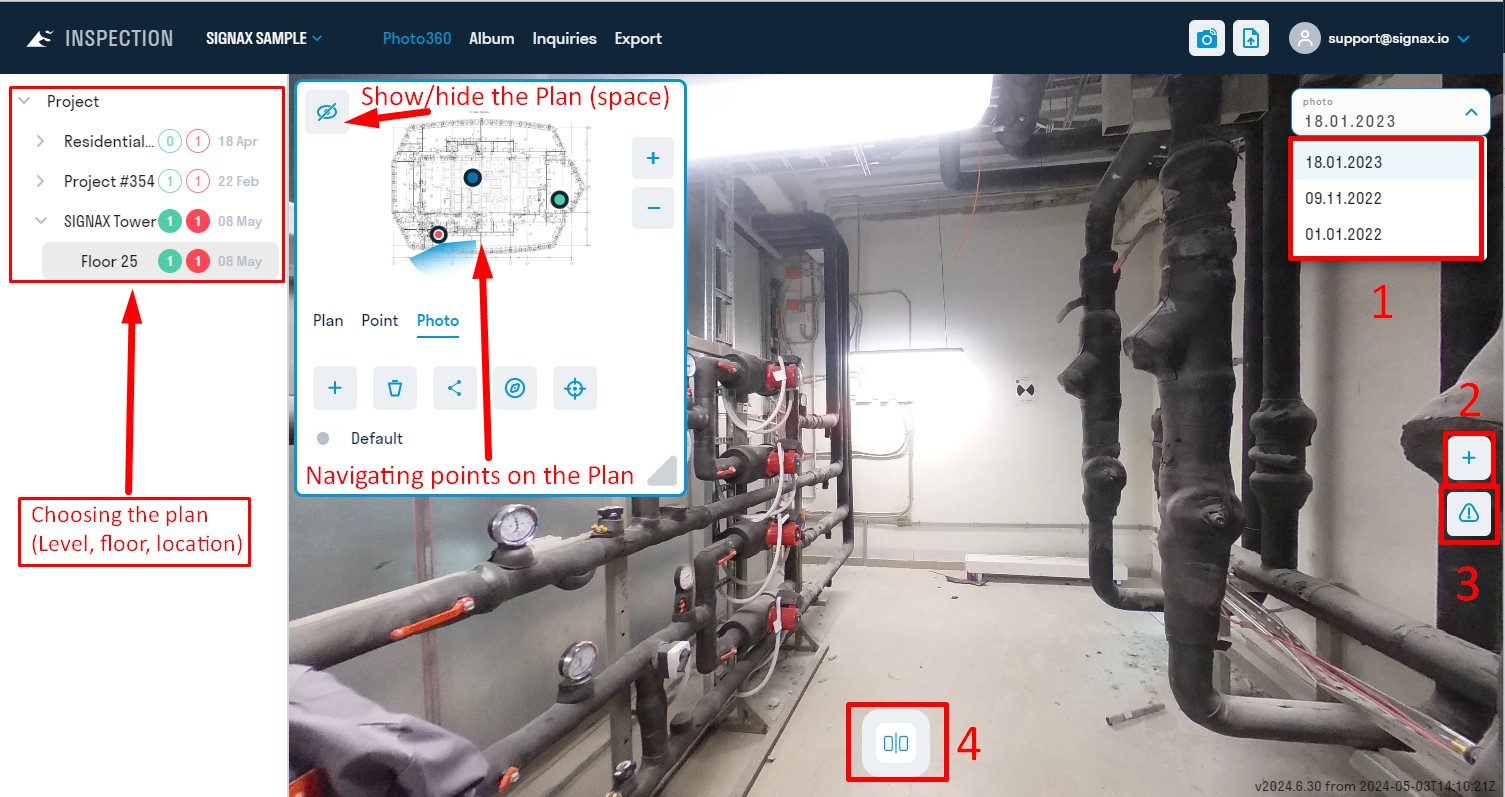
- On the left side of the screen, select a floor plan.
- After it's loaded, you can choose a photo capture point on the plan.
- To adjust the plan area size, click and drag the bottom right corner.
- Press the "space" button on the keyboard to hide or show the plan.
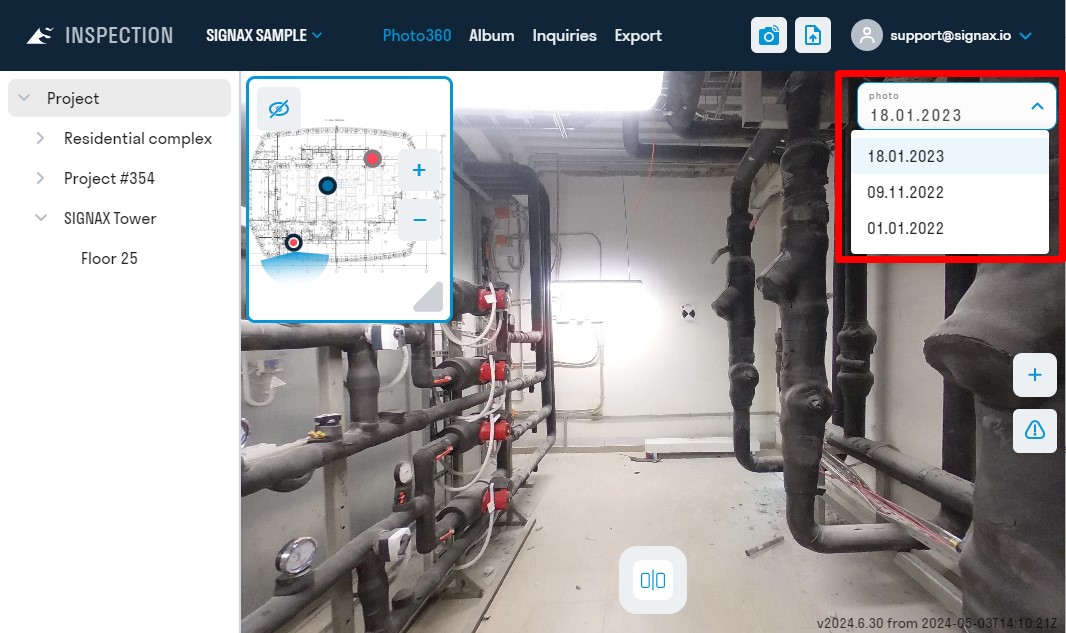
1. Choosing the date of the Photo.
2. Click ![]() to add a comment to the Photo.
to add a comment to the Photo.
3. Click ![]() to see a list of comments.
to see a list of comments.
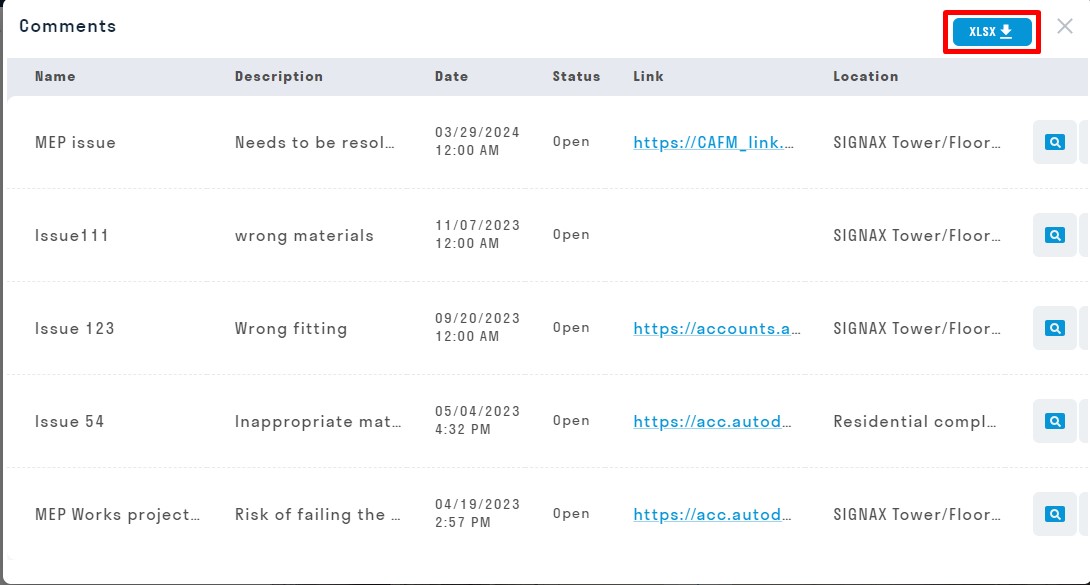
You can export all comments as an XLSX file with a location and other details.
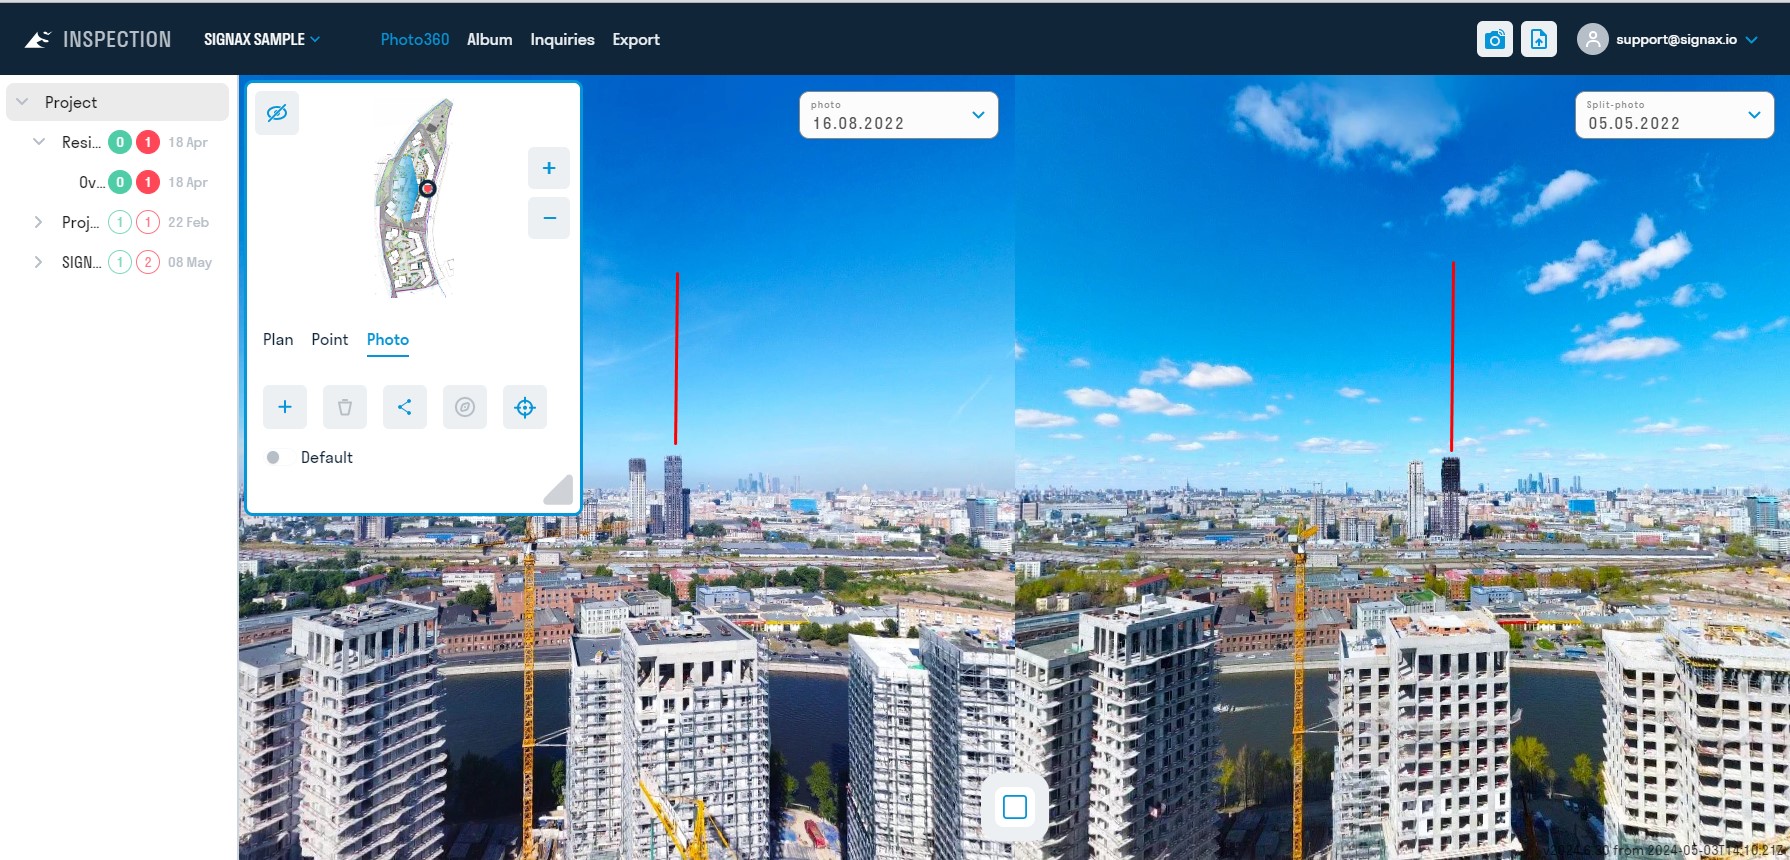
4. Click ![]() to compare photos to different dates.
to compare photos to different dates.
You can also compare photo-360 with a model. For this opportunity produce panoramic images of the planned construction from various viewpoints within the model in Navisworks. You must use our plugin, SIGNAX TOOLS, to export the required BIM model panoramic images with one button. These model-generated panoramas serve as a benchmark for progress and quality control.
Project Administration
Project administration is done at pa.signax.io. The Administrator can access project and plan creation, photo uploads, album creation, statistics export, project settings, and more.
Creating Plans
The Project structure consists of blocks (buildings, sections, structures, etc.) and plans (floors, levels, locations) with points and photos.
1. To create a block, click the three dots next to "Project" ➤ "Add Block."
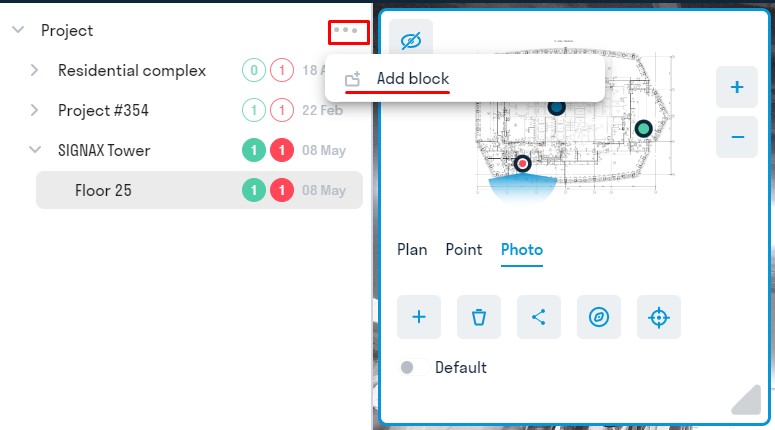
2. To create a plan, click the three dots next to the "Block" ➤ "Add Plan."
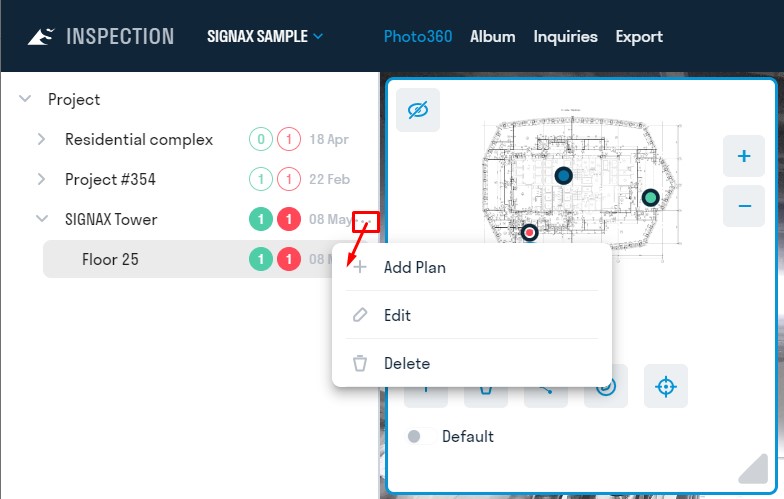
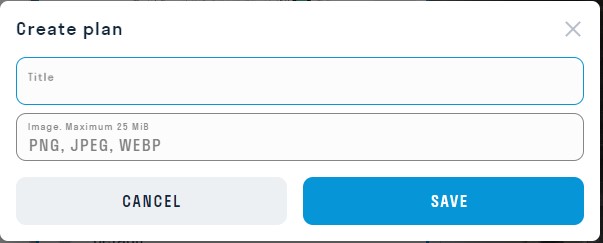
Enter the plan's name in the open window, such as "Floor 1," and upload the plan image in PNG, JPEG, or WEBP format.
If plans are saved in PDF, they need to be converted using online services
(e.g.,https://pdf.io/pdf2jpg/ or https://smallpdf.com/en/pdf-to-jpg) or the STDU Viewer program.
3. Add the remaining blocks and floors similarly.
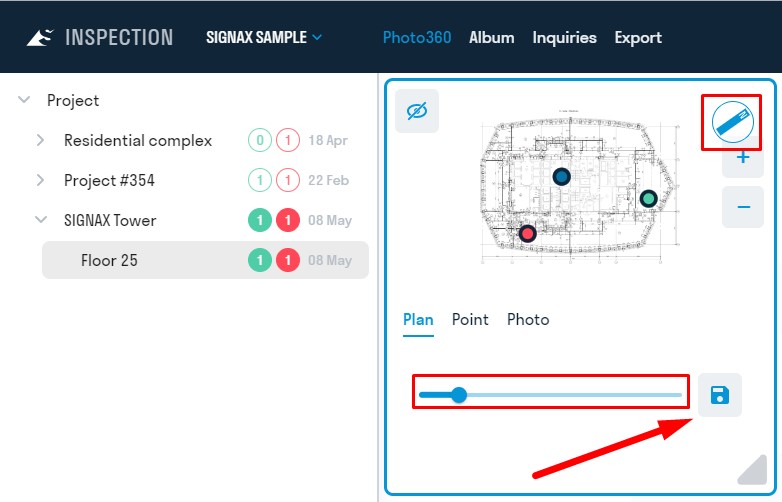
Setting Up Plans.
To define the north direction for a plan, go to the "PLAN" tab, move the slider to set the correct north orientation
(![]() indicated by "N"), and then click
indicated by "N"), and then click ![]() "Set Azimuth."
"Set Azimuth."
Creating Points
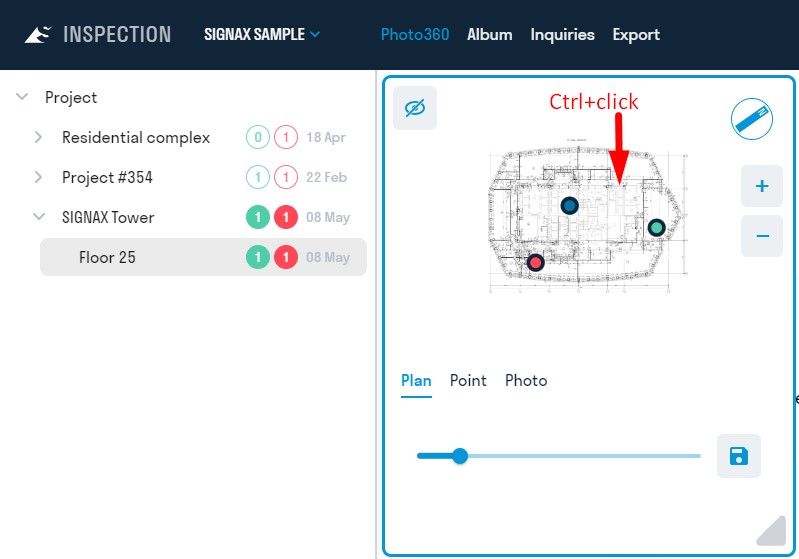
1. There are two methods to create a Point:
Method 1: Hold down the CTRL key on your keyboard and click the left mouse button in the desired area of the plan.
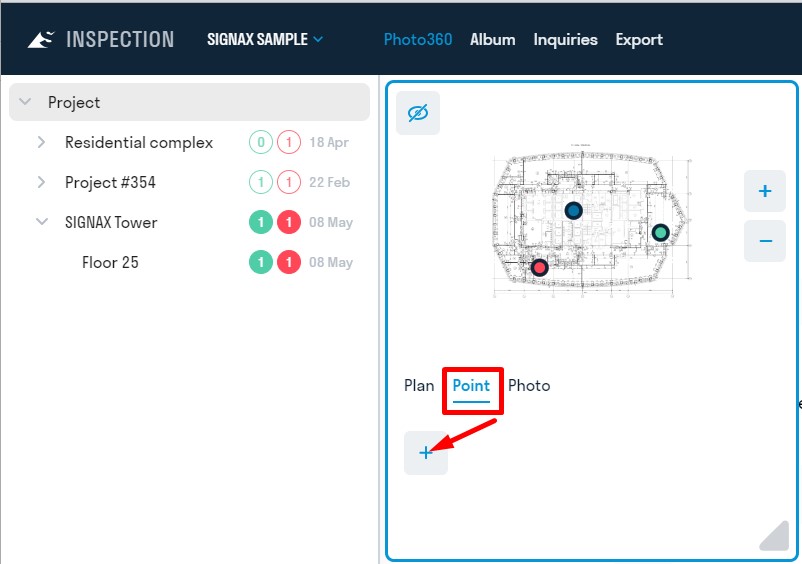
Method 2: In the "Point" tab, click "Add." A pointer will appear on the plan. Choose the location for the point and click "Add" again.
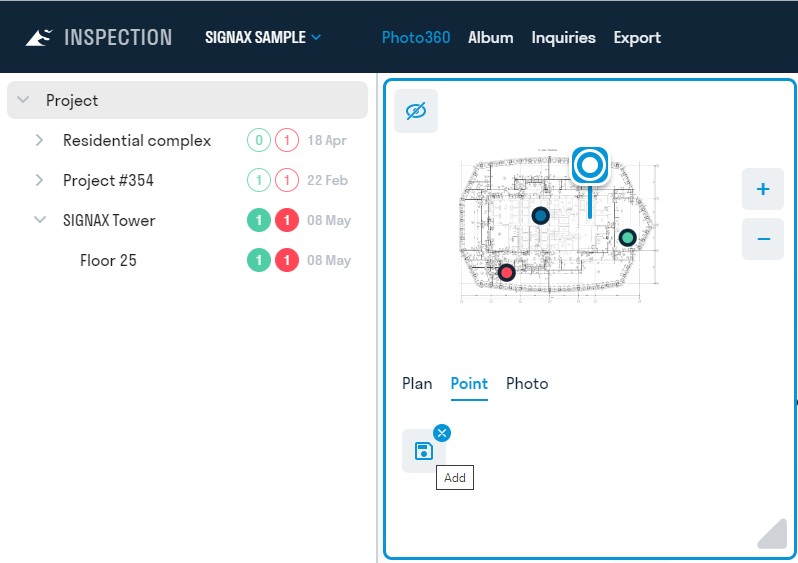
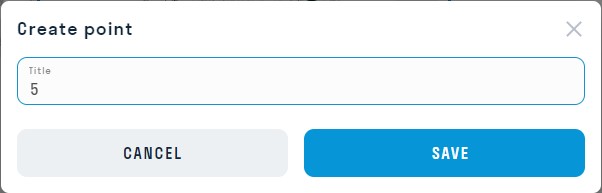
2. Enter a name for the point (e.g., 1), then click "Save." The point will appear on the plan.
 Configuring Points
After creating a point, the point settings will be enabled in the "POINT" tab.
Assigning Point Status
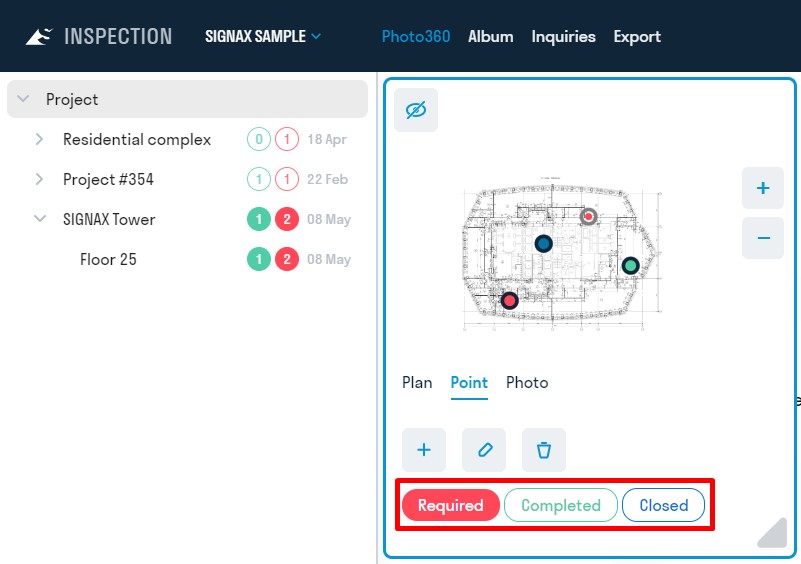
Points can be assigned one of three statuses:
- Required: A red point. This point needs a photograph.
- Completed: A green point. A photograph has been uploaded this week.
- Finished: A blue point. No further photographs are needed here.
Statuses help the Digital engineer identify which points need attention on the site.
Recommendation: Configure the automatic reset of the status from "Completed" to "Required" on a specified day of the week so that the Digital Engineer receives up-to-date information about point statuses during project synchronization. For more details, see "Project Settings."
Example of Working with Point Statuses
Initially, points are created with the "Required" status. The Digital engineer (photomaker) arrives at the site, synchronizes with the Photomaker app, and receives the points that must be visited. Once the engineer has taken a photo at the point, the point's status changes to "Completed" and turns green, simplifying the search and highlighting the points not yet completed. After covering the entire site, the engineer uploads the photos to the SIGNAX INSPECTION service. If "status change" is enabled in the project settings, the points in the INSPECTION service will change status from "Required" to "Completed."
Then, the scope engineer, QA/QC engineer, and project manager review the photos, provide comments, and add new points. It's recommended that the project automatically reset the point status from "Completed" back to "Required" before the photomaker's next visit. This way, the photomaker will receive the most up-to-date information on point statuses after synchronization.
Uploading Photos
Typically, photos are automatically uploaded through the SIGNAX Photomaker app after each Digital Engineer inspection. However, there are cases where 360-degree photos can be added manually (e.g., when uploading 360-degree photos taken by a drone).
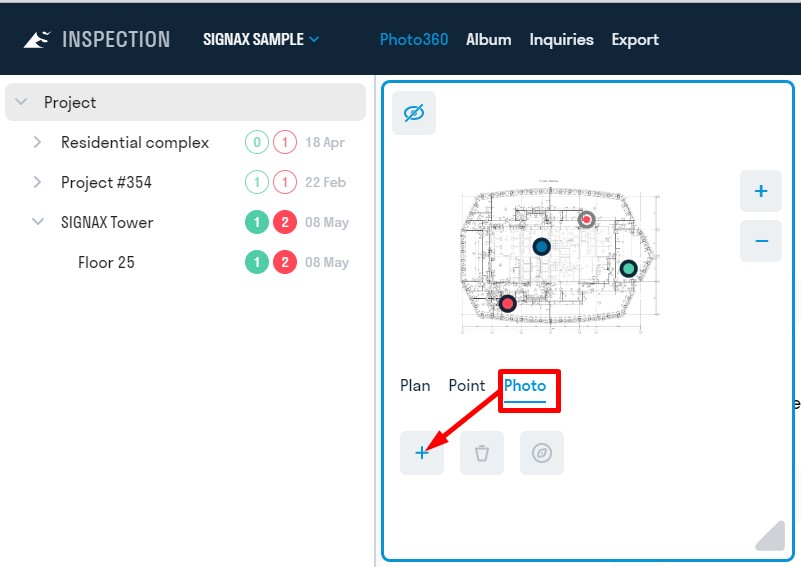
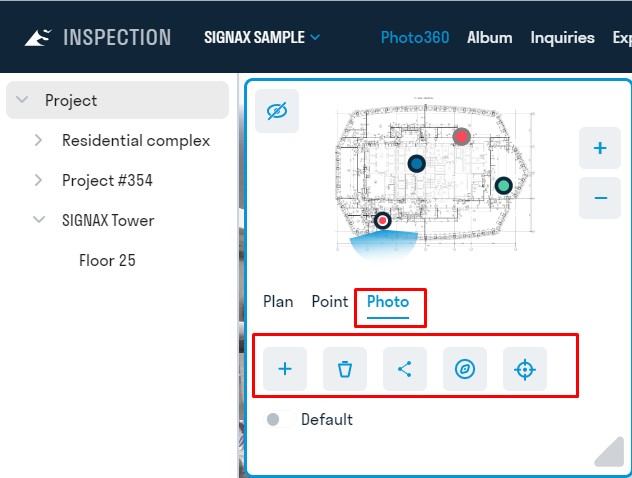
1. To add a photo, select a point, go to the "PHOTO" tab, and click "Add."
2. In the window that appears, choose the Photo's creation date and upload the Photo itself in PNG, JPEG, or WEBP format. Also, select the photo type: ordinary or 360-degree. Click "Save."
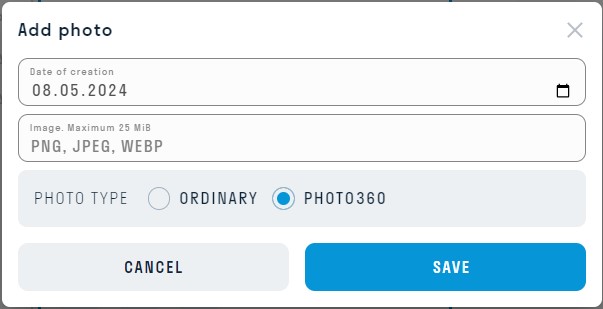
Photos added can be viewed in chronological order.
Configuring Photos
After adding a photo, the photo settings on the "PHOTO" tab become active.
Setting the Azimuth
To align the Photo's direction relative to the plan, rotate the Photo to face north, then click ![]() "Set Azimuth."
"Set Azimuth."

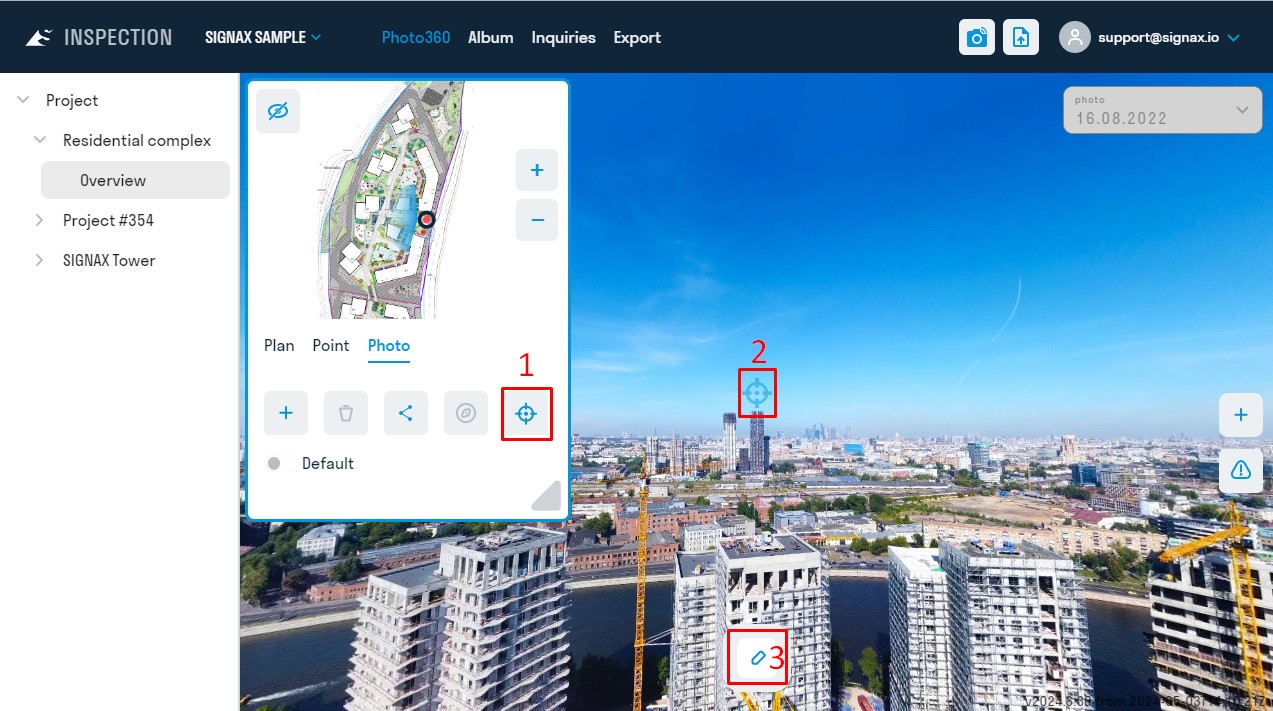
Setting the Azimuth Using Photo Alignment
Alignment is used to set the Photo's azimuth based on another photo, for instance, with drone shots in open areas where finding north each time can be challenging.
1. Select the Photo you want to align with and click "Align."
2. Use the sight on the Photo to aim at a static object that will remain consistent between photos, such as a building.
3. Click "Select Reference Photo."
4. On the right, you'll see the reference photo that will be used to align the left Photo. By default, the previous Photo in the list is chosen, but you can select a different one from the list.
5. Use the slider to aim the sight on the right Photo toward the same object.
6. Click "Save."
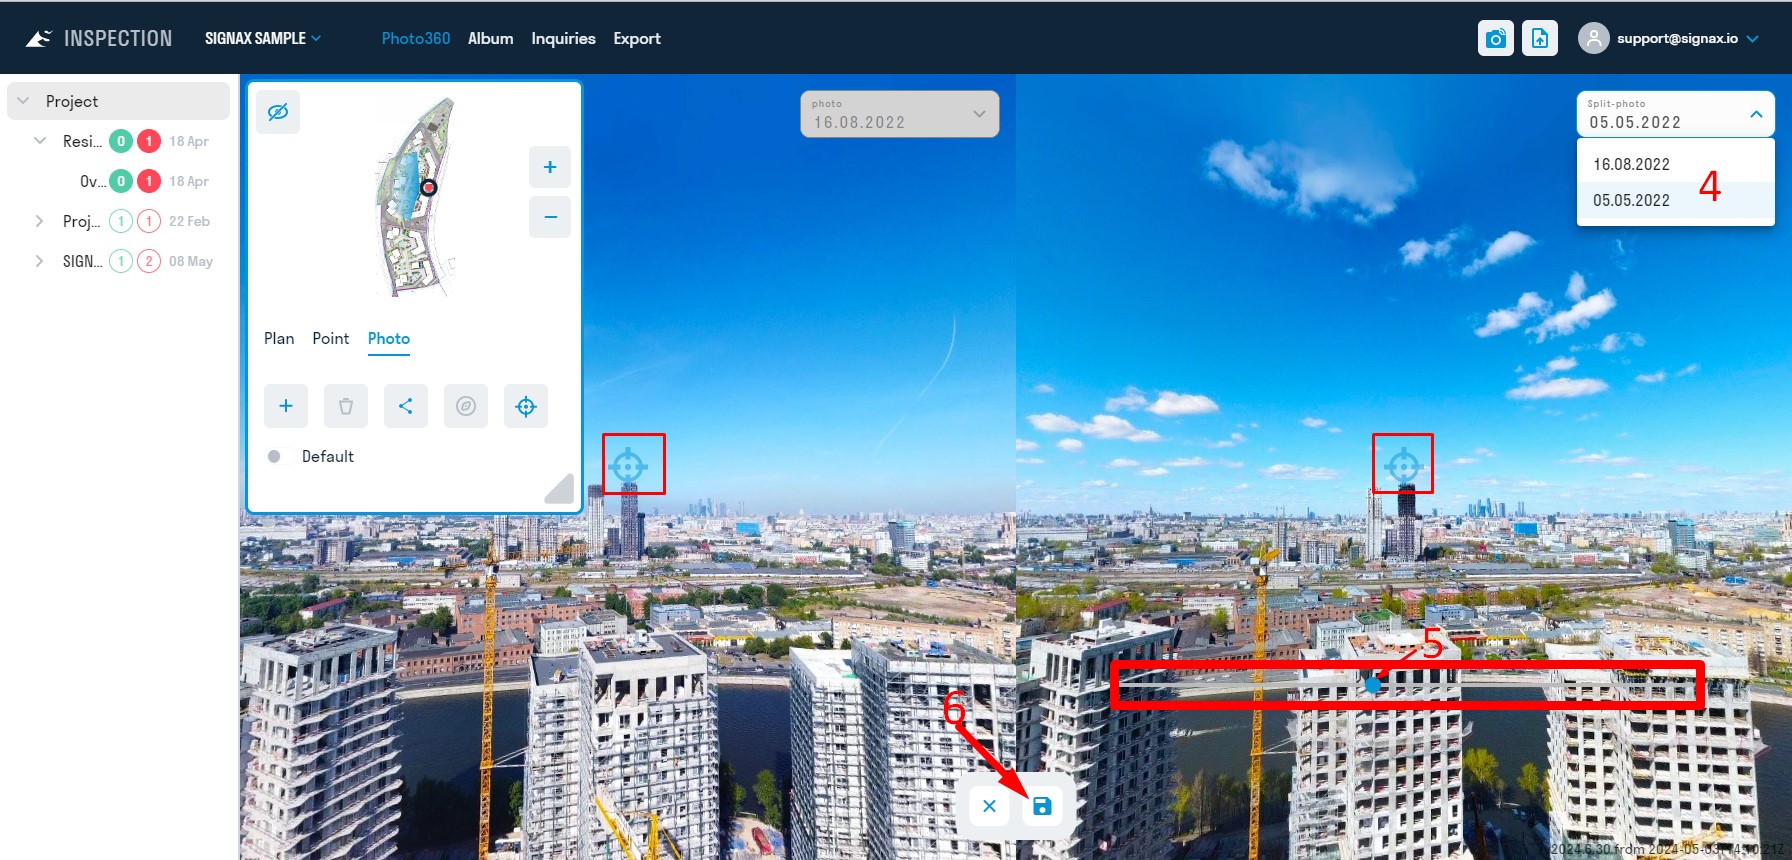
7. The left Photo will match the reference photo's orientation, ensuring both are aligned northward.
Creating Photo Links
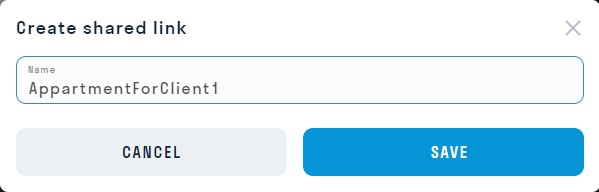
1. Select a photo and, in the "PHOTO" tab, click "Create Link."
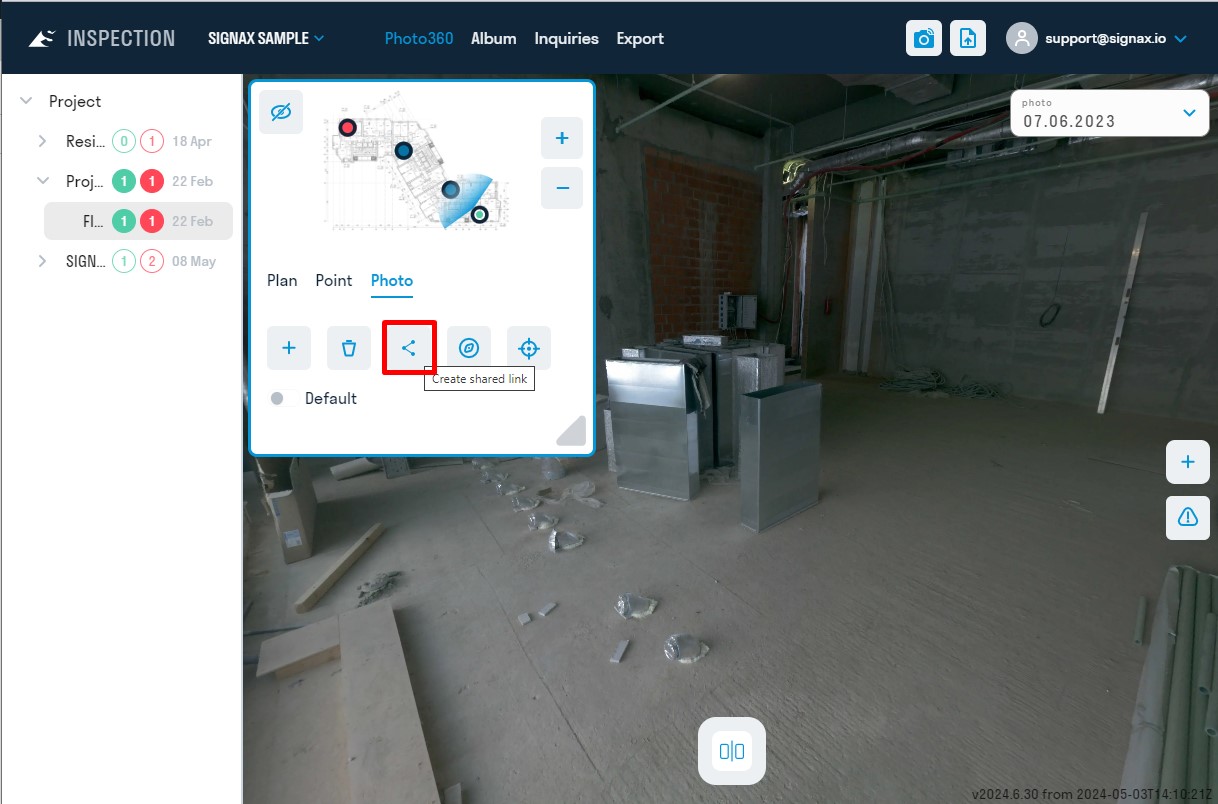
2. Enter a name for the link and click "Save." The link will be copied to the clipboard and saved in the "Public Photo List."
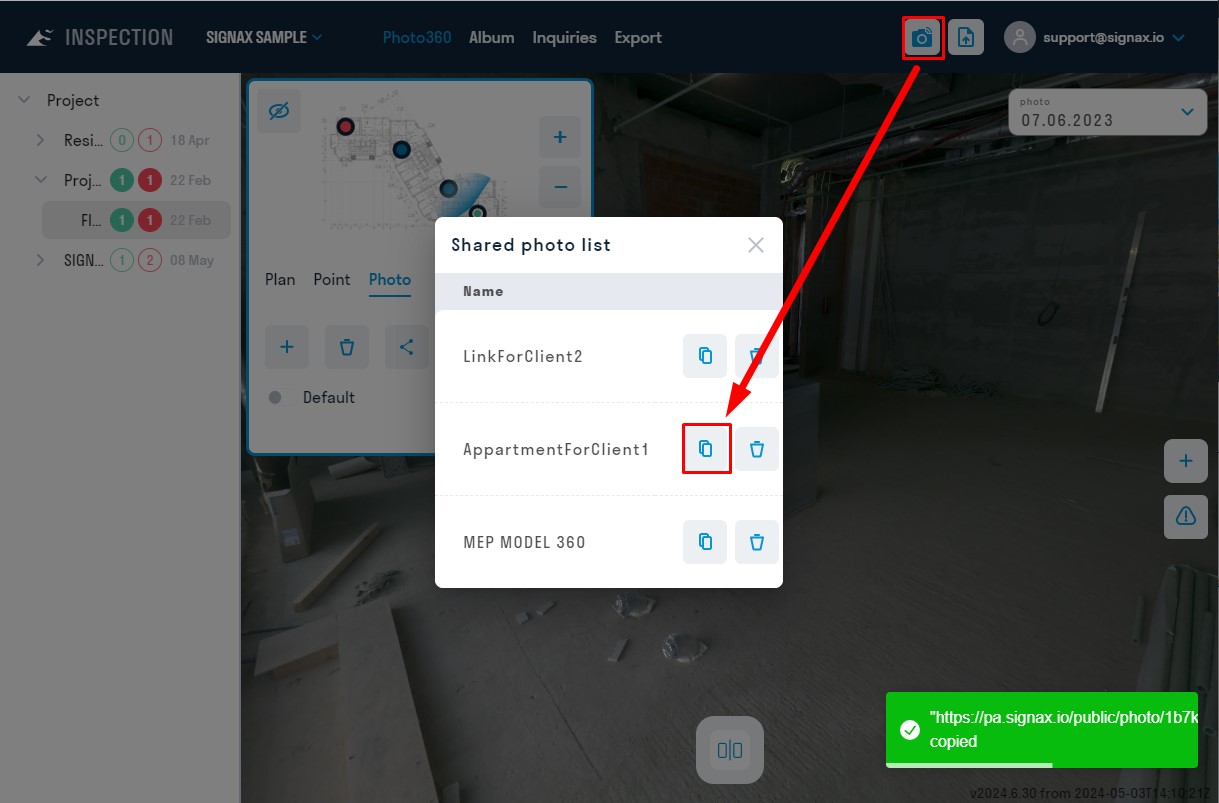
3. All created links are stored in the "Public Photo List." To access them, Click the "Photo Links" button ![]() and copy the link.
and copy the link.
Project Settings
Project configuration is done by the user to ensure convenient and efficient work on each project, with the ability to customize parameters flexibly.
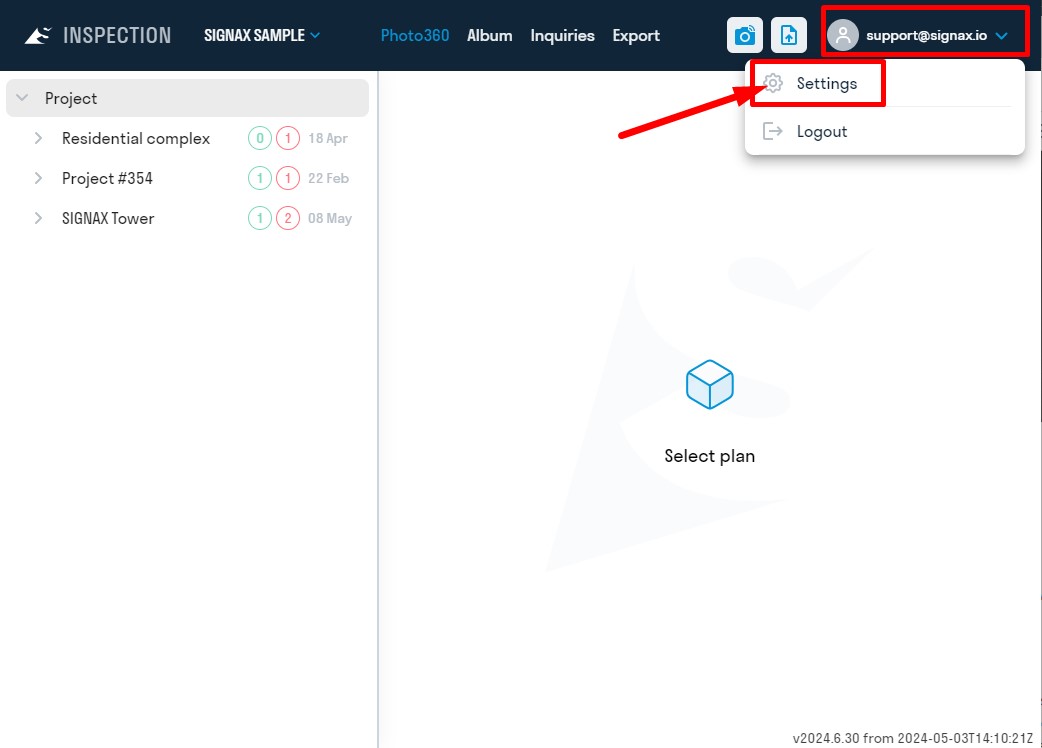
Click on your Profile icon and go to Settings.
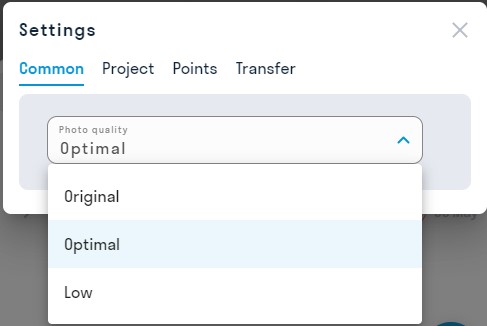
Common
This tab allows you to change the image quality. A higher resolution means the Photo will take longer to open.
Project

- Auto-publishing Photos adds newly uploaded photos directly to the album.
- Change Status to "Completed" when a new photo appears at a point that allows the point's status to change from "Required" to "Completed" once a photo is uploaded. If tracking completed photos is necessary, keep this toggle enabled. It's also recommended that the automatic status reset from "Completed" to "Required" be enabled so the photomaker receives accurate status information during project synchronization.
Points
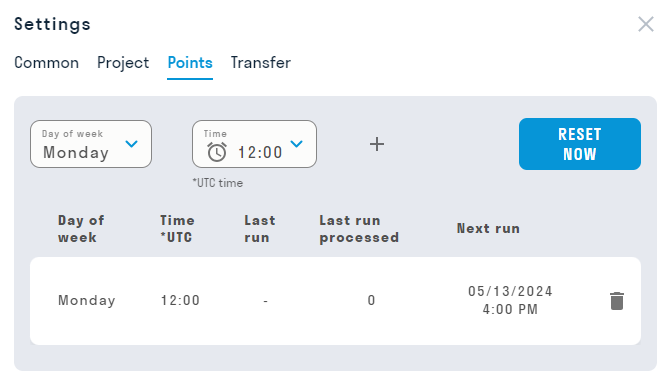
This setting changes the status of all project points from "Completed" to "Required" according to a set schedule. The status reset helps the Digital Engineer (photomaker) receive up-to-date status information after synchronizing with the project. Typically, the photomaker only needs to visit the site once weekly, so it's advisable to reset statuses before each visit.
- To schedule status resets, select the weekday and time in UTC from the drop-down menus, then click the "+" button. A form will appear below, showing the Day and Time of the reset, the last reset date, how many points had their status changed, and the next reset.
- If you need to reset statuses immediately instead of following a schedule, click "Reset Now."
Albums
Albums are managed at pa.signax.io in the "Album" section.
Albums contain selected and approved photos that can be shared with developers and embedded via <iframe>. No SIGNAX INSPECTION license is needed to view a published album.
Creating an Album
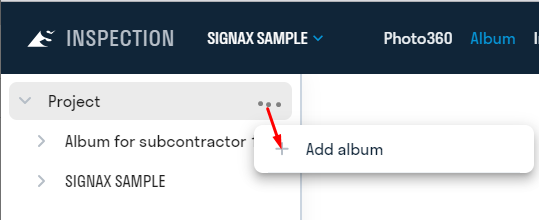
1. Go to the "Album" section.
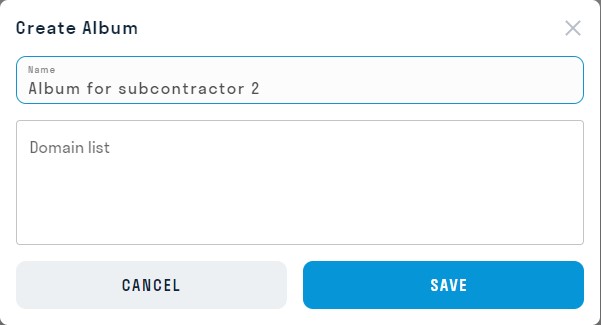
2. To create an album, click the three dots next to "Entire Object" ➤ "Add Album."
3. Enter the album's name and the developer's domain (optional), for instance, https://www.hub.signax.io, where the album will be used. If there are multiple domains, list each on a new line. The domain is specified to prevent the album link from being copied from <iframe> on the developer's site and inserted into an unauthorized site.
4. An empty album will be created, showing the entire object structure with all plans, points, and photos.
5. Fill the album with photos by checking the boxes next to the plans or points to include. For each selected point, use the toggle to add photos to the album.
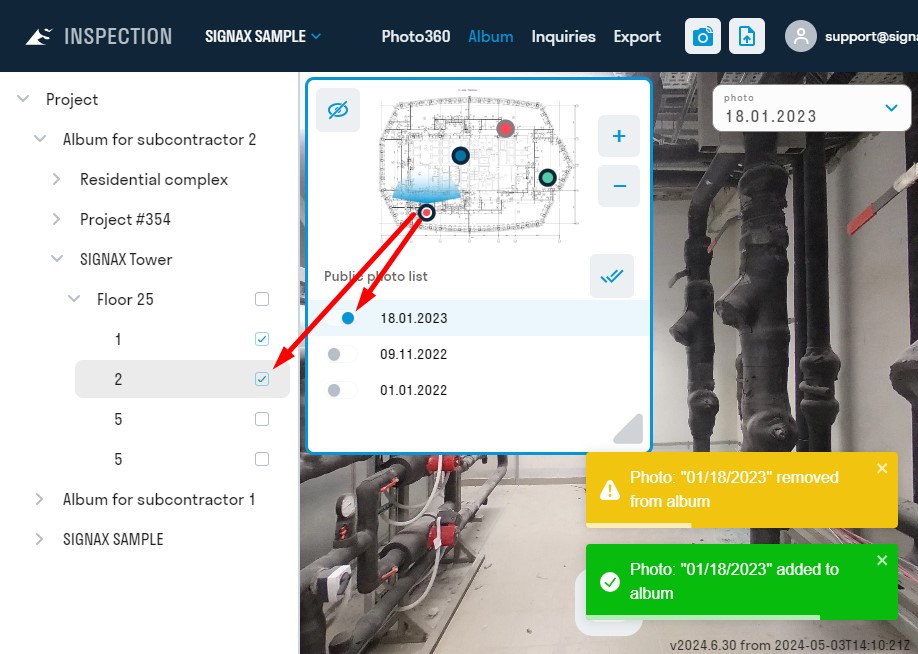
 Adds all photos at the selected point to the album.
- Automatic album photo addition can be enabled in the project settings on the "Project" tab.
A window will open with a link to the published album that can be sent to the customer.
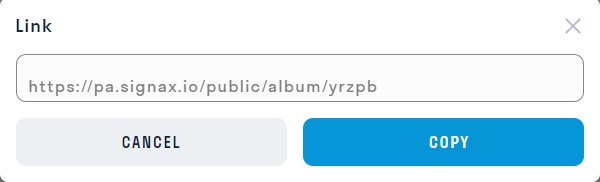
7. The customer will see only the plans, points, and photos you've selected and nothing extra.
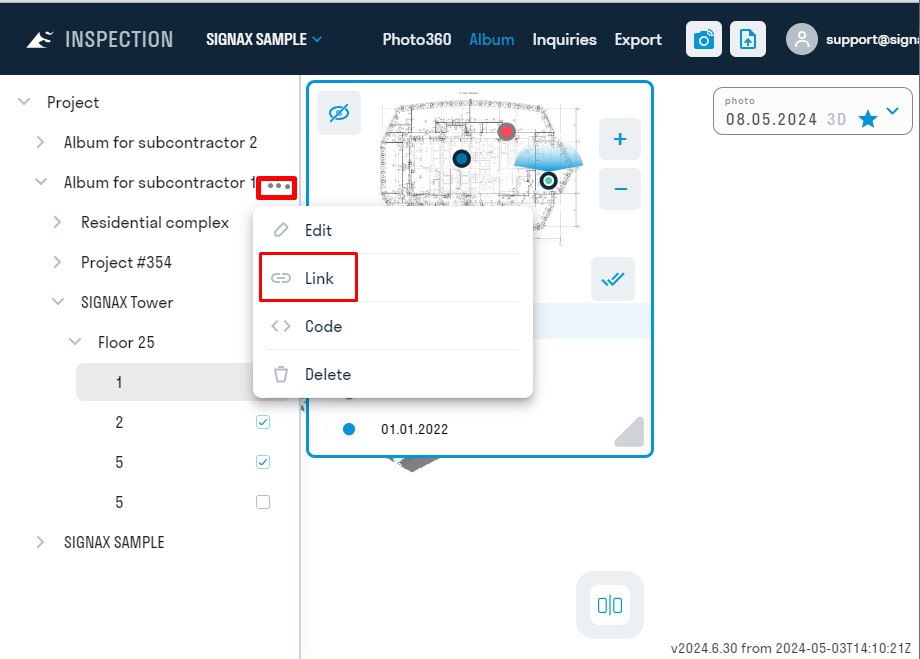
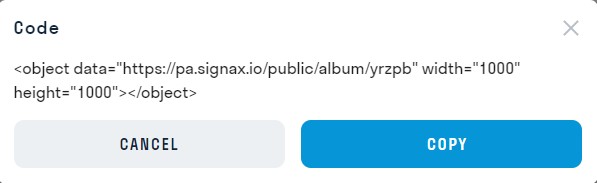
8. You can also copy the embed code to integrate the album into the developer's website via <iframe>. Click the three dots next to the album name and choose "Code."
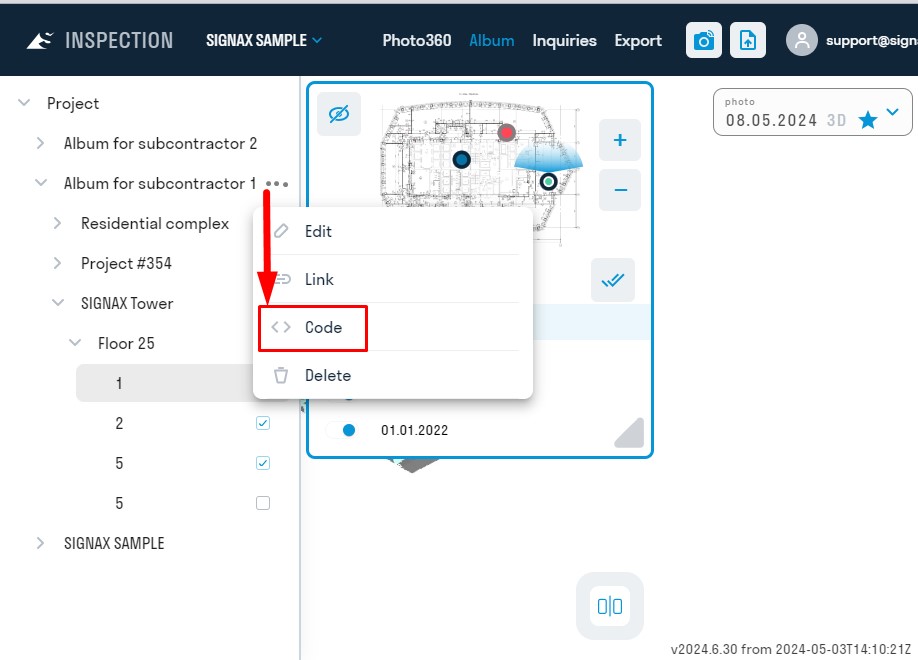
A window will open with the code, which can be sent to the customer's IT to embed the album into their web page.
Inquires
Inquiries are managed at pa.signax.io in the "Inquiries" section. The inquiries section is designed to create inquiries on plans, similar to photos. Inquiries serve as a communication tool between the office and engineers on-site and for project participants.
1. Go to the "Inquiries" section.
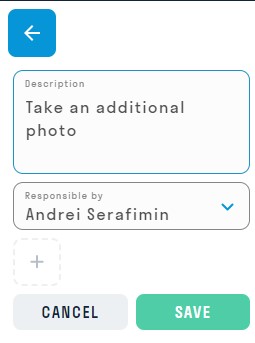
2. To create an inquiry, click "Add."
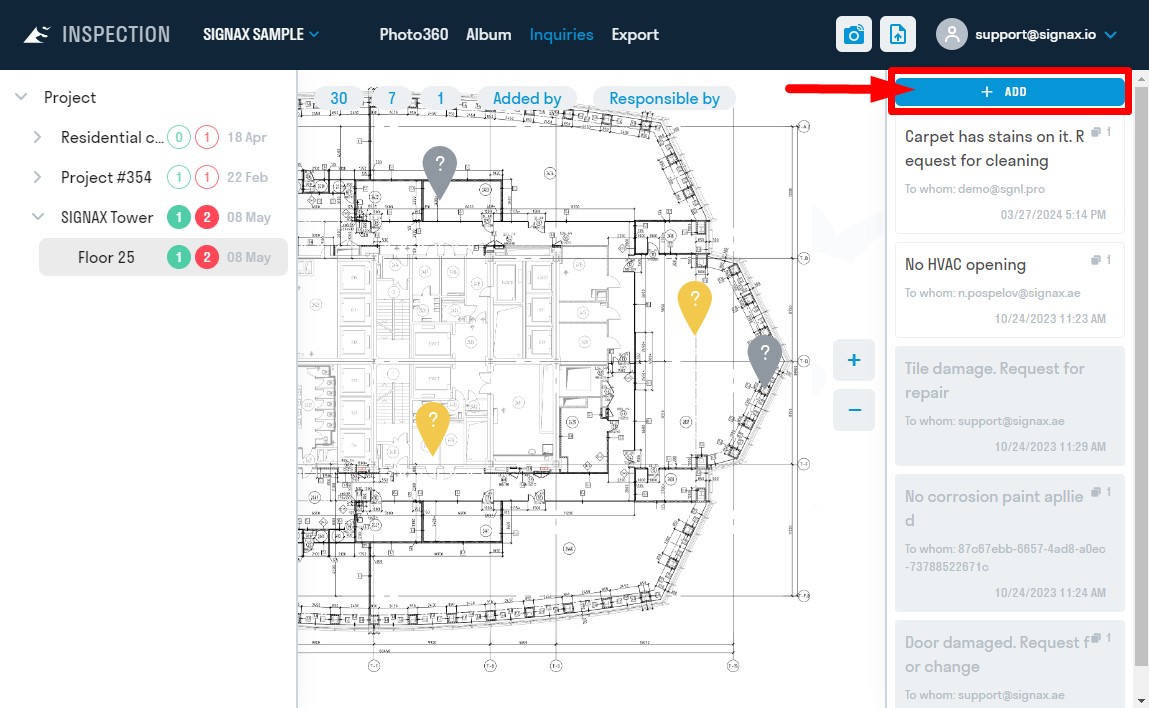
3. Complete the inquiry description, assign a responsible person, and attach photos or explanatory materials if necessary. Then, click "Save."
4. The list of all inquiries is displayed on the right side of the window. You can easily filter the inquiries using the filter menu by selecting the necessary filter (inquiries made today, this week, this month, by the creator of the inquiry, or by the responsible person).
Tips & Tricks
Tripod Weights
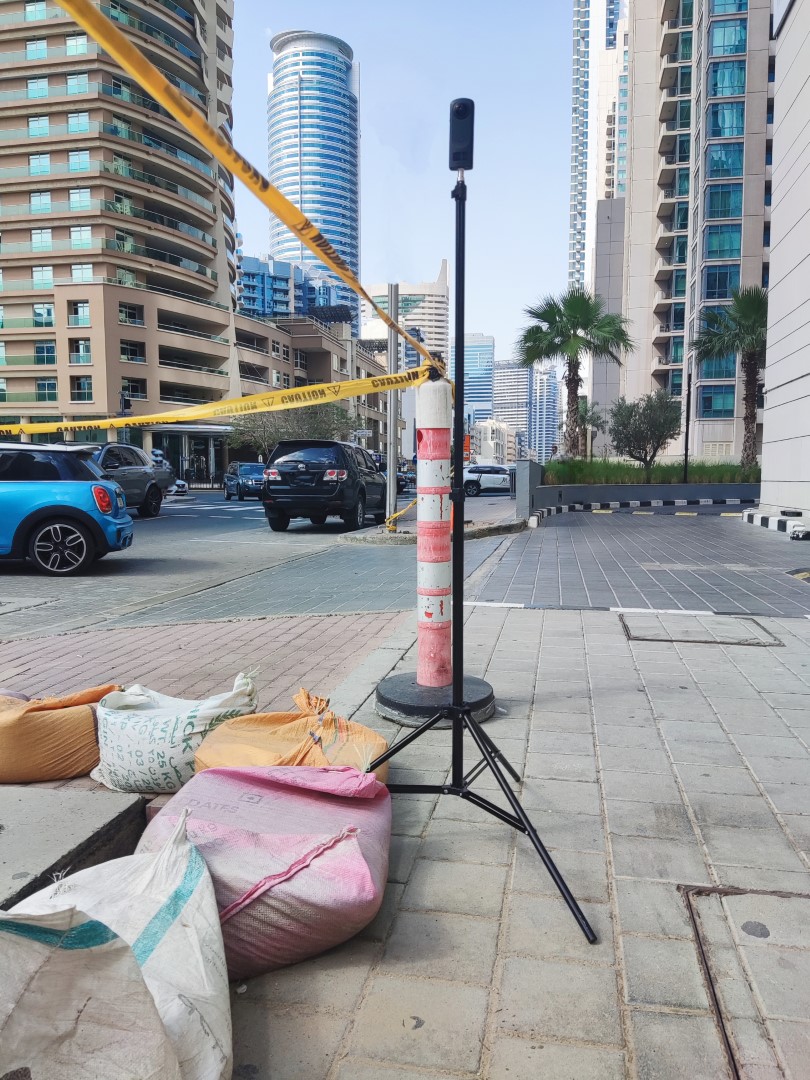
Adding weights to your tripod improves stability and wind resistance, enhancing safety but reducing mobility due to the lower setup speed. This is crucial for outdoor shoots in windy conditions, ensuring your equipment remains stable and secure.
Power Bank
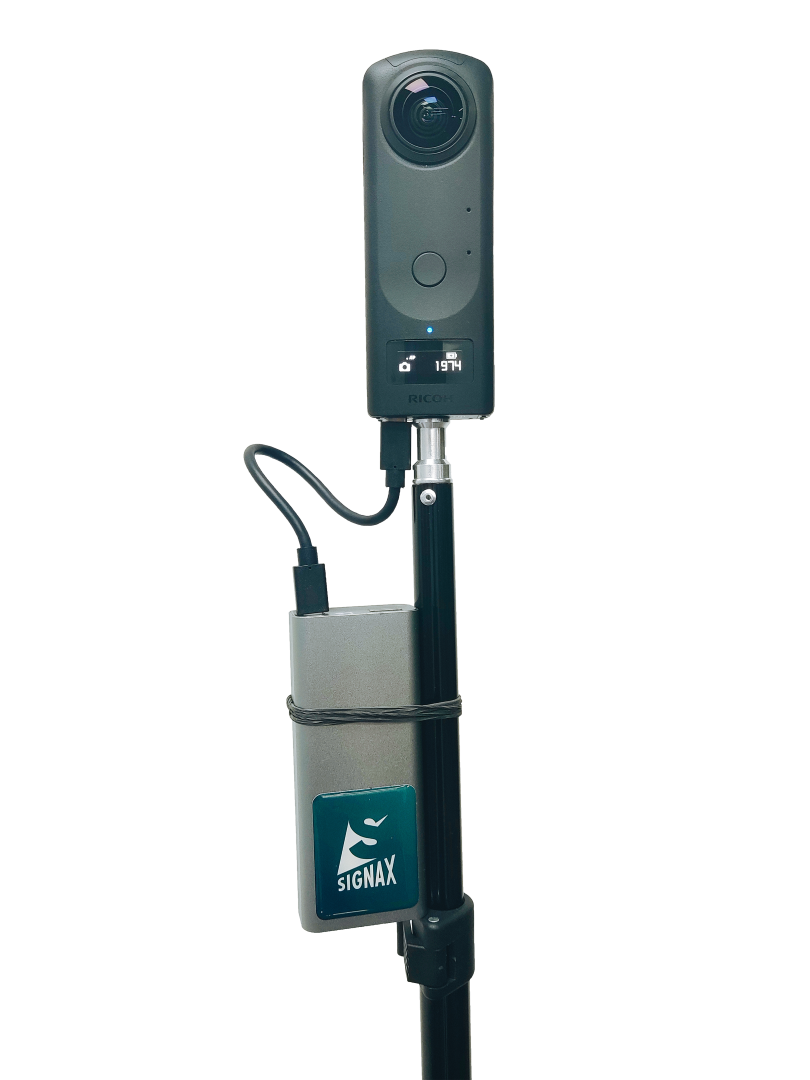
A power bank allows your equipment to work without needing frequent recharges. This is especially beneficial during colder seasons when battery life diminishes faster. We recommend using a power bank immediately when you start work in cold weather.
Protective Case

Always use a protective case for your camera when moving between floors on a construction site. This enhances safety, prevents accidents, and protects the camera from dust and debris. It is a simple yet effective way to avoid damage and maintain the integrity of your equipment.
Remember: Sometimes, despite the best preparations, things can go wrong.
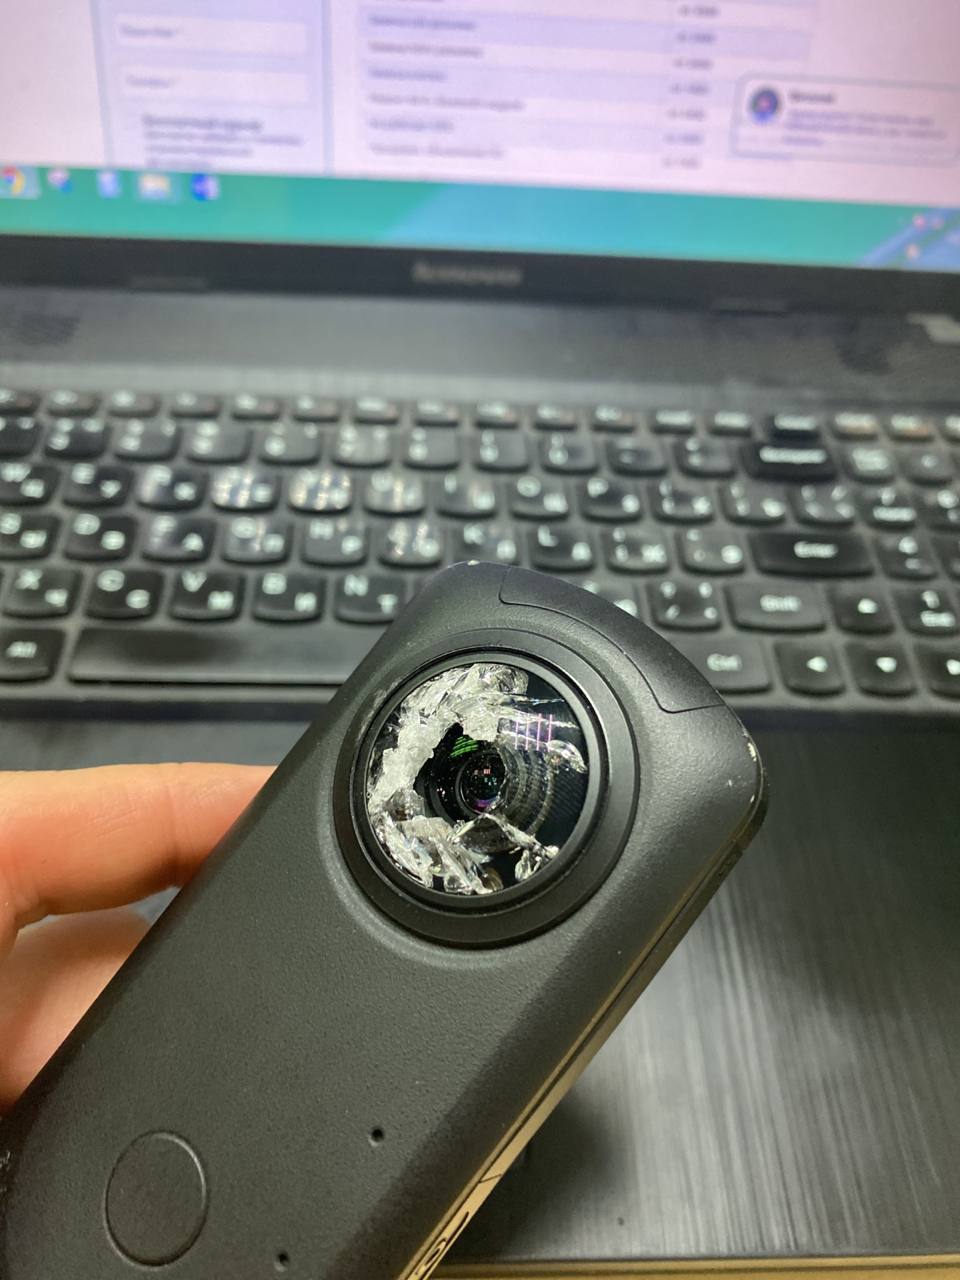
Construction sites are inherently high-risk areas, and not all things can be planned for. Always prioritize safety and prepare for the unexpected to minimize risks. Safety first!
No Comments