< INSPECTION. Project Settings | INSPECTION. Album >
The project structure consists of blocks (buildings, sections, structures, etc.) and plans (floors, levels, locations) with points and photographs.
- To create a block, click the three dots next to “Entire object” → “Add block”

- To create a plan, click the three dots next to “Block” → “Add plan”

In the window that opens, enter a name for the plan, for example, Floor 1, and upload an image of the plan in PNG, JPEG, or WEBP format. File size no more than 25 MB .
.

- Add the remaining blocks and floors in the same way
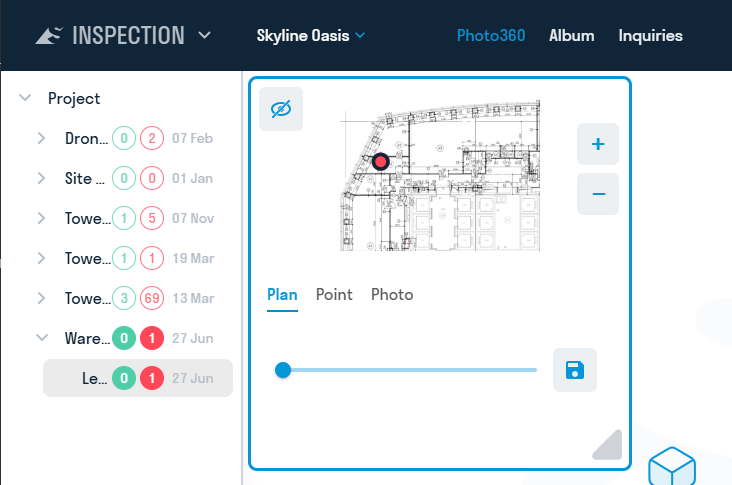
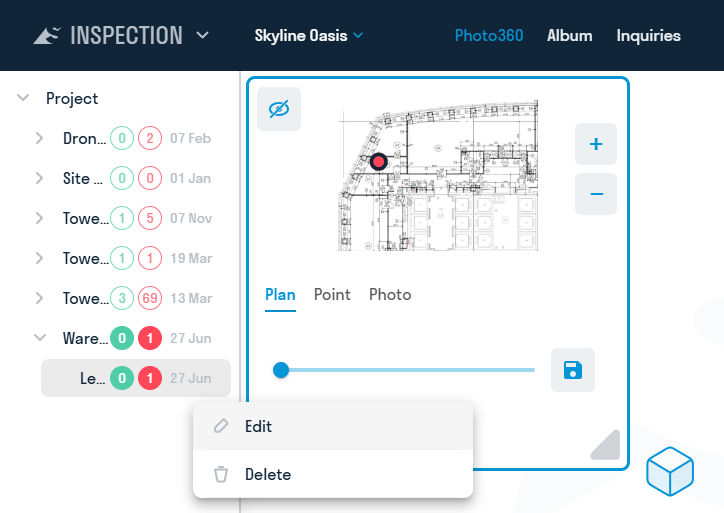
¶ Editing and deleting plans
- To replace the plan image, click the three dots opposite “Plan” → “Edit”
- To delete the plan, click the three dots opposite “Plan” → “Delete”
¶ Setting up the plan*
To set the north relative to the plan, go in the "PLAN" tab and, moving the slider, set the correct location of the north (the letter "N"), and then click "Set azimuth"

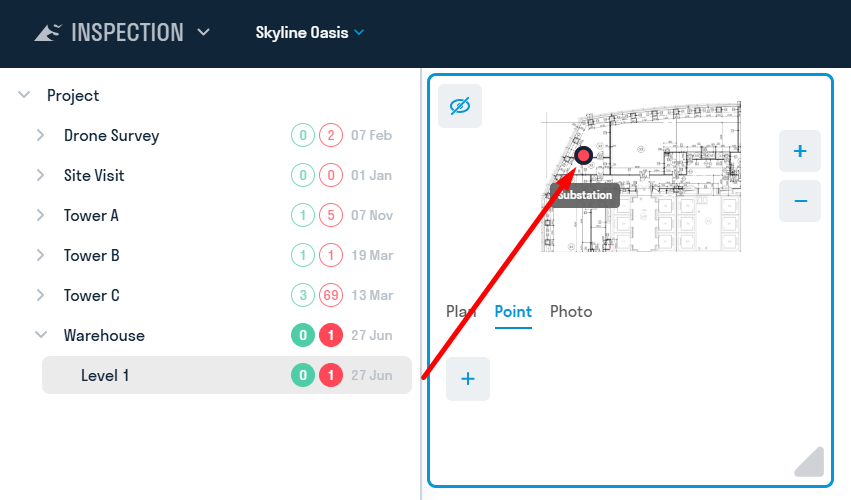
¶ Creating a point
A point can be created in two ways:
- Hold down CTRL on your keyboard and left-click in the desired area on the plan

- In the "Point" tab, click "Add". A pointer will appear on the plan. Select a location for the point on the plan and click “Add” again
In the window that appears, enter the name of the point, for example, 1, and click “Save”


The point will appear on the plan
¶ Setting up points
After creating a point, the point settings will become active on the POINT tab

Points can be assigned one of three statuses:
- Required - red dot. A photo needs to be taken at the point.
- Completed - green dot. A photo has been uploaded at the point this week.
- Completed - blue dot. No more photos need to be taken at the point.
Statuses help the Digital Survey Engineer identify the points that he needs to work with on site.
You can set up an automatic reset of the status from Completed to Required on any day of the week, so that the photo maker receives the points that need to be uploaded to when synchronizing with the project. Learn more about this in “ Project Settings ”
Example of working with point statuses
Initially, points are created with the Required (Red) status. A digital survey engineer (photo maker) arrives at the site, syncs in the Photomaker app, and receives the required points. After taking a photo at a point, the point will be marked as Completed and colored green, making it easier to find and complete any remaining points. After the engineer has completed the entire site, they send the photos to the Inspection service. If "status change" is enabled in the project settings, the points in the Inspection service will change their status from Required (Red) to Completed (Green). Engineers from the Production and Technical Department, Construction Supervision Department, and the Project Manager review the photos and add new points.
It is recommended to set the automatic reset of point statuses from Completed (Green) to Required (Red) in the project settings before the photo maker's next visit to the site. This way, after synchronization, the photo maker will again receive the required points.
- To add a photo, select a point, go to the PHOTO tab and click “Add”

- In the window that appears, select the date the photo was created and upload the photo itself in PNG, JPEG or WEBP format. Also select the photo type: regular or 360 photo. Click “Save”

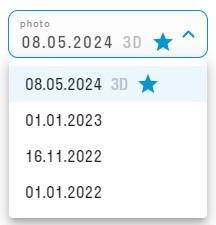
You can view the added photos in chronological order

¶ Photo settings*
After adding a photo, the photo settings will become active on the PHOTO tab
Azimuth settings
To adjust the direction of the photo relative to the plan, turn the photo to the north and click “Set azimuth”.

Adjusting Azimuth Using Photo Alignment
Alignment is used to set the azimuth of a photo using another photo, for example, for photos taken with a quadcopter when determining the direction of north is problematic.

- Select the photo you want to align and tap "Alignment"
- Use the target that appears on the photo to point to a static object that will not change from photo to photo. For example, this could be a building.
- Tap "Select Reference Photo" at the bottom of the screen.

- A reference photo will appear on the right, which will be used to align the left photo. By default, the previous photo in the list is selected. You can select another photo from the list.
- Using the slider, aim the right photo towards the object selected in step 2
- Click Save.

- The left photo will take the orientation of the reference photo, i.e. their north will face the same direction
Links are shared to a specific photo for use, for example, by construction inspectors in a comment or by the sales department to send a client a 360 photo of his apartment during construction.
- Select a photo and in the PHOTO tab, click “Create link”

- In the window that appears, enter a name for the link and click “Save”. The link will be copied to the clipboard and saved in the “List of public photos”

- All created links are stored in the “List of public photos”. Click the “Photo links” button (camera icon) and copy the link.

¶ Photo export
The tool allows you to export selected viewpoints as a panoramic image for subsequent insertion into the INSPECTION module.
1. To create a viewpoint, you need to select the place where you want to get a panoramic photo, and position your view in this place.
Attention! You must align the view exactly vertically using the "Align camera vertically" command. Otherwise, if the camera is not strictly parallel to the floor, the image will not be stitched correctly when publishing to INSPECTION.
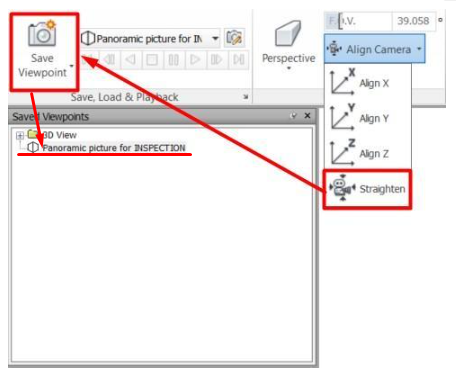
After that, you need to save the viewpoint and give it a name.
2. Click on the SIGNAX tab in the Export | Import panel ➤ Photo360
3. Select the desired viewpoints, specify the lighting settings and photo resolution. Click “OK”.
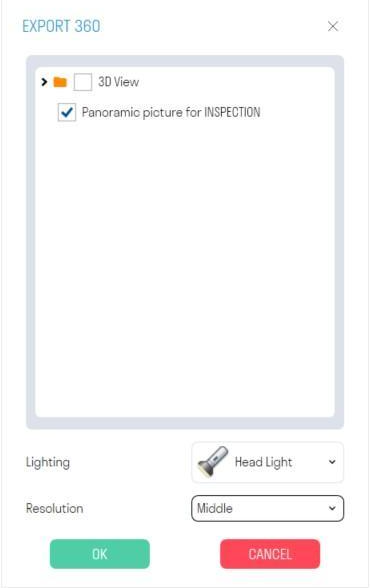
Note: If there are backlight leaks in the panoramic photo, it is recommended to select a different lighting type.
Note: The resolution of the panoramic photo affects the duration of its upload. Low - 5-10 seconds. Medium - 30-60 seconds. High - 3-5 minutes.
4. The resulting panoramas in .png format can be inserted into the INSPECTION module for comparison with the actual condition on the construction site.
¶ Publishing Photo360
This tool allows you to upload viewpoints created in the Navisworks model to the INSPECTION service for comparison with the actual condition of the construction site. Administrator rights in the INSPECTION service are required to upload photos.
1. First, create viewpoints in Navisworks. To create a viewpoint, select the location where you want to get a panoramic photo and position your view at that location.
Attention! You must align the view exactly vertically using the "Align Camera Vertically" command. Otherwise, if the camera is not strictly parallel to the floor, the image will not be stitched correctly when published to INSPECTION.
After this, you need to save the viewpoint, giving it an appropriate name. It is recommended to adhere to the BLOCK-FLOOR-POINT tree structure for automatic matching of viewpoints with INSPECTION points (see point 4).
2. In SIGNAL Settings select the project to which you want to upload 360 panoramas

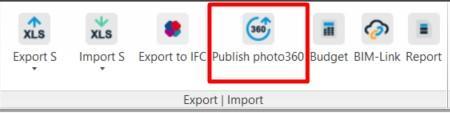
3. Click on the SIGNAX PRO tab in the Export | Import panel ➤ Publish Photo360
4. In the window that opens, expand the desired plan in the left part, and in the right part, match the point from INSPECTION with the viewpoint from Navisworks by selecting the latter from the list in the "Viewpoint" column.
To automatically match viewpoints with points from INSPECTION, click DEFINE at the top of the window.
Viewpoints will be populated automatically, provided that the viewpoint location in the tree matches the point location in INSPECTION, i.e. the BLOCK-FLOOR-POINT tree structure matches.
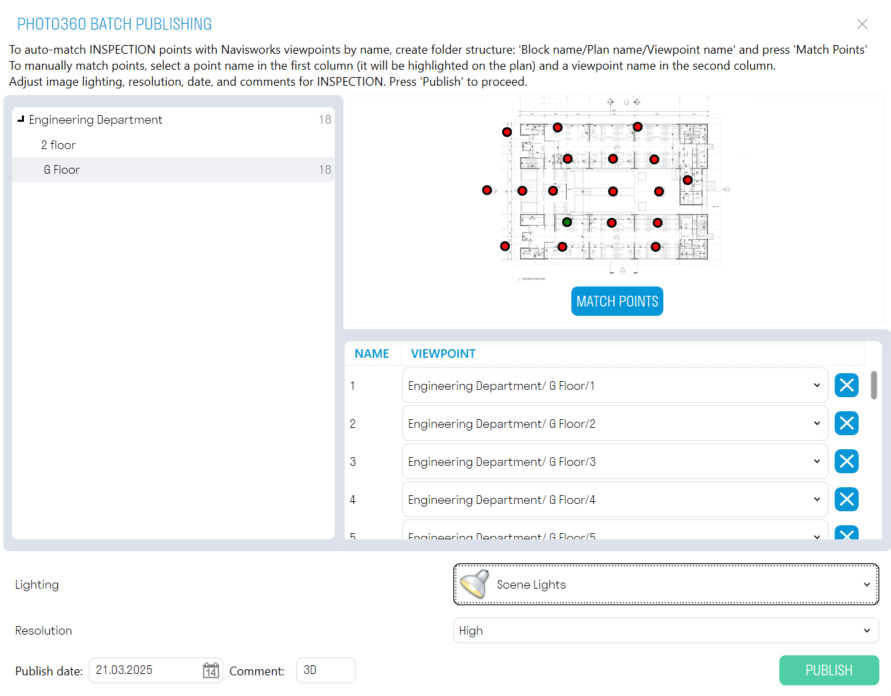
5. Select a Lighting Type. If there are backlight leaks in the panoramic photo, it is recommended to select a different lighting type.
6. Select a Resolution. The higher the resolution, the longer it will take to upload a panoramic photo. Low - 5-10 seconds. Medium - 30-60 seconds. High - 3-5 minutes.
7. Specify the Photo Publishing Date and, if necessary, a Comment. The comment is displayed in the list of photos in the INSPECTION service, it is required to mark the photos uploaded from the model, and is limited to five characters.
8. Click “Publish” and wait until the photos are uploaded to the INSPECTION service
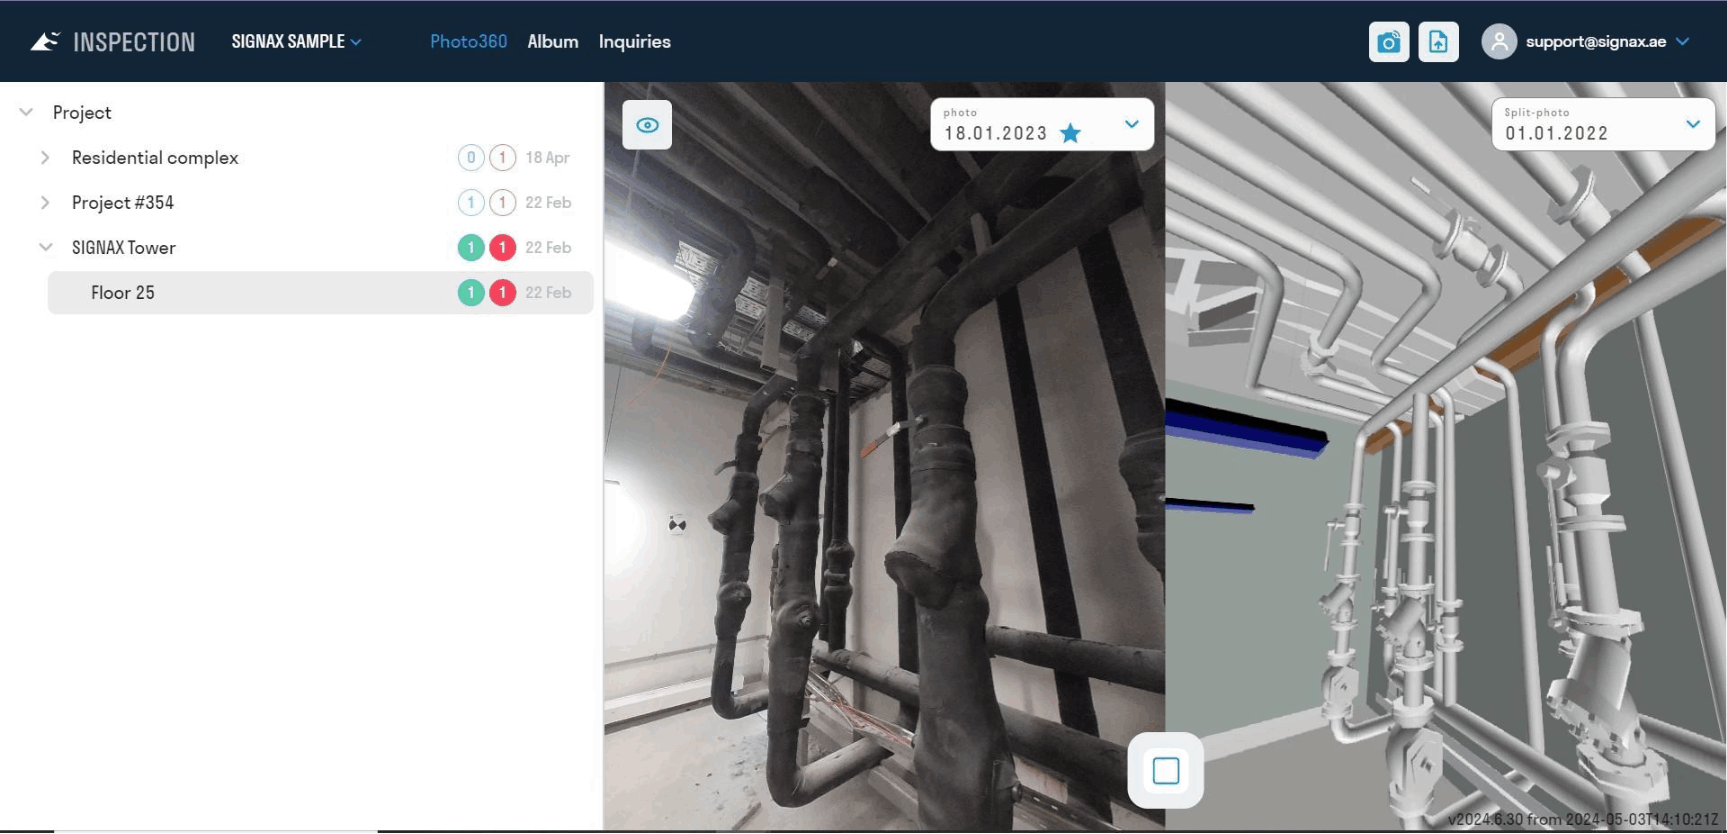
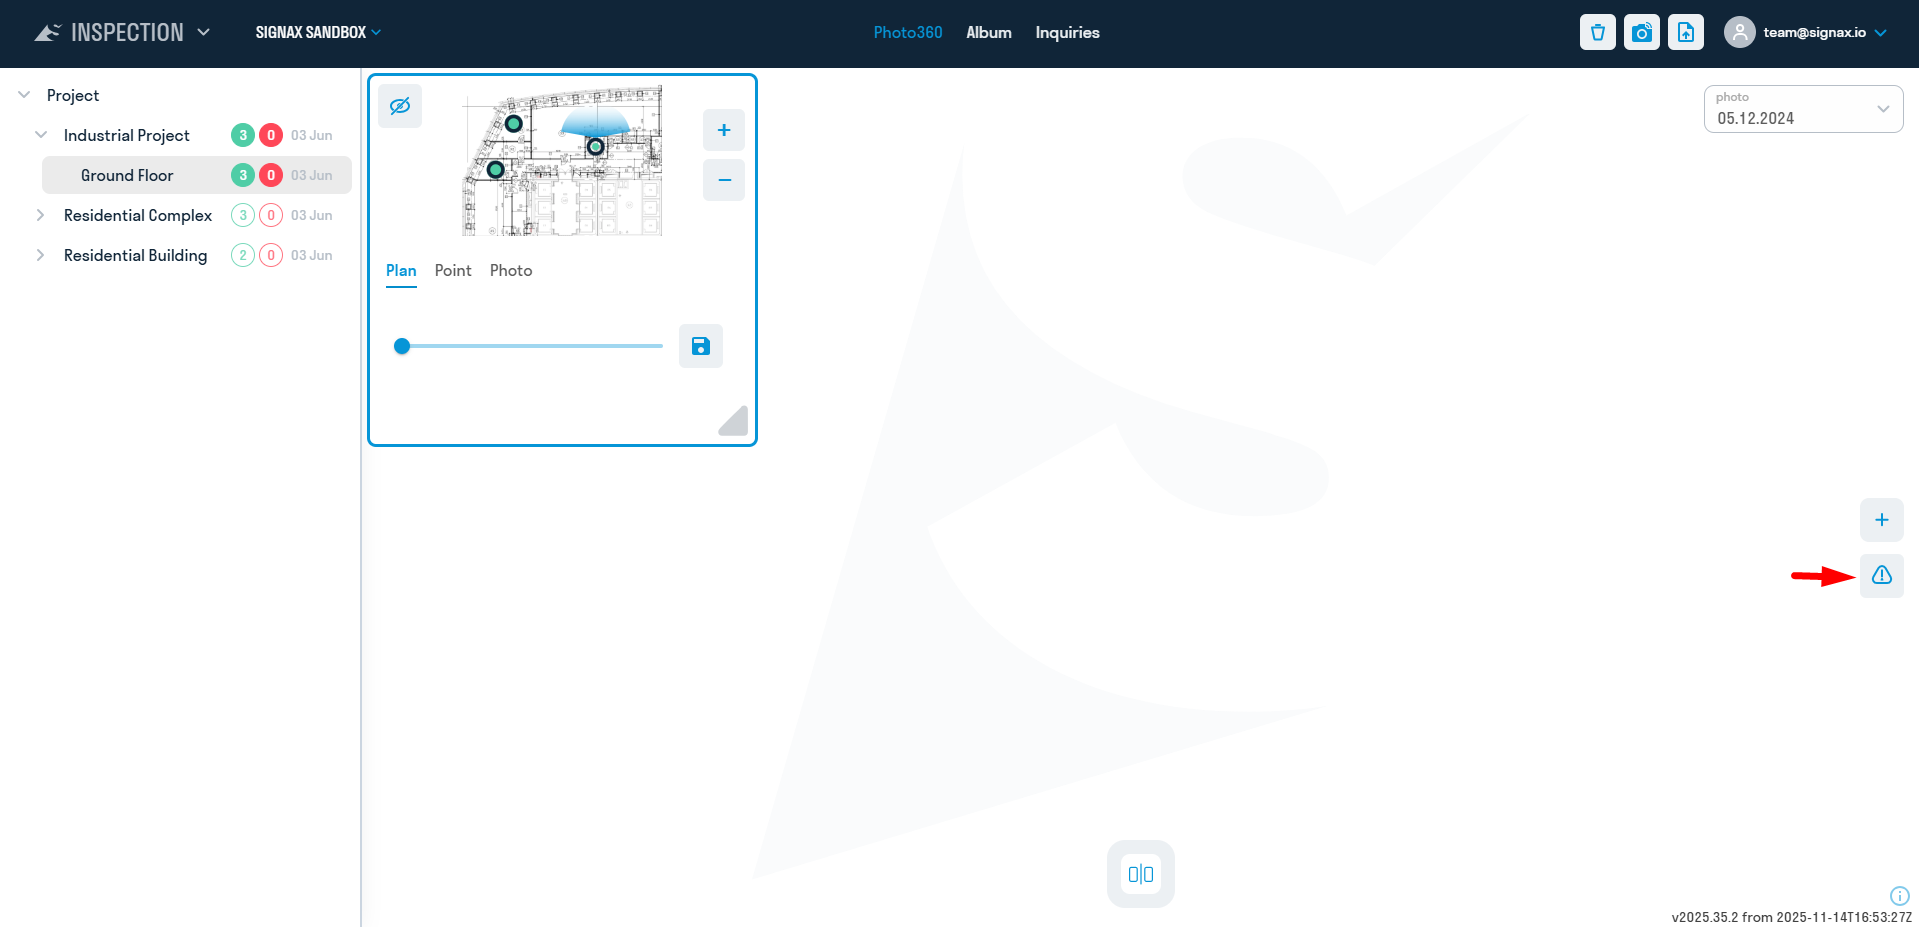
INSPECTION users can view photos on pb.signax.io in the Photo360 section.
- On the left side of the screen, you can select the floor plan.
- After uploading, you can select the point where you want to take the photo on the plan.
- The size of the area with the plan is adjusted by clicking and stretching the lower right corner of the plan area.
- To hide/show the plan, press the space bar on your keyboard
- To compare, select a photo and click “Compare”
.png)
¶ Photo comments. Comments list
To leave a comment on a photo, go to the project page and click the “Create comment” button
In the tab that opens, you can see the name of the comment, its description, and its status.
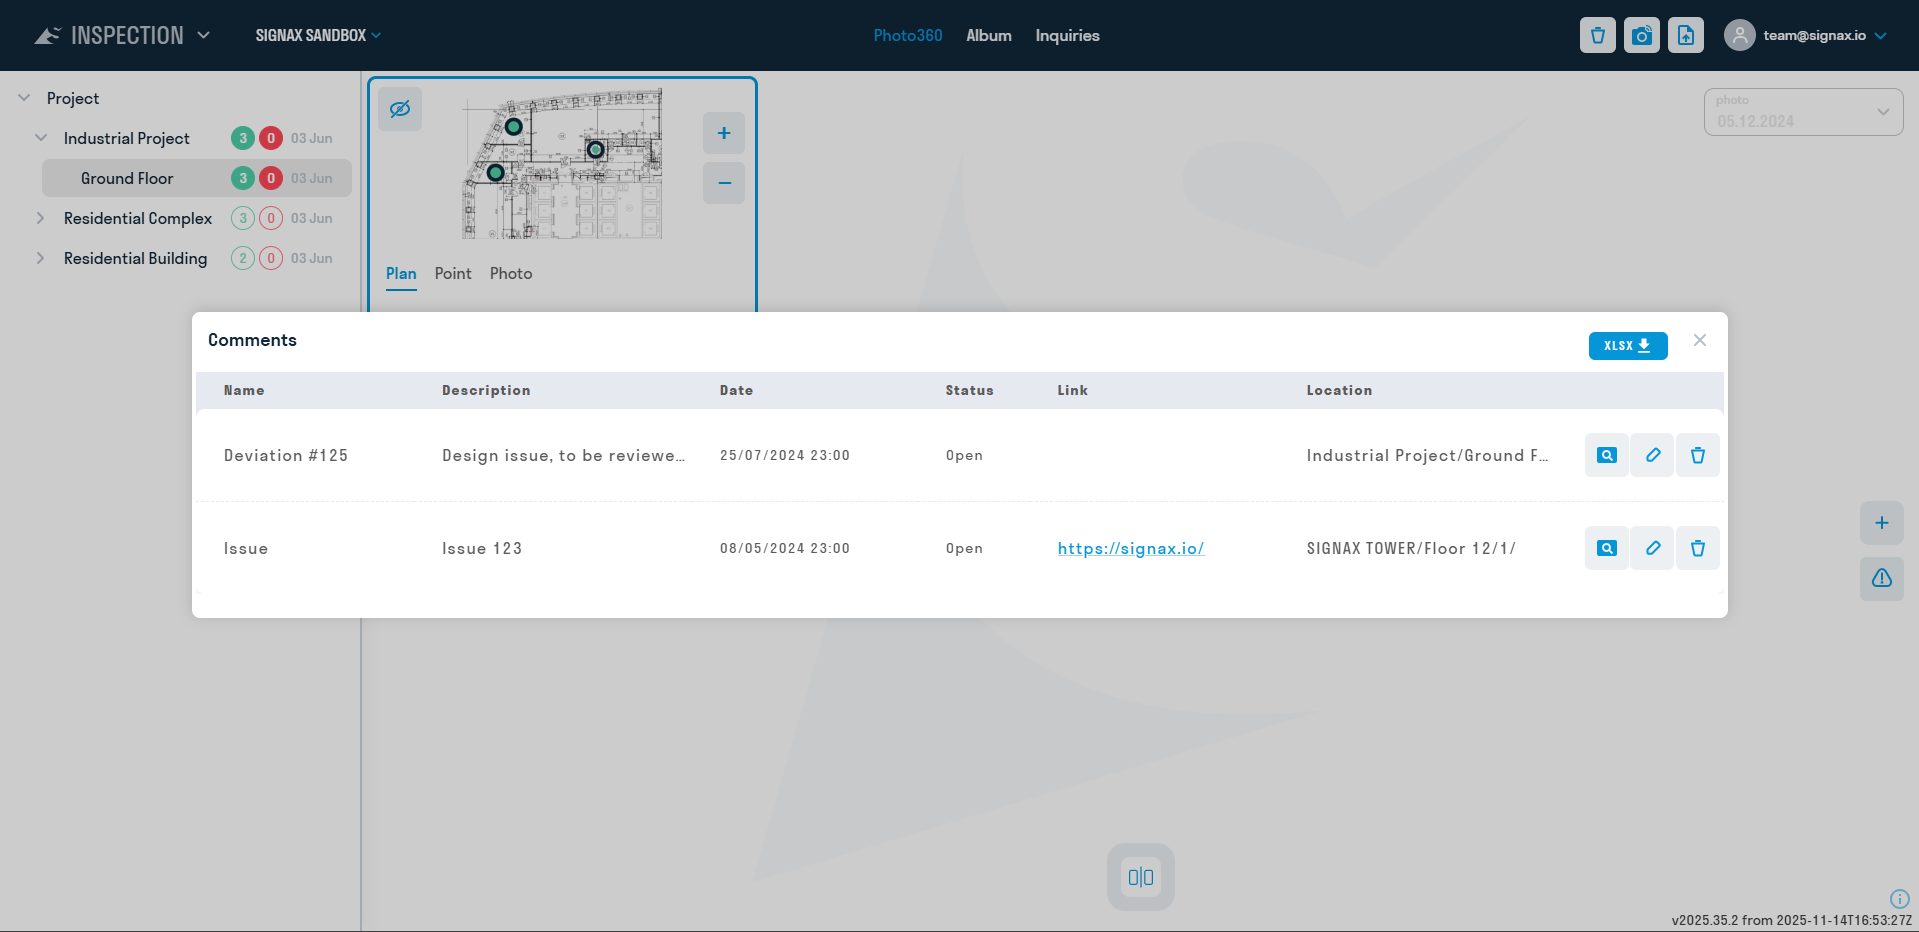
The entire list of comments can be downloaded in xlsx format. To do this, click the corresponding button in the upper right corner.