Construction progress tracking methodology
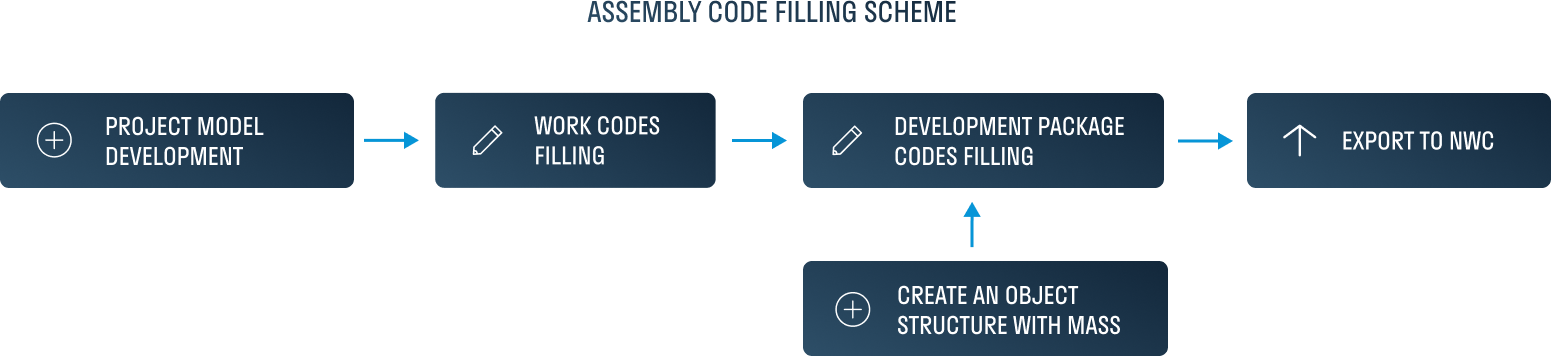
It is recommended that the designer (consultant) fills in the model's assembly codes; it is necessary to register this requirement in the design assignment or EIR. If the designer doesn't fill out the assembly codes before transferring the model, the general contractor or technical customer must re-fill them using Dynamo scripts for further work with the 5D model.
Example of work assembly code: A10.20.50 or W3.2.1
First, you need to download all standard sizes into an Excel file. Then, fill in the work assembly codes in the elements that show work status. After that, it is necessary to load the object structure file, which consists of form-generating units dividing the object into sections and floors.
Example of an element package code: A10.20.50-B01.S03.L05 or W3.2.1-B01.S03.L25
To associate element packages with works and budget items, they must have the exact breakdown ( ex., the same assembly code used to determine the volumes).
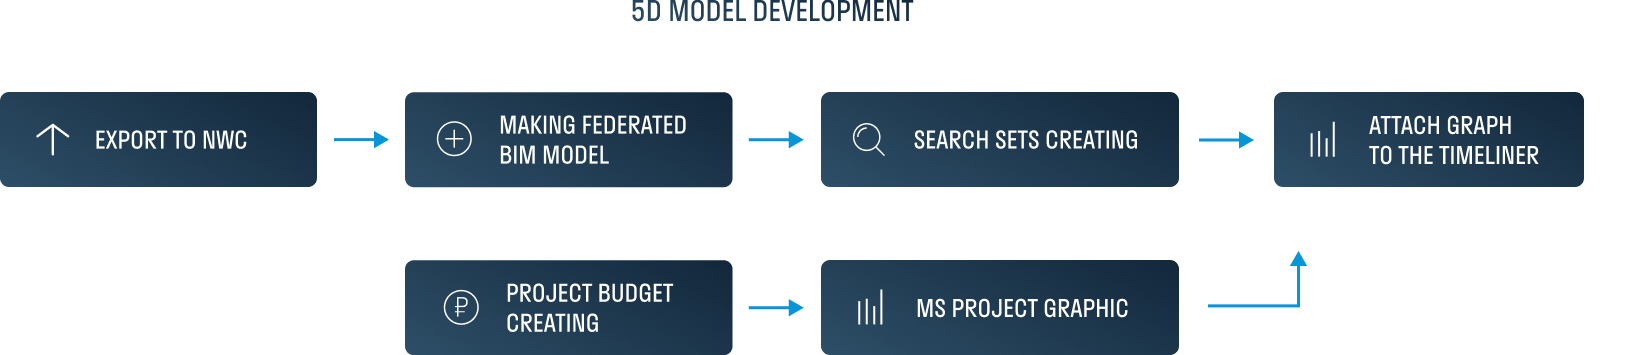
In a basic situation, we receive project model files with a filled assembly code divided into packages from the designer. Next, create the NWF model, which is necessary to generate and check search sets from an Excel file using the SIGNAX for Navis plugin.
Then export work volumes to Excel using the same plugin. Finally, create a pivot table, the Bill of Quantities, and the project budget based on the previous Excel report.
After that, create the Microsoft Project time-scaled activity network schedule and bind it with Navisworks Timeliner.
Realize construction visualization and plan / actual tracking performing with the Timeliner tool.
The following scheme represents the construction model-creating process:

Autodesk Revit creates a new construction model file for a specific job based on the construction model template. Further, load project models into the template. The project model contains the necessary elements for volume calculating and progress display. Then, take the construction elements from the loaded file and transfer them into the construction model. After that, make additional preparations, such as cutting into sections.
Further, convert the construction model into NWC format for assembly in Autodesk Navisworks, where you will mark the elements' completion status, confirm completed work volumes, and make a plan / actual comparison. Also, using the construction model, prepare PDF 3D reports and NWD model for uploading to the SIGNAX DASHBOARD Customer's Account.
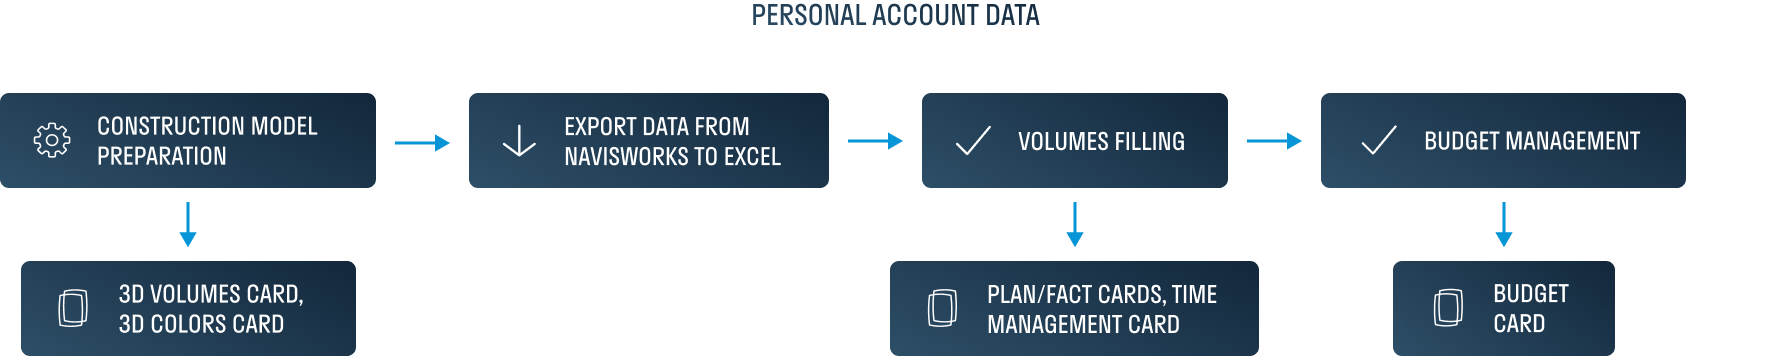
The Customer's Account gets the information directly from the BIM model and Excel. To prepare data in Excel, we use exporting volumes from Autodesk Navisworks using our plugin. Then, using Excel, we track the volumes summary, the connection between the work performance and the project budget, and the accounting of non-modeled works. After that, the information is collected on a separate sheet (in a predetermined form) and copied into the Plan-fact, Rates, Budget, Workers dynamics cards.
Load NWD Models into Autodesk Docs, copy the model URL, and paste into the Customer's Account card. Further synchronization by URL link is automatic and allows you to update the model through the Autodesk Desktop Connector by saving the file.
No Comments