2.1.3. Administrator
Registration of your own account
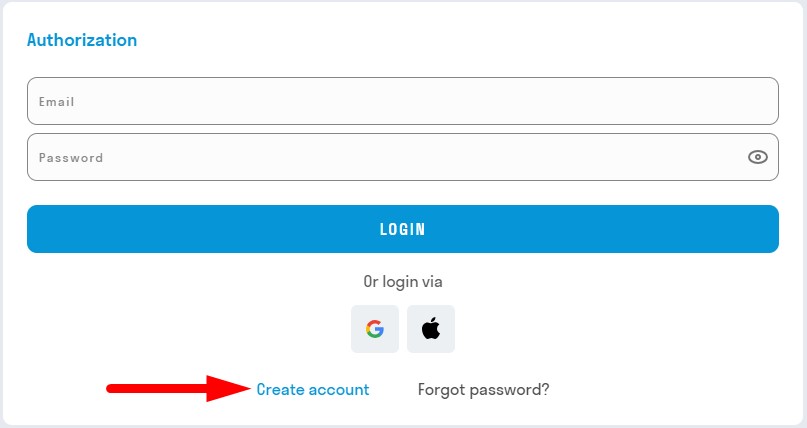
1. For self-registration in the SIGNAX service, click "Create an account" on the authentication page or follow the link.
2. Enter your email address and click "Next".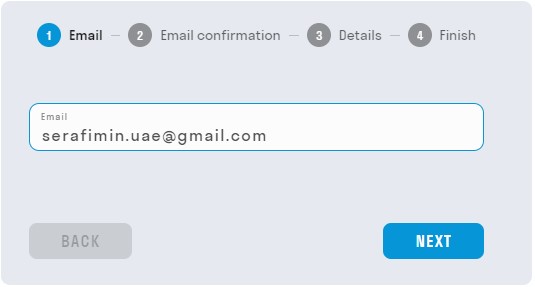
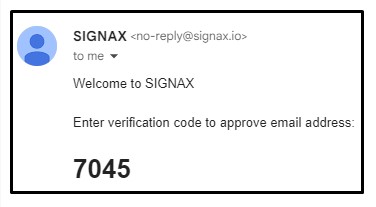
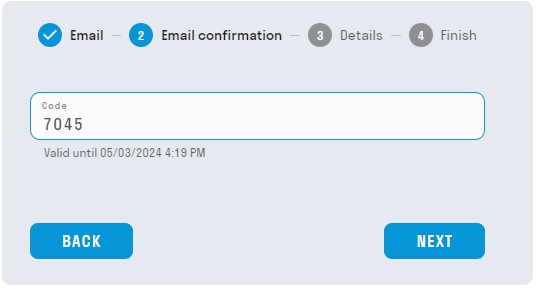
3. Within a few minutes, you will receive an email with a confirmation code to enter in the "Code" field.
4. Create a password over 8 characters, containing at least one uppercase letter and one digit. If necessary, you can fill in your full name.
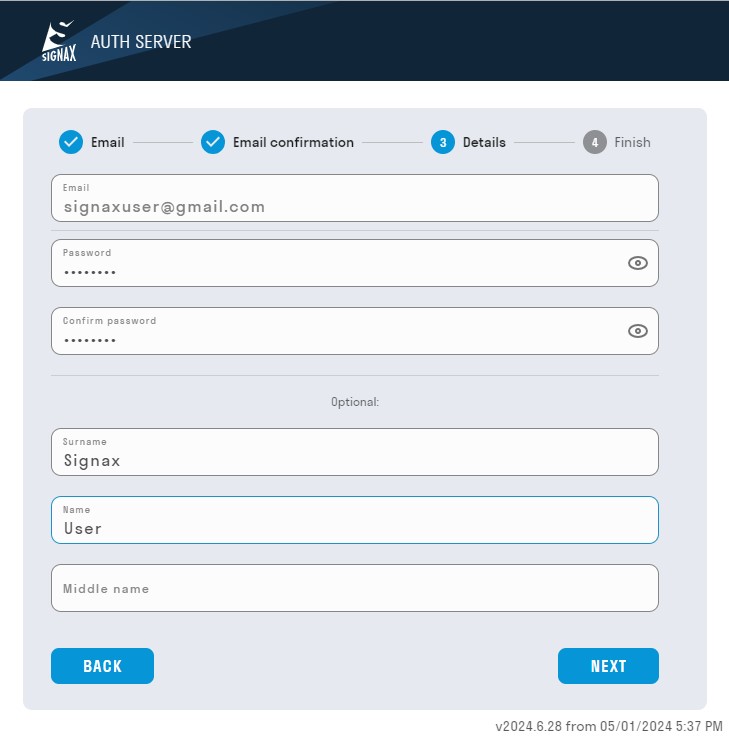
5. Complete the registration.
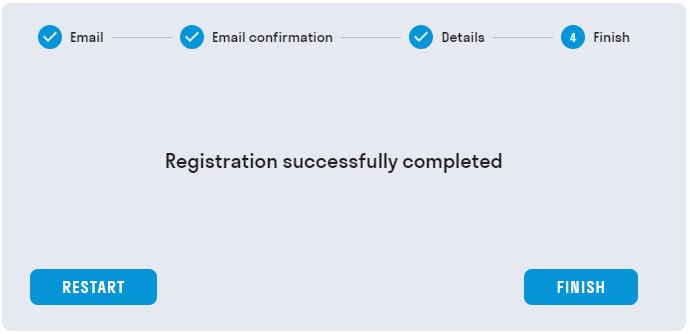
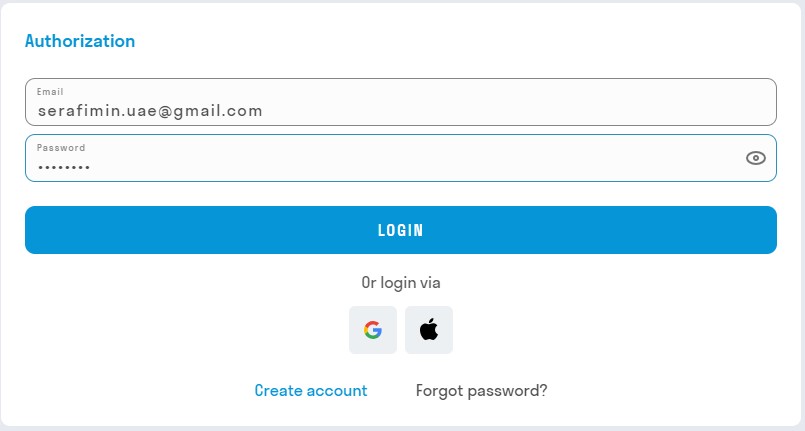
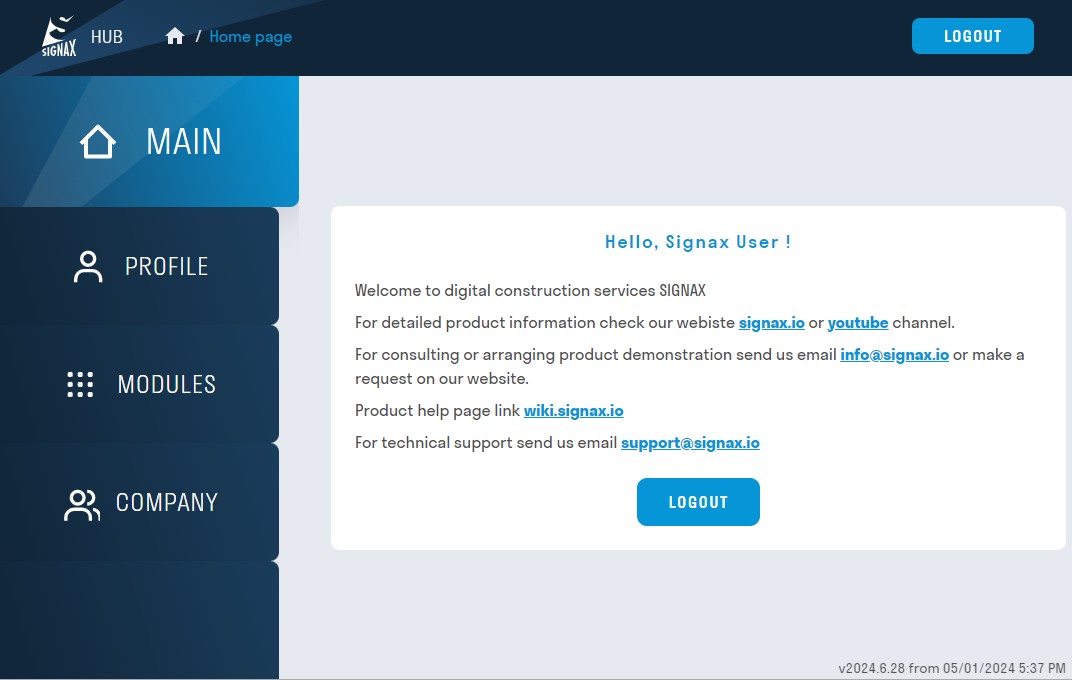
6. After registration, you will be redirected to the main page https://hub.signax.io/. Click on "SIGN IN" and enter your registration details.
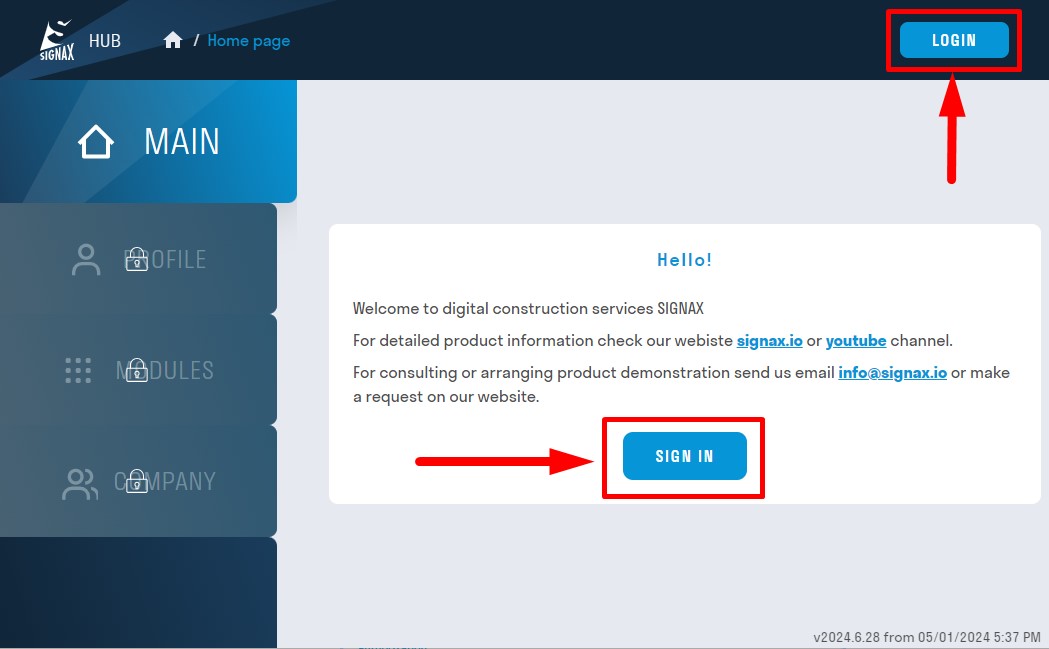
7. You are in the personal account.
Creation a Company
1. Go to the COMPANY section and click + for creating a Company

2. Enter the company information and click "ADD"
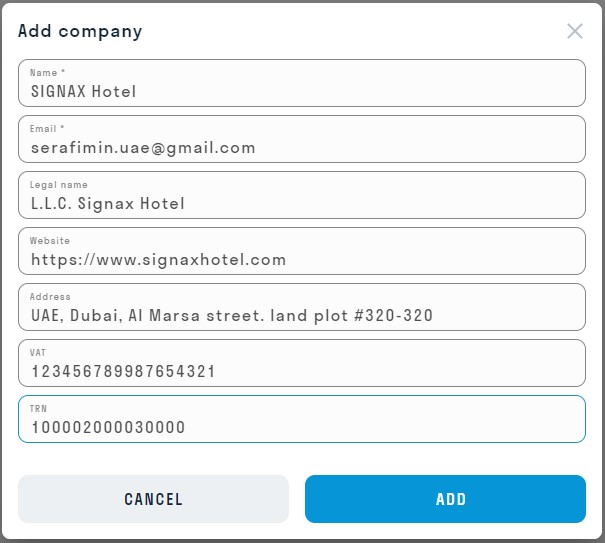
When you create a Company, you become its Owner and Administrator. You can add other Users as Owners and/or Administrators. Added Owners can remove the Company's initial creator. This might apply when a user, acting as technical support, creates and configures the Company, and their role ends there.
|
Permissions |
Owner
|
Administrator
|
User
|
| Add or remove users from the Company |
+ |
+ |
- |
| Assign or remove licenses to users |
+ |
+ |
- |
| Create a project and add users |
+ |
+ |
- |
| Assign owner statuses to other users |
+ |
- |
- |


*One account can create no more than two Companies.
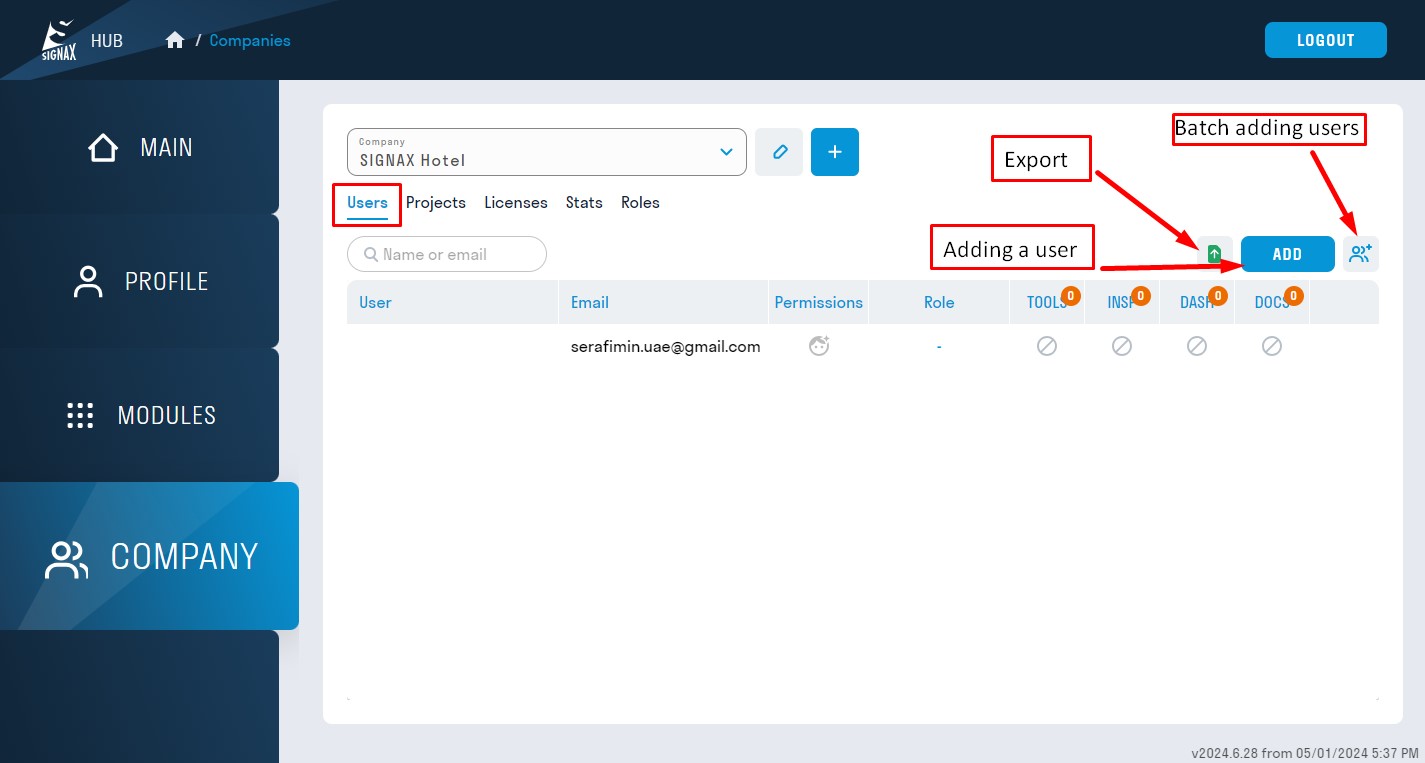
Adding Users to the Company
Add all necessary Users to the created Company. You can do this one by one or in bulk.
Adding one User
1. To add one User, select the created Company and click "ADD"
2. Write the email of the User being added.
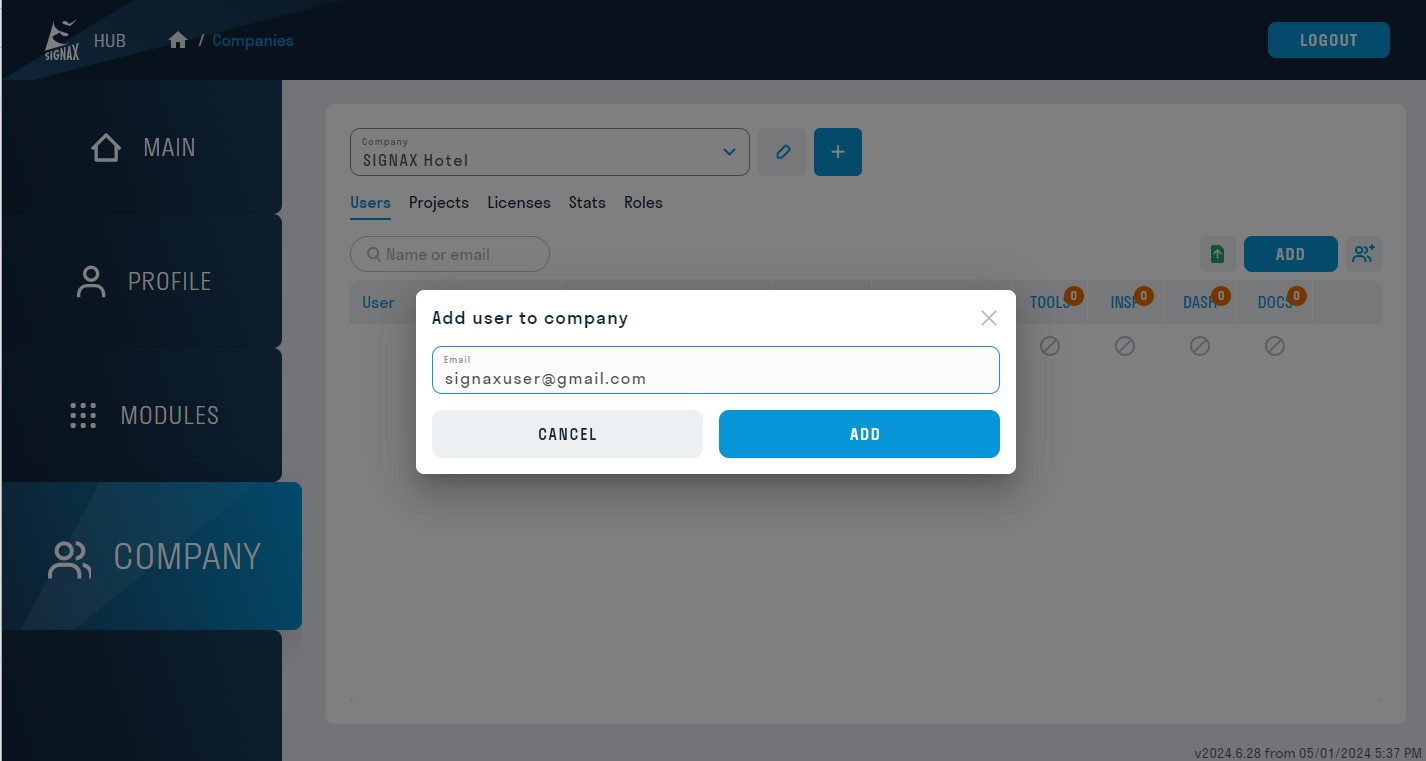
3. The User will receive a notification at the provided email address.
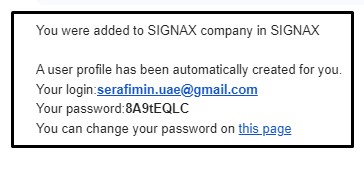
If the User has not previously registered in the SIGNAX system, an account will be automatically created for the User after the Administrator invites them to the Company.
An email with the login and a generated password will be sent to the User's specified email address. The User can change the password on the "PROFILE" tab in the HUB.
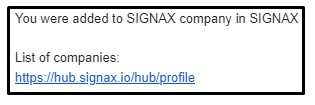
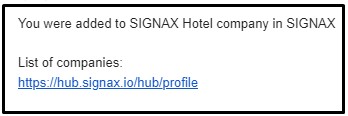
If you are already registered in the SIGNAX system, you will receive an email notifying you of your addition to the Company.
4. After adding a user, the Administrator will see the added User in the Company's list. They can then assign a role and issue the corresponding licenses.
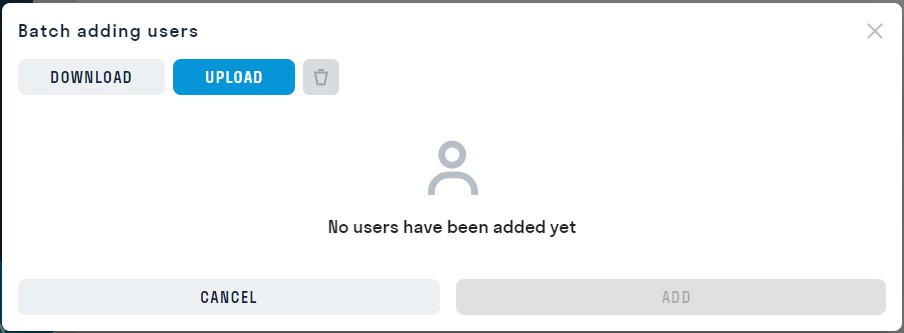
Batch Adding Users
1. To add multiple users, select the created Company and click 
2. In the window that opens, download the Excel template with an example of how to fill it out by clicking "DOWNLOAD"
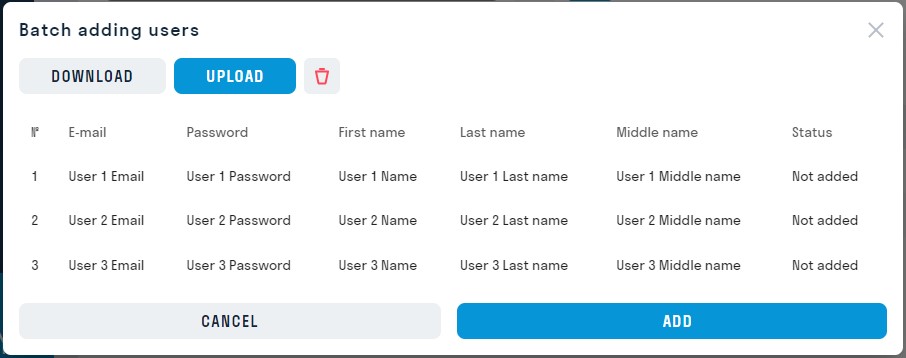
3. Fill out the following fields in Excel and save the file. The allowable number of users in the Company is calculated based on the number of licenses in the Company plus 5 users. For instance, if the Company has 100 licenses, you can add 105 users.

- User Email: Required field.
- Password: Must be at least 6 characters long, containing at least one number and one uppercase letter. If this field is left blank, a password for an unregistered user will be generated automatically.
- First Name: Optional field.
- Last Name: Optional field.
- Middle Name: Optional field.
4. Upload the completed template by clicking "UPLOAD." All listed users will appear in the window. The "Status" column will indicate whether the user is already in the Company or not. Click "Add" to add the users.
5. A notification will be sent to the users' specified email addresses:
- If a user has not previously registered in the SIGNAX system, an account will be automatically created, and an email containing the login and an automatically generated password will be sent. The password can be changed under the "PROFILE" tab if needed.
- If a user is already registered in the SIGNAX system, they will receive an email notifying them of their addition to the Company.
6. After adding users, the Administrator will see them in the Company's list.
The Company is created.

7. You can export the user list to Excel by clicking
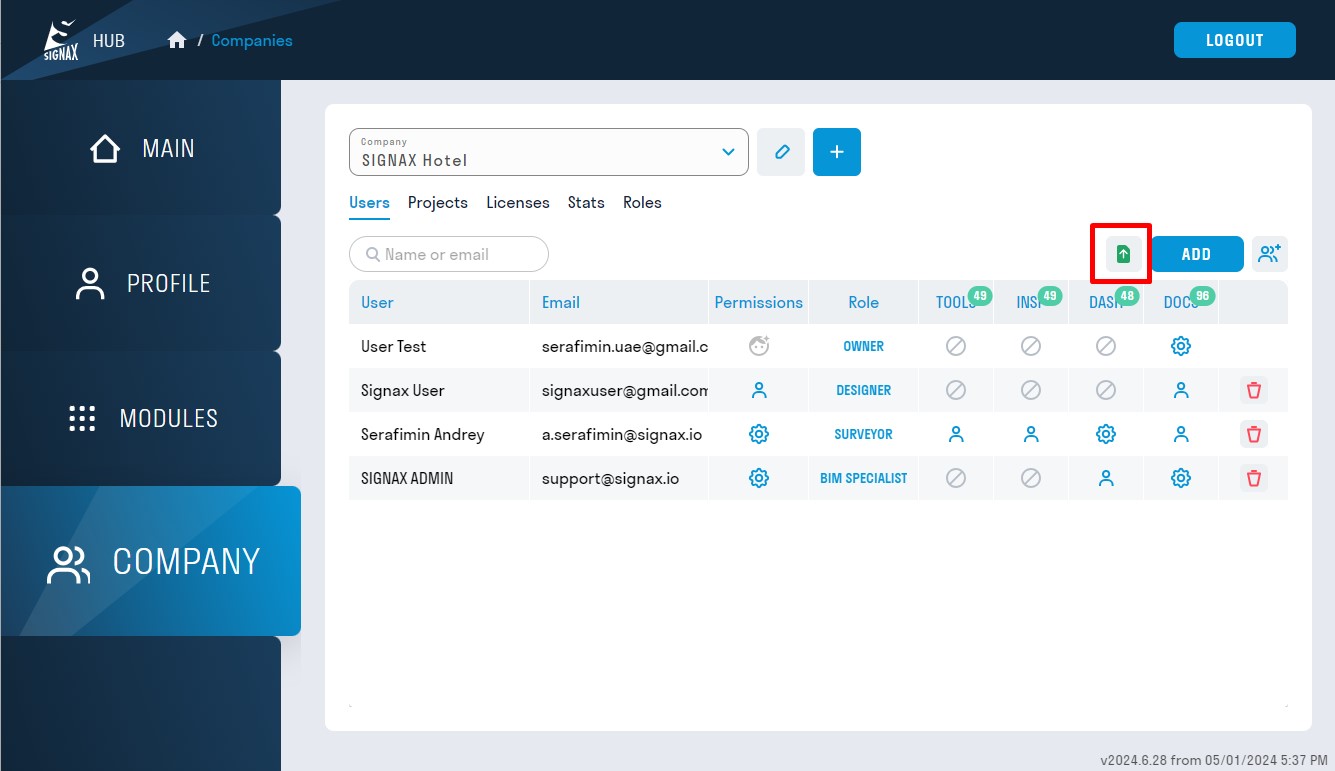
To include information about projects, select the appropriate field and click "DOWNLOAD"
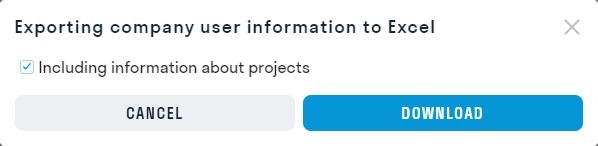
The Excel file displays information on users, projects, rights, and roles.

Obtaining Licenses
1. The Administrator should send a request to support@signax.io with the following text:
Request for License Assignment:
- Name of the legal entity requesting the licenses (including the created Company's name).
- Number of licenses needed.
2. Wait for technical support to confirm the assigned licenses. This usually happens on the same day.
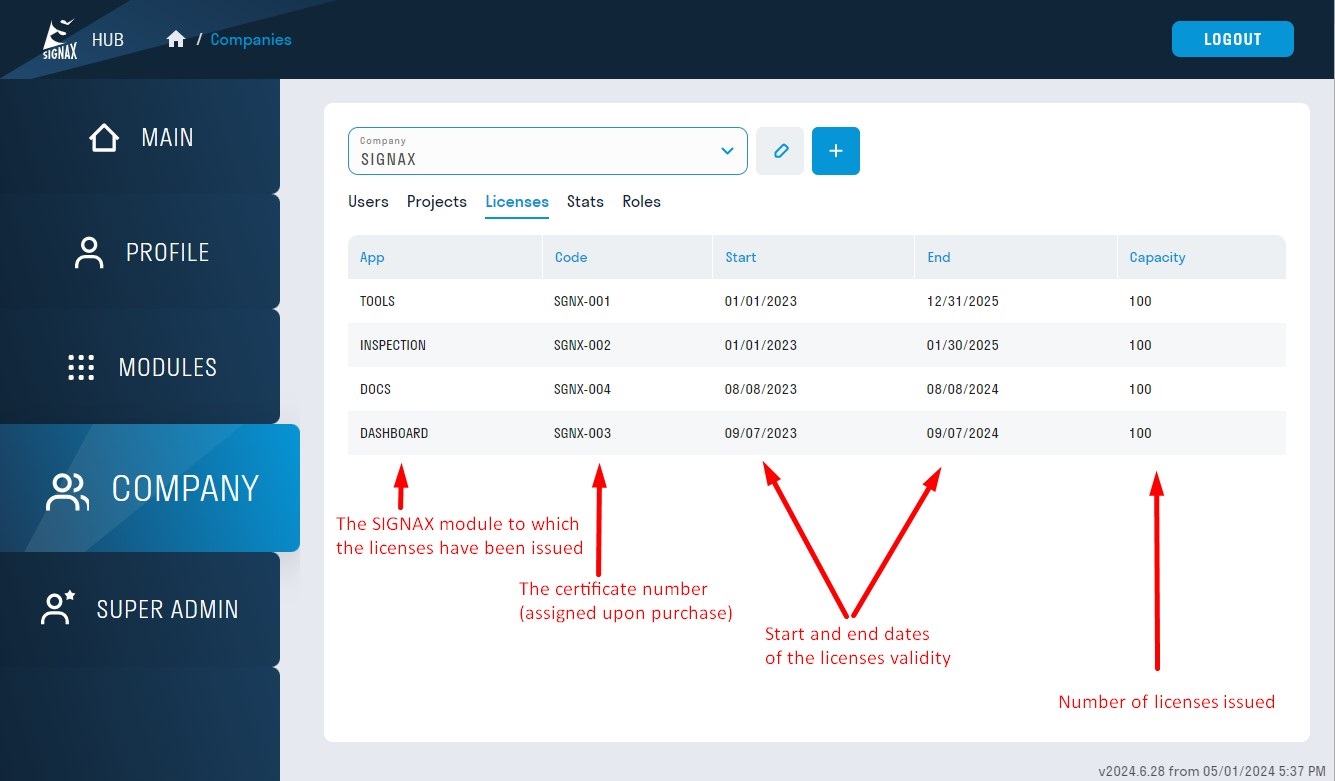
The number of issued licenses is in the "COMPANY" section ➤ Licenses.
Assigning Licenses
1. Go to the "COMPANY" section ➤ Users.
2. To assign a license to a user, click at the intersection of User - Application.
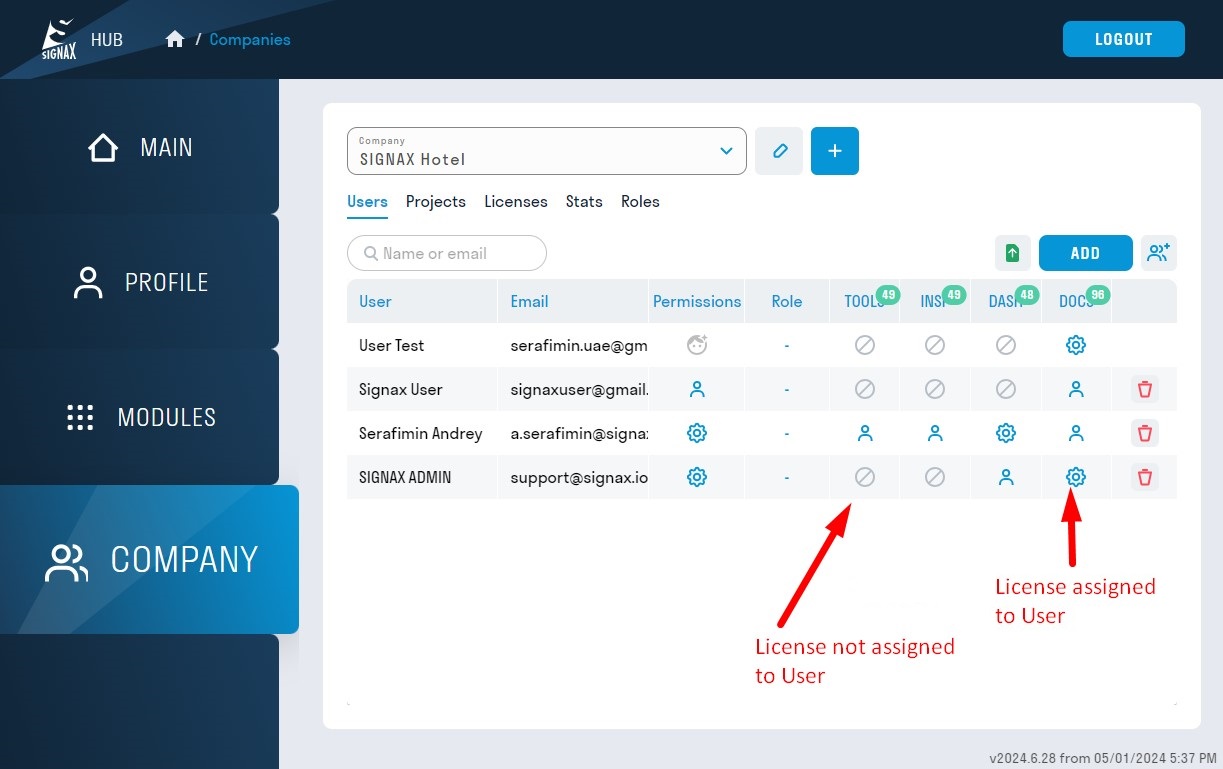
3. All SIGNAX services can provide licenses for users or administrators. Administrators have extended usage capabilities for SIGNAX services.
| License | Description |
|
Administrator License |
|
| User License | |
|
|
License Not Assigned |
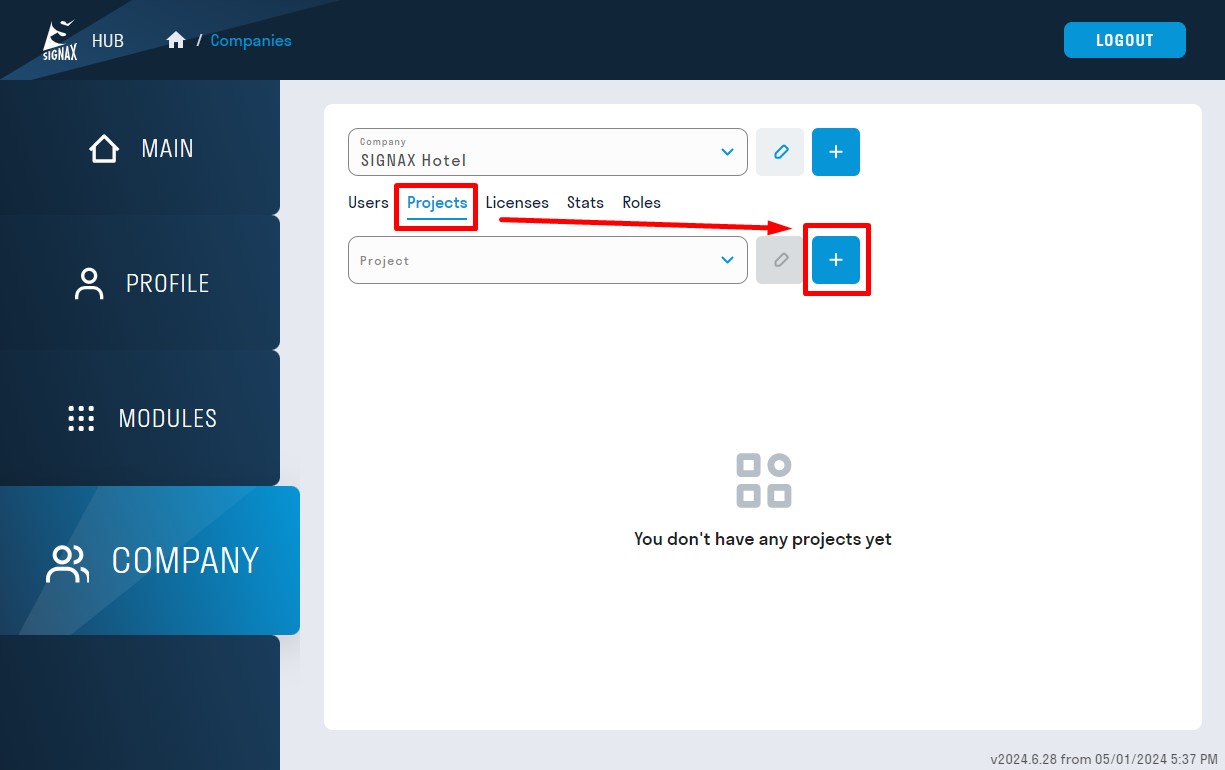
Creating a Project
A single company can have multiple projects. Create projects, add users to them, and assign roles to users.
1. Go to hub.signax.io ➤ COMPANY section ➤ PROJECTS tab and click +
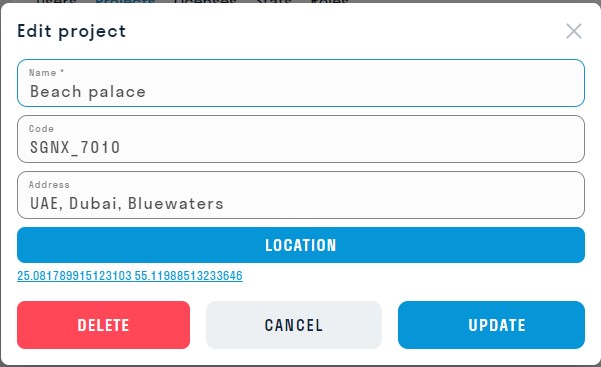
2. Fill in the fields and click "Add"
3. The Project is created. Now, add users to the Project by clicking "Add"

4. In the window that appears, select users from the list and click "Add"
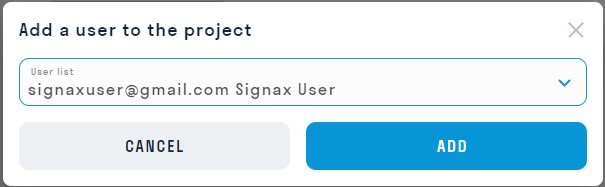
5. The users are added, and you can assign them roles.
Creating Roles
Roles are used to control participants' access to additional modules and system elements based on their project responsibilities.
1. To create a role, go to hub.signax.io ➤ COMPANY section ➤ ROLES tab and click "Add"
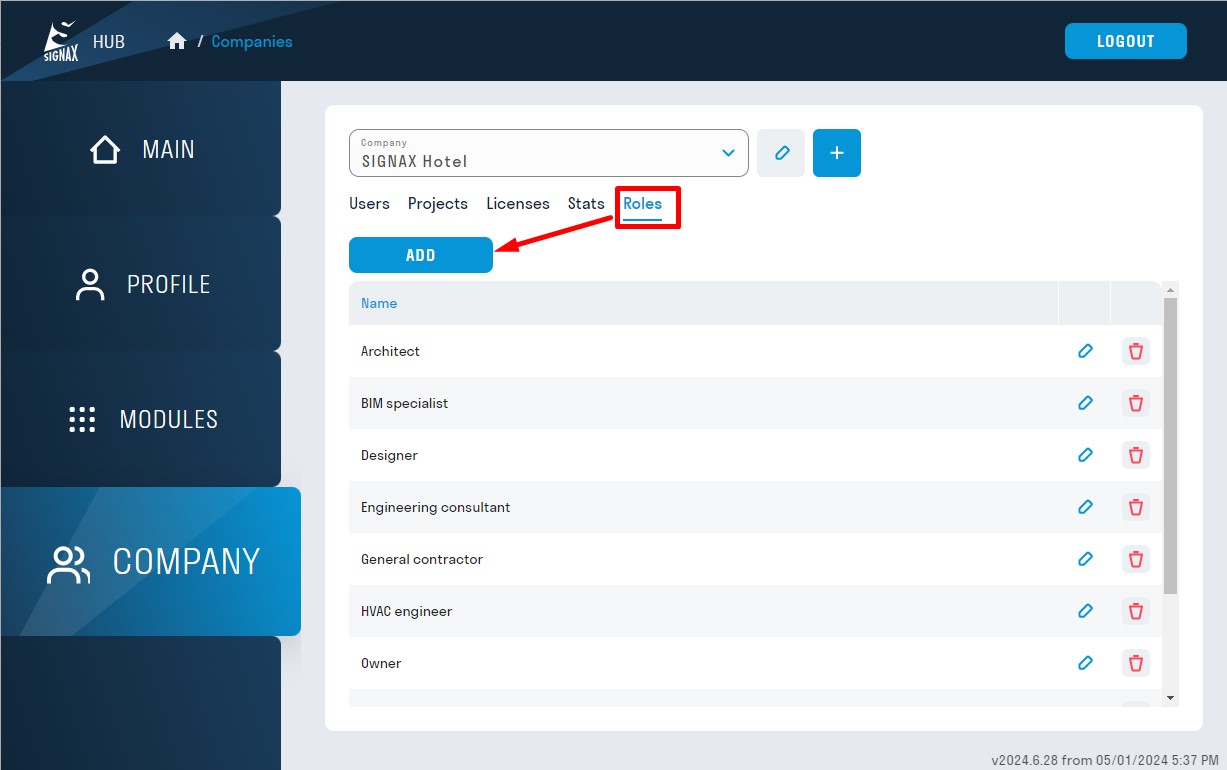
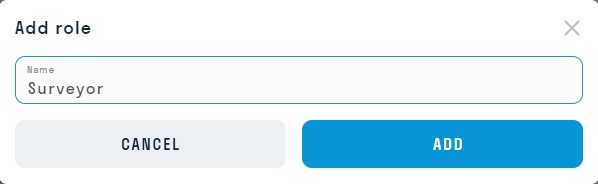
7.2. Set a role name and click "Add"
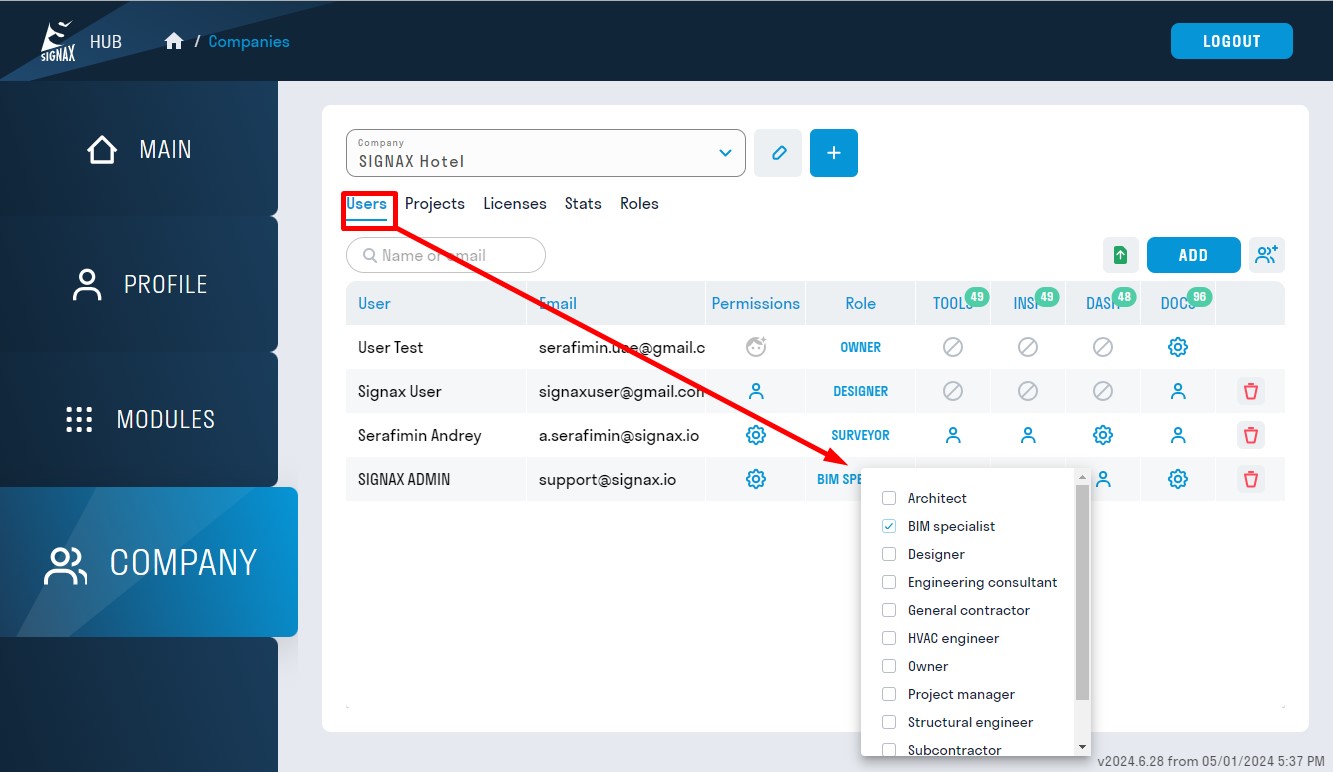
7.3. After creating the necessary roles, go to the USERS tab, click - in the “Role” column, and assign the appropriate Role to each User. The role will now be automatically assigned when a user is added to a new Project. Different users, such as designers, can share a role.
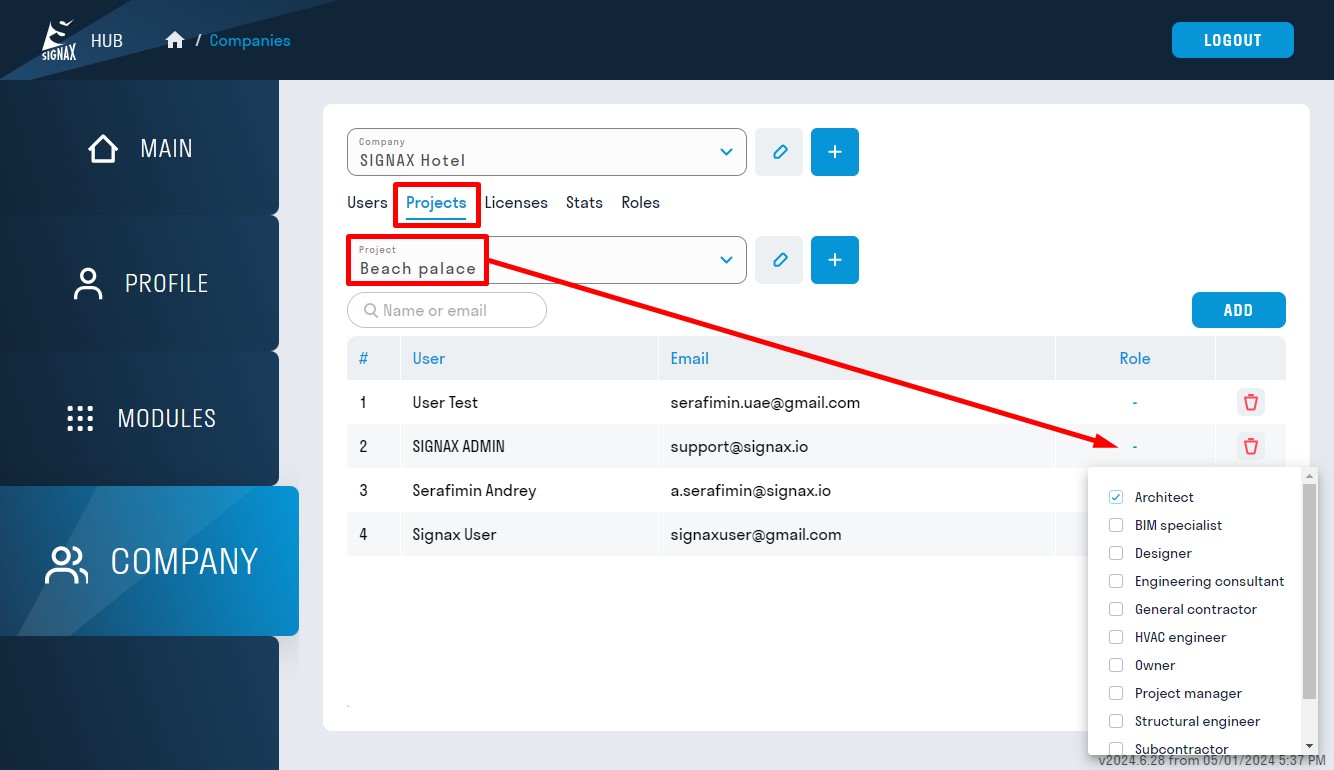
To change a user's role in an existing project, go to the PROJECTS tab, click the three dots in the “Role” column, and assign the appropriate role to the user in that project.
No Comments