< TOOLS. Work Methodology | TOOLS FOR NAVIS. Panel >
SIGNAX TOOLS for Navisworks plugin settings are located in the Settings ➤ Settings panel

¶ General
The license check is performed when you start using the plugin functionality. The TOOLS module is divided into TOOLS FREE and TOOLS PRO. TOOLS FREE is supplied with DASHBOARD and automatically picks up authorization from it. TOOLS PRO is supplied separately and requires separate authorization.
Click on the panel Settings ➤ Settings ➤ General

- Log in with your account.
- Export the plugin settings to an XML file. You can send the file with the settings to your colleagues so that they use the same settings when working with the plugin.
- Import the plugin settings in XML format.
This setting allows you to specify colors for coloring elements when using certain commands.
Click on the Settings panel ➤ Settings ➤ Coloring
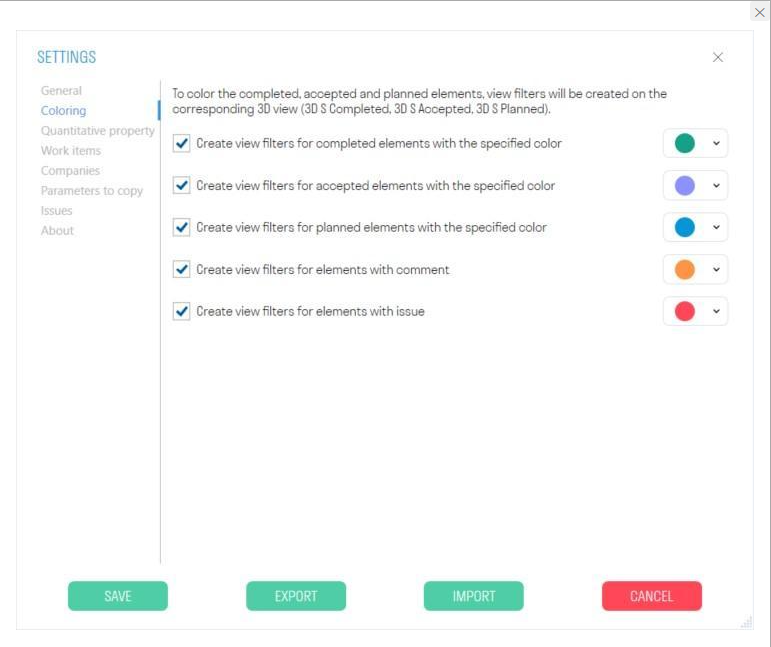
- In the upper part of the window, select from the drop-down list the colors that will be used to color elements after executing certain commands.
Note: For the “Complete”, “Accept” and “Schedule” commands, the color will be specified in the SIGNAX-Color property. For the “Comment” and “Remark” commands, the color will be specified in the SIGNAX - IssueColor property.
- The lower part of the window shows the valid names of issue statuses for files from DOCS. For each color, specify the status names separated by commas. When importing notes from DOCS using the “From DOCS” command, elements will be colored in the colors of the specified statuses.
Note: If a status does not require coloring, simply remove it from all
lists
This setting specifies the root folder with local documents. From the root folder, you can link folders and files to model elements via the "Documents" tab in the "SIGNAX Panel". When linking a document, the path will be hidden and only the path after the root folder will be listed.
Click on the Settings panel ➤ Settings ➤ Documents

- Select the path to the folder with documents by clicking "..."
Example of use
After linking all the necessary documentation to the elements, you can send an archive with documents and a model in NWD format to another User. The User saves the archive on a local computer or server, then unzips it and specifies a new path to the root folder in the model. This way, all documents will be pulled into the model.
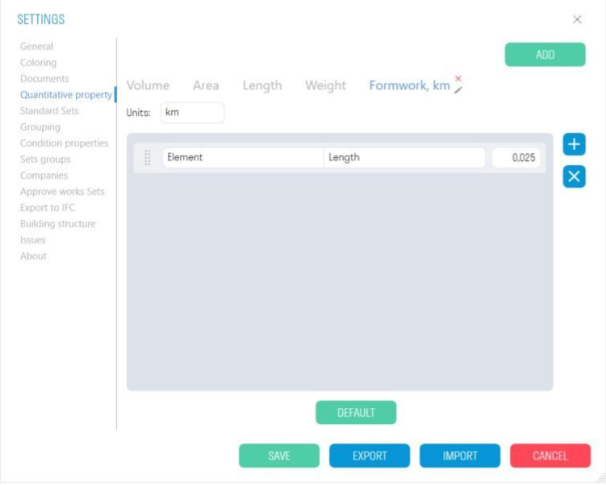
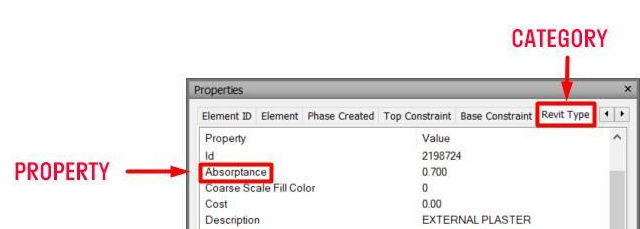
The current list specifies Category-Property pairs that serve as criteria for collecting the summary numerical characteristics of elements (Volume/Area/Length/Weight) when working with the "Calculations" section. If an element has at least one property in the specified category, the value for the calculation is taken from this property. The order of the parameters in the list corresponds to the order in which the parameters are searched for in the element.
1. On the panel, click Settings ➤ Settings ➤ Quantitative Property
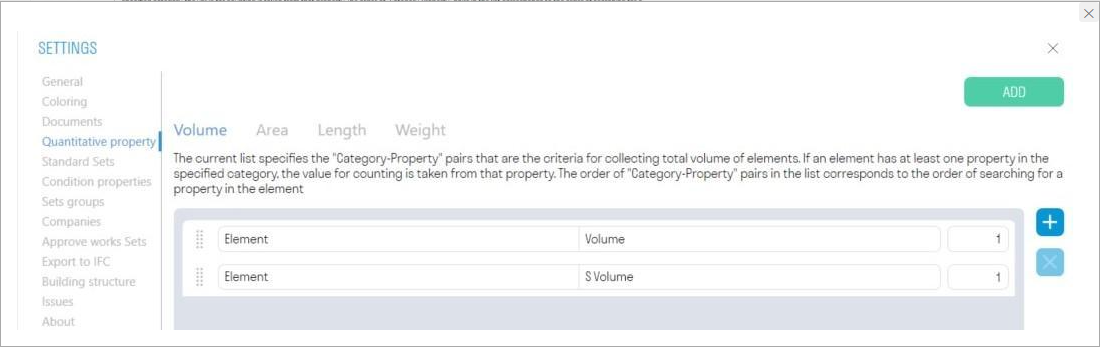
- To add a new Category-Property pair, click .
- In the “Category” line, enter the name of the tab that contains the desired property.
- In the “Property” line, enter the name of the property from which the value will be taken.
- The third column with the coefficient is used to convert between units of measurement, for example, m to km or kg to t.
Important: The names must be entered exactly as written in the properties panel, observing capital letters, spaces, hyphens, etc., so that the plugin can find the given category and property.
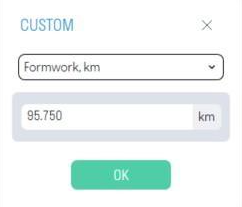
2. If necessary, create your own quantitative properties that can be used to convert to certain units of measurement, for example, m to km or kg to t. To do this, click "Add" in the upper right corner.
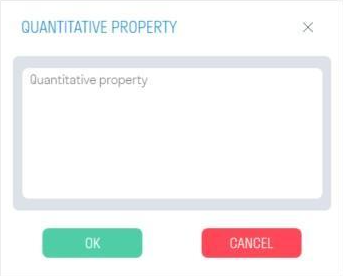
- Enter the name of the quantitative property and click "OK"
3. Enter the units of measurement, the "Category-Property" pair, and the conversion factor from one unit of measurement to another.
4. Close the settings, saving them at the bottom of the window. Then select the required elements and use the "USER" command on the Calculations tab to view the specified numerical characteristic

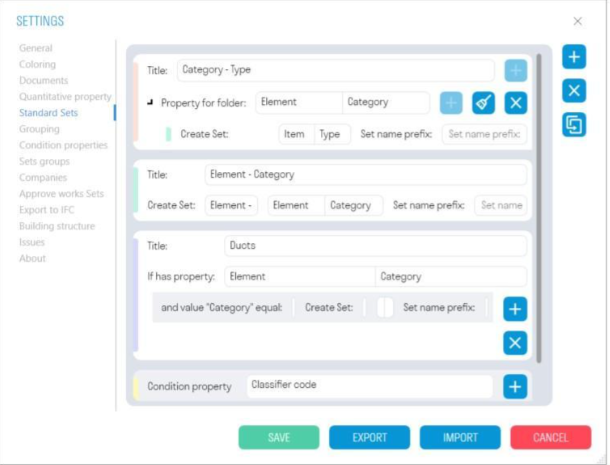
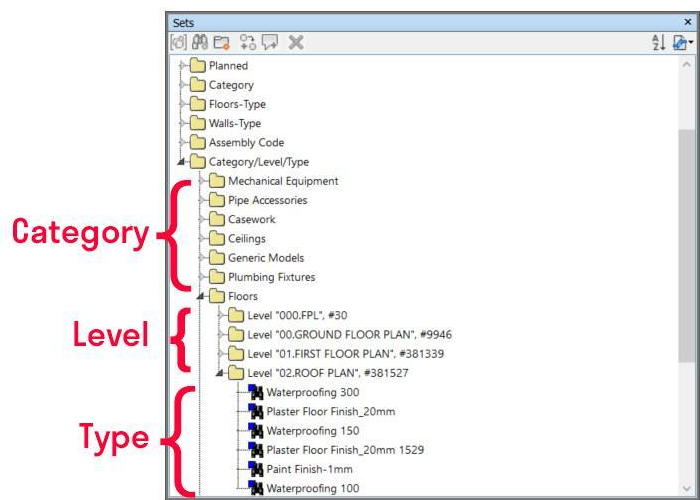
In the "Standard Sets" setting, certain rules are specified for creating search sets. For example, according to the created rules, you can split the information model using the “Standard” tool for any scenarios: system types, equipment types, pipe diameters, materials, etc.
- Click on the panel Settings ➤ Settings ➤ Standard Sets
- To duplicate a rule with values, select it and click .
2. To add a rule for creating a Sets, click

and select one of the rules
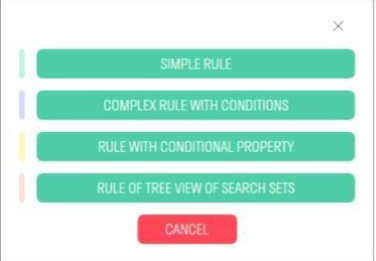
2.1. Simple rule
This rule allows you to split the model by any one of the properties, for example, by category, classifier code, floor, building, etc.

- In the “Name” line enter the name of the rule that will be displayed in the creation window “Standard”
- In the “Folder name” line enter the name of the folder in which the search sets will be created
- In the “Category - Property” line enter the category and property for which the Sets will be created.
- In the “Prefix” line you can enter a prefix to the search set, for example, “Category-”.
For example, let's split the model by category:

This rule is used to create search sets in the Sets panel using the “Standard” tool.

2.2. Complex rule with conditions
This rule allows you to split elements with a certain value by various properties. For example, elements with the category value "Wall" can be split by "Type" or "Floor".

- In the "Name" line enter the name of the rule, which will be displayed in the creation window “Standard”
- Then the algorithm is as follows: If an element has a property, for example, "Category", and the value of this property is equal to, for example, "Walls", then search sets are created in the folder that split these elements by property, for example, "Type".
Properties are specified as “Category-Property” pairs
- In the “Folder name” line enter the name of the folder in which the search sets will be created
- In the “Prefix” line you can enter a prefix to the search set, for example, “Type -”
For example, let's split the elements of the “Wall” and “Floor” categories by “Type”:

According to this rule, search sets are created in the Sets panel using the “Standard” tool.
2.3. Rule with a conditional property
This rule allows you to split the model by “Conditional Property” .

- Click “+” and select from the list the “Conditional property” by which you want to split the model, for example, “Code by classifier”.
- In the “Folder name” line enter the name of the folder in which the search sets will be created
- In the “Prefix” line you can enter a prefix to the search set, for example, “Code - ”.
For example, let's split the model by classifier:

This rule is used to create search sets in the Sets panel using the “Standard” tool.

2.4. Tree-like construction rule
This rule includes the three previous rules and allows you to split the entire model according to a hierarchical structure.
For example, you can split the model first by "Category," then by "Classifier Code," then by "Floor," and finally, using a simple rule, split it by "Type." Each subsequent hierarchical split will be included in the previous split.

- Folder properties are specified as Category-Property pairs
Thus, we get a tree-like structure of search sets

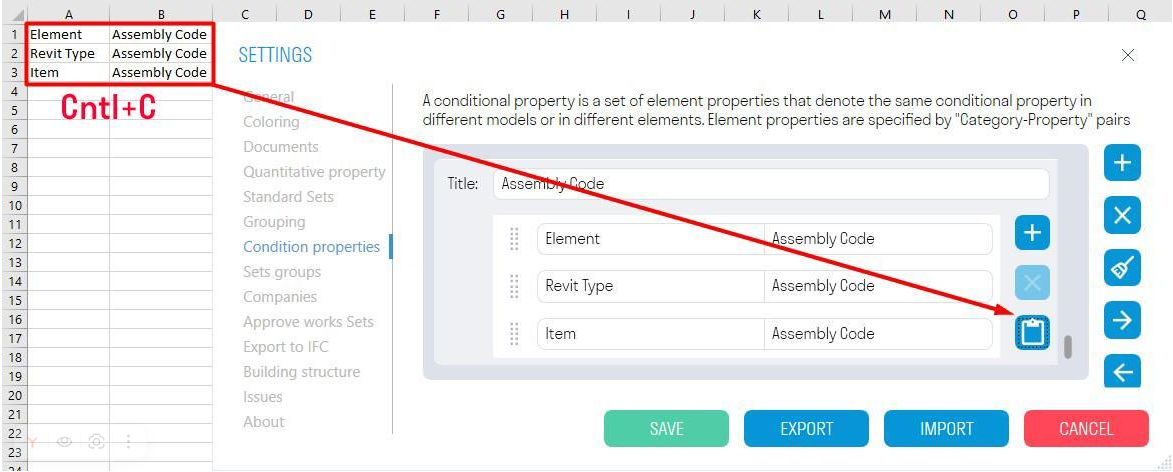
This is a set of element properties that denote the same conditional property in different models or in different elements. For example, the "Level" property in different elements can be in "Object-Base Level" or in "Object-Level". This setting is used in “Standard MON” when creating search sets, as well as in Export properties.
Click on the Settings panel ➤ Settings ➤ Conditional Properties
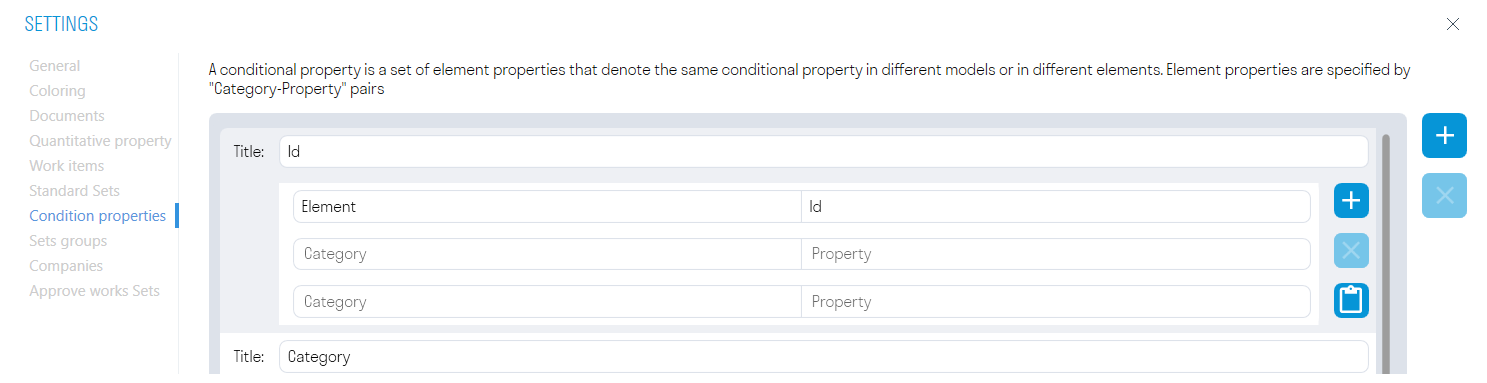
- The set of element properties is defined by "Category-Property" pairs
- It is possible to copy data from Excel. To do this, select the cells in Excel, press Ctrl+C, go to the plug-in and click the "Paste data from Excel" button. The data will be copied to the Conditional Properties
This setting allows you to add set groups with elements that need to be checked for intersections using the Checker command.
Click on the Settings panel ➤ Settings ➤ Sets Groups
Using the “Standard” command, first create search sets with elements that need to be checked for intersections.

- Create a group by clicking , enter the group name, set the element intersection tolerance, and add the necessary search sets to the group.
allows you to add created search sets to the group. Select the set and click “OK”


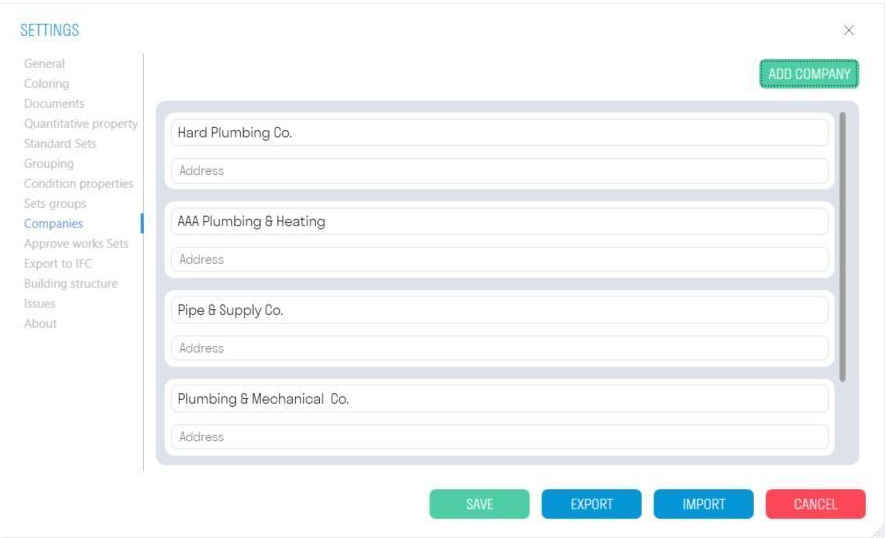
The setting allows you to add Companies that perform certain types of work at the site and specify them when using the Complete/Accept/Schedule tools.
1. Click on the Settings panel ➤ Settings ➤ Companies
You can add a company manually by filling in the fields yourself, or find it by TIN/OGRN using the search.